Battle of Trafalgar
| Battle of Trafalgar | |||||||
|---|---|---|---|---|---|---|---|
| Part of the Trafalgar Campaign | |||||||
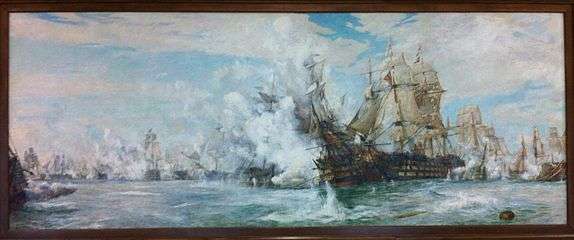
 The Battle of Trafalgar, as seen from the starboard mizzen shrouds of the Victory by J. M. W. Turner (oil on canvas, 1806 to 1808) | |||||||
| |||||||
| Belligerents | |||||||
|
|
| ||||||
| Commanders and leaders | |||||||
|
|
| ||||||
| Strength | |||||||
|
33 ships (27 ships of the line and six others) |
41 ships (France: 18 ships of the line and eight others Spain: 15 ships of the line) | ||||||
| Casualties and losses | |||||||
|
458 dead Total: 1,666[1] |
France: Spain: Aftermath: Total: 13,781 | ||||||


The Battle of Trafalgar (21 October 1805) was a naval engagement fought by the British Royal Navy against the combined fleets of the French and Spanish Navies, during the War of the Third Coalition (August–December 1805) of the Napoleonic Wars (1803–1815).
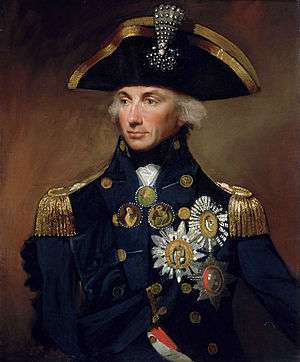
Twenty-seven British ships of the line led by Admiral Lord Nelson aboard HMS Victory defeated thirty-three French and Spanish ships of the line under the French Admiral Villeneuve in the Atlantic off the southwest coast of Spain, just west of Cape Trafalgar, in Caños de Meca. The Franco-Spanish fleet lost twenty-two ships, without a single British vessel being lost. It was the most decisive naval battle of the war, conclusively ending French plans to invade England.
The British victory spectacularly confirmed the naval supremacy that Britain had established during the eighteenth century and was achieved in part through Nelson's departure from the prevailing naval tactical orthodoxy.[3] This involved engaging an enemy fleet in a single line of battle parallel to the enemy to facilitate signalling in battle and disengagement, and to maximise fields of fire and target areas. Nelson instead divided his smaller force into two columns directed perpendicularly against the enemy fleet, with decisive results.
Nelson was shot by a French musketeer during the battle and died shortly after, becoming one of Britain's greatest war heroes. Villeneuve was captured along with his ship Bucentaure. Admiral Federico Gravina, the senior Spanish flag officer, escaped with the remnant of the fleet and succumbed months later to wounds sustained during the battle. Villeneuve attended Nelson's funeral while a captive on parole in Britain.
Background
In 1805, the First French Empire, under Napoleon Bonaparte, was the dominant military land power on the European continent, while the Royal Navy controlled the seas.[4] During the course of the war, the British imposed a naval blockade on France, which affected trade and kept the French from fully mobilising their own naval resources.[5] Despite several successful evasions of the blockade by the French navy, it failed to inflict a major defeat upon the British, who were able to attack French interests at home and abroad with relative ease.[6]
When the Third Coalition declared war on France, after the short-lived Peace of Amiens, Napoleon was determined to invade Britain. To do so, he needed to ensure that the Royal Navy would be unable to disrupt the invasion flotilla, which would require control of the English Channel.[7]
The main French fleets were at Brest in Brittany and at Toulon on the Mediterranean coast. Other ports on the French Atlantic coast harboured smaller squadrons. France and Spain were allied, so the Spanish fleet based in Cádiz and Ferrol was also available.[8]
The British possessed an experienced and well-trained corps of naval officers.[9] By contrast, some of the best officers in the French navy had either been executed or had left the service during the early part of the French Revolution.[10] Vice-Admiral Pierre-Charles Villeneuve had taken command of the French Mediterranean fleet following the death of Latouche Treville. There had been more competent officers but they had either been employed elsewhere or had fallen from Napoleon's favour.[11] Villeneuve had shown a distinct lack of enthusiasm for facing Nelson and the Royal Navy after the French defeat at the Battle of the Nile in 1798.[12]
Napoleon's naval plan in 1805 was for the French and Spanish fleets in the Mediterranean and Cádiz to break through the blockade and join forces in the Caribbean. They would then return, assist the fleet in Brest to emerge from the blockade, and together clear the English Channel of Royal Navy ships, ensuring a safe passage for the invasion barges.[13]
The Caribbean
Early in 1805, Vice Admiral Lord Nelson commanded the British fleet blockading Toulon. Unlike William Cornwallis, who maintained a tight grip off Brest with the Channel Fleet, Nelson adopted a loose blockade in the hope of luring the French out for a major battle.[13] However, Villeneuve's fleet successfully evaded Nelson's when the British were blown off station by storms. While Nelson was searching the Mediterranean for him, erroneously supposing that Villeneuve intended to make for Egypt, Villeneuve passed through the Strait of Gibraltar, rendezvoused with the Spanish fleet, and sailed as planned for the Caribbean. Once Nelson realised that the French had crossed the Atlantic Ocean, he set off in pursuit.[14]
Cádiz
Villeneuve returned from the Caribbean to Europe, intending to break the blockade at Brest,[12] but after two of his Spanish ships were captured during the Battle of Cape Finisterre by a squadron under Vice-Admiral Sir Robert Calder, Villeneuve abandoned this plan and sailed back to Ferrol in northern Spain.[15] There he received orders from Napoleon to return to Brest according to the main plan.[16]
Napoleon's invasion plans for Britain depended on having a sufficiently large number of ships-of-the-line before Boulogne in France. This would require Villeneuve's force of 33 ships to join Vice-Admiral Ganteaume's force of 21 ships at Brest, along with a squadron of five ships under Captain Allemand, which would have given him a combined force of 59 ships-of-the-line.
When Villeneuve set sail from Ferrol on 10 August, he was under orders from Napoleon to sail northward toward Brest. Instead, he worried that the British were observing his manoeuvres, so on 11 August he sailed southward towards Cádiz on the southwestern coast of Spain.[17] With no sign of Villeneuve's fleet, on 25 August, the three French army corps' invasion force near Boulogne broke camp and marched into Germany, where it was later engaged.[18][19]
The same month, Nelson returned home to Britain after two years of duty at sea.[20] He remained ashore for 25 days and was warmly received by his countrymen.[21] Word reached Britain on 2 September about the combined French and Spanish fleet in Cádiz harbour.[22] Nelson had to wait until 15 September before his ship, HMS Victory, was ready to sail.[23]
On 15 August, Cornwallis decided to detach 20 ships-of-the-line from the fleet guarding the English Channel and to have them sail southward to engage the enemy forces in Spain.[24] This left the Channel drastically reduced of large vessels, with only 11 ships-of-the-line present.[25] This detached force formed the nucleus of the British fleet that would fight at Trafalgar. This fleet, under the command of Vice-Admiral Calder, reached Cádiz on 15 September. Nelson joined the fleet on 28 September to take command.[26]
The British fleet used frigates (faster, but too fragile for the line of battle), to keep a constant watch on the harbour, while the main force remained out of sight, approximately 50 miles (80 km) west of the shore.[27] Nelson's hope was to lure the combined Franco-Spanish force out and engage it in a decisive battle. The force watching the harbour was led by Captain Blackwood, commanding HMS Euryalus.[27] His squadron of seven ships comprised five frigates, a schooner and a brig.[28]
Supply situation
At this point, Nelson's fleet badly needed provisioning. On 2 October, five ships-of-the-line, HMS Queen, Canopus, Spencer, Zealous, Tigre, and the frigate HMS Endymion were dispatched to Gibraltar under Rear-Admiral Sir Thomas Louis for supplies.[29] These ships were later diverted for convoy duty in the Mediterranean, although Nelson had expected them to return. Other British ships continued to arrive, and by 15 October the fleet was up to full strength for the battle. Nelson also lost Calder's flagship, the 98-gun Prince of Wales, which he sent home as Calder had been recalled by the Admiralty to face a court martial for his apparent lack of aggression during the engagement off Cape Finisterre on 22 July.
Meanwhile, Villeneuve's fleet in Cádiz was also suffering from a serious supply shortage that could not be easily rectified by the cash-poor French.[30] The blockade maintained by the British fleet had made it difficult for the Franco-Spanish allies to obtain stores, and their ships were ill-equipped. Villeneuve's ships were also more than two thousand men short of the force needed to sail. These were not the only problems faced by the Franco-Spanish fleet. The main French ships-of-the-line had been kept in harbour for years by the British blockade with only brief sorties. The French crews included few experienced sailors, and, as most of the crew had to be taught the elements of seamanship on the few occasions when they got to sea, gunnery was neglected. The hasty voyage across the Atlantic and back used up vital supplies. Villeneuve's supply situation began to improve in October, but news of Nelson's arrival made Villeneuve reluctant to leave port. Indeed, his captains had held a vote on the matter and decided to stay in harbour.
On 16 September, Napoleon gave orders for the French and Spanish ships at Cádiz to put to sea at the first favourable opportunity, join with seven Spanish ships-of-the-line then at Cartagena, go to Naples and land the soldiers they carried to reinforce his troops there, then fight decisively if they met a numerically inferior British fleet.
The fleets
| British | Franco-Spanish | |
|---|---|---|
| First rates | 3 | 4 |
| Second rates | 4 | 0 |
| Third rates | 20 | 29 |
| Total ships of the line | 27 | 33 |
| Other ships | 6 | 7 |
British
On 21 October, Admiral Nelson had 27 ships-of-the-line under his command. Nelson's flagship, HMS Victory, captained by Thomas Masterman Hardy, was one of three 100-gun first rates in his fleet. He also had four 98-gun second rates and twenty third rates. One of the third rates was an 80-gun vessel and sixteen were 74-gun vessels. The remaining three were 64-gun ships, which were being phased out of the Royal Navy at the time of the battle. Nelson also had four frigates of 38 or 36 guns, a 12-gun schooner and a 10-gun cutter.
Franco-Spanish
Against Nelson, Vice-Admiral Villeneuve—sailing on his flagship Bucentaure—fielded 33 ships-of-the-line, including some of the largest in the world at the time. The Spanish contributed four first-rates to the fleet. Three of these ships, one at 130 guns (Santisima Trinidad) and two at 112 guns (Príncipe de Asturias, Santa Ana), were much larger than anything under Nelson's command. The fourth first-rate carried 100 guns. The fleet had six 80-gun third-rates, (four French and two Spanish), and one Spanish 64-gun third-rate. The remaining 22 third-rates were 74-gun vessels, of which fourteen were French and eight Spanish. In total the Spanish contributed 15 ships of the line and the French 18. The fleet also included five 40-gun frigates and two 18-gun brigs, all French.
The battle
Nelson's plan
The prevailing tactical orthodoxy at the time involved manoeuvring to approach the enemy fleet in a single line of battle and then engaging broadside in parallel lines.[31] Before this time the fleets had usually been involved in a mixed mêlée. One reason for the development of the line of battle system was to facilitate control of the fleet: if all the ships were in line, signalling in battle became possible.[32] The line also allowed either side to disengage by breaking away in formation; if the attacker chose to continue, their line would be broken as well.[31] This often led to inconclusive battles, or allowed the losing side to minimise its losses; but Nelson wanted a conclusive action.[33]
His solution to the problem was to cut the opposing line in three. Approaching in two columns, sailing perpendicular to the enemy's line, one towards the centre of the opposing line and one towards the trailing end, his ships would break the enemy formation into three, surround one third, and force them to fight to the end.[34] Nelson hoped specifically to cut the line just in front of the French flagship, Bucentaure; the isolated ships in front of the break would not be able to see the flagship's signals, hopefully taking them out of combat while they reformed. The intention of going straight at the enemy echoed the tactics used by Admiral Duncan at the Battle of Camperdown and Admiral Jervis at the Battle of Cape St Vincent, both in 1797.[35]

The plan had three principal advantages. First, the British fleet would close with the Franco-Spanish as quickly as possible, reducing the chance that they would be able to escape without fighting.[36] Second, it would quickly bring on a mêlée and frantic battle by breaking the Franco-Spanish line and inducing a series of individual ship-to-ship actions, in which the British were likely to prevail. Nelson knew that the superior seamanship, faster gunnery and better morale of his crews were great advantages.[37] Third, it would bring a decisive concentration on the rear of the Franco-Spanish fleet. The ships in the van of the enemy fleet would have to turn back to support the rear, which would take a long time.[34] Additionally, once the Franco-Spanish line had been broken, their ships would be relatively defenceless against powerful broadsides from the British fleet, and it would take them a long time to reposition to return fire.
The main drawback of attacking head-on was that as the leading British ships approached, the Franco-Spanish fleet would be able to direct raking broadside fire at their bows, to which they would be unable to reply. To lessen the time the fleet was exposed to this danger, Nelson had his ships make all available sail (including stuns'ls), yet another departure from the norm.[38] He was also well aware that French and Spanish gunners were ill-trained and would have difficulty firing accurately from a moving gun platform. The Combined Fleet was sailing across a heavy swell, causing the ships to roll heavily and exacerbating the problem. Nelson's plan was indeed a gamble, but a carefully calculated one.[39]
During the period of blockade off the coast of Spain in October, Nelson instructed his captains, over two dinners aboard Victory, on his plan for the approaching battle. The order of sailing, in which the fleet was arranged when the enemy was first sighted, was to be the order of the ensuing action, so that no time would be wasted in forming a precise line.[40] The attack was to be made in two lines. One, led by his second-in-command Vice-Admiral Cuthbert Collingwood, was to sail into the rear of the enemy line, while the other, led by Nelson, was to sail into the centre and vanguard.[36] The intention was to split the enemy line and engage in close quarter action, a form of combat in which, Nelson believed, the British fleet would have the advantage. In preparation for the battle, Nelson ordered the ships of his fleet to be painted in a distinctive yellow and black pattern (later known as the Nelson Chequer) that would make them easy to distinguish from their opponents.[41]
Nelson was careful to point out that something had to be left to chance. Nothing is sure in a sea battle, so he left his captains free from all hampering rules by telling them that "No captain can do very wrong if he places his ship alongside that of the enemy."[35] In short, circumstances would dictate the execution, subject to the guiding rule that the enemy's rear was to be cut off and superior force concentrated on that part of the enemy's line.
Admiral Villeneuve himself expressed his belief that Nelson would use some sort of unorthodox attack, stating specifically that he believed—accurately—that Nelson would drive right at his line. But his long game of cat and mouse with Nelson had worn him down, and he was suffering from a loss of nerve. Arguing that the inexperience of his officers meant he would not be able to maintain formation in more than one group, he chose not to act on his assessment.[42]
Departure
The Combined Fleet of French and Spanish warships anchored in Cádiz and under the leadership of Admiral Villeneuve was in disarray. On 16 September 1805 Villeneuve received orders from Napoleon to sail the Combined Fleet from Cádiz to Naples. At first Villeneuve was optimistic about returning to the Mediterranean, but soon had second thoughts. A war council was held aboard his flagship, Bucentaure, on 8 October.[43] While some of the French captains wished to obey Napoleon's orders, the Spanish captains and other French officers, including Villeneuve, thought it best to remain in Cádiz.[44] Villeneuve changed his mind yet again on 18 October 1805, ordering the Combined Fleet to sail immediately even though there were only very light winds.[45]
The sudden change was prompted by a letter Villeneuve had received on 18 October, informing him that Vice-Admiral François Rosily had arrived in Madrid with orders to take command of the Combined Fleet.[46] Stung by the prospect of being disgraced before the fleet, Villeneuve resolved to go to sea before his successor could reach Cádiz. At the same time, he received intelligence that a detachment of six British ships (Admiral Louis' squadron), had docked at Gibraltar, thus weakening the British fleet. This was used as the pretext for sudden change.
The weather, however, suddenly turned calm following a week of gales. This slowed the progress of the fleet leaving the harbour, giving the British plenty of warning. Villeneuve had drawn up plans to form a force of four squadrons, each containing both French and Spanish ships. Following their earlier vote on 8 October to stay put, some captains were reluctant to leave Cádiz and as a result they failed to follow Villeneuve's orders closely and the fleet straggled out of the harbour in no particular formation.
It took most of 20 October for Villeneuve to get his fleet organised; it eventually set sail in three columns for the Straits of Gibraltar to the southeast. That same evening, Achille spotted a force of 18 British ships-of-the-line in pursuit. The fleet began to prepare for battle and during the night, they were ordered into a single line. The following day, Nelson's fleet of 27 ships-of-the-line and four frigates was spotted in pursuit from the northwest with the wind behind it. Villeneuve again ordered his fleet into three columns, but soon changed his mind and ordered a single line. The result was a sprawling, uneven formation.
At 5:40 a.m. on the 21st of October, the British were about 21 miles (34 km) to the northwest of Cape Trafalgar, with the Franco-Spanish fleet between the British and the Cape. At circa 6 a.m., Nelson gave the order to prepare for battle.[47] At 8 am the British frigate Euryalus, which had been keeping watch on the Combined Fleet overnight, observed the British fleet still "forming the lines" in which it would attack.[48]
At 8 a.m., Villeneuve ordered the fleet to wear together (turn about) and return to Cádiz. This reversed the order of the allied line, placing the rear division under Rear-Admiral Pierre Dumanoir le Pelley in the vanguard. The wind became contrary at this point, often shifting direction. The very light wind rendered manoeuvring virtually impossible for all but the most expert seamen. The inexperienced crews had difficulty with the changing conditions, and it took nearly an hour and a half for Villeneuve's order to be completed. The French and Spanish fleet now formed an uneven, angular crescent, with the slower ships generally to leeward and closer to the shore.
By 11 a.m. Nelson's entire fleet was visible to Villeneuve, drawn up in two parallel columns. The two fleets would be within range of each other within an hour. Villeneuve was concerned at this point about forming up a line, as his ships were unevenly spaced and in an irregular formation. The Franco-Spanish fleet was drawn out nearly five miles (8 km) long as Nelson's fleet approached.
As the British drew closer, they could see that the enemy was not sailing in a tight order, but rather in irregular groups. Nelson could not immediately make out the French flagship as the French and Spanish were not flying command pennants.
Nelson was outnumbered and outgunned, the enemy totalling nearly 30,000 men and 2,568 guns to his 17,000 men and 2,148 guns. The Franco-Spanish fleet also had six more ships-of-the-line, and so could more readily combine their fire. There was no way for some of Nelson's ships to avoid being "doubled on" or even "trebled on".
As the two fleets drew closer, anxiety began to build among officers and sailors; one British sailor described the time before thus: "During this momentous preparation, the human mind had ample time for meditation, for it was evident that the fate of England rested on this battle".[49]
Battle


The battle progressed largely according to Nelson's plan. At 11:45, Nelson sent the famous flag signal, "England expects that every man will do his duty".
His Lordship came to me on the poop, and after ordering certain signals to be made, about a quarter to noon, he said, "Mr. Pasco, I wish to say to the fleet, ENGLAND CONFIDES THAT EVERY MAN WILL DO HIS DUTY" and he added "You must be quick, for I have one more to make which is for close action." I replied, "If your Lordship will permit me to substitute 'expects' for 'confides' the signal will soon be completed, because the word 'expects' is in the vocabulary, and 'confides' must be spelt," His Lordship replied, in haste, and with seeming satisfaction, "That will do, Pasco, make it directly."[50]
The term "England" was widely used at the time to refer to the United Kingdom; the British fleet included significant contingents from Ireland, Scotland and Wales. Unlike the photographic depiction (right), this signal would have been shown on the mizzen mast only and would have required 12 lifts.
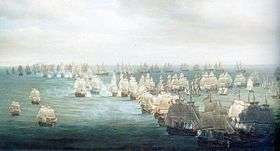
As the battle opened, the French and Spanish were in a ragged curved line headed north. As planned, the British fleet was approaching the Franco-Spanish line in two columns. Leading the northern, windward column in Victory was Nelson, while Collingwood in the 100-gun Royal Sovereign led the second, leeward, column. The two British columns approached from the west at nearly a right angle to the allied line. Nelson led his column into a feint toward the van of the Franco-Spanish fleet and then abruptly turned toward the actual point of attack. Collingwood altered the course of his column slightly so that the two lines converged at this line of attack.
Just before his column engaged the allied forces, Collingwood said to his officers: "Now, gentlemen, let us do something today which the world may talk of hereafter." Because the winds were very light during the battle, all the ships were moving extremely slowly, and the foremost British ships were under heavy fire from several of the allied ships for almost an hour before their own guns could bear.

At noon, Villeneuve sent the signal "engage the enemy", and Fougueux fired her first trial shot at Royal Sovereign.[52][53][54] Royal Sovereign had all sails out and, having recently had her bottom cleaned, outran the rest of the British fleet. As she approached the allied line, she came under fire from Fougueux, Indomptable, San Justo and San Leandro, before breaking the line just astern of Admiral Alava's flagship Santa Ana, into which she fired a devastating double-shotted raking broadside.

The second ship in the British lee column, Belleisle, was engaged by L'Aigle, Achille, Neptune and Fougueux; she was soon completely dismasted, unable to manoeuvre and largely unable to fight, as her sails blinded her batteries, but kept flying her flag for 45 minutes until the following British ships came to her rescue.
For 40 minutes, Victory was under fire from Héros, Santísima Trinidad, Redoutable and Neptune; although many shots went astray, others killed and wounded a number of her crew and shot her wheel away, so that she had to be steered from her tiller belowdecks. Victory could not yet respond. At 12:45, Victory cut the enemy line between Villeneuve's flagship Bucentaure and Redoutable; she came close to the Bucentaure, firing a devastating raking broadside through her stern which killed and wounded many on her gundecks. Villeneuve thought that boarding would take place, and with the Eagle of his ship in hand, told his men, "I will throw it onto the enemy ship and we will take it back there!" However Victory engaged the 74-gun Redoutable; Bucentaure was left to be dealt with by the next three ships of the British windward column: Temeraire, Conqueror and HMS Neptune.
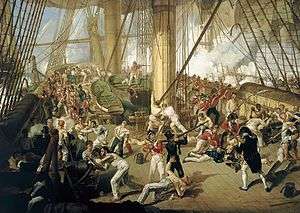
A general mêlée ensued and, during that fight, Victory locked masts with the French Redoutable. The crew of Redoutable, which included a strong infantry corps (with three captains and four lieutenants), gathered for an attempt to board and seize the Victory. A musket bullet fired from the mizzentop of Redoutable struck Nelson in the left shoulder, passed through his spine at the sixth and seventh thoracic vertebrae, and lodged two inches below his right scapula in the muscles of his back. Nelson exclaimed, "They finally succeeded, I am dead." He was carried below decks.
Victory's gunners were called on deck to fight boarders, and she ceased firing. The gunners were forced back below decks by French grenades. As the French were preparing to board Victory, Temeraire, the second ship in the British windward column, approached from the starboard bow of Redoutable and fired on the exposed French crew with a carronade, causing many casualties.
At 13:55, Captain Lucas, of Redoutable, with 99 fit men out of 643 and severely wounded himself, surrendered. The French Bucentaure was isolated by Victory and Temeraire, and then engaged by HMS Neptune, HMS Leviathan and Conqueror; similarly, Santísima Trinidad was isolated and overwhelmed, surrendering after three hours.
As more and more British ships entered the battle, the ships of the allied centre and rear were gradually overwhelmed. The allied van, after long remaining quiescent, made a futile demonstration and then sailed away. The British took 22 vessels of the Franco-Spanish fleet and lost none. Among the captured French ships were L'Aigle, Algésiras, Berwick, Bucentaure, Fougueux, Intrépide, Redoutable, and Swiftsure. The Spanish ships taken were Argonauta, Bahama, Monarca, Neptuno, San Agustín, San Ildefonso, San Juan Nepomuceno, Santísima Trinidad, and Santa Ana. Of these, Redoutable sank, and Santísima Trinidad and Argonauta were scuttled by the British. Achille exploded, Intrépide and San Augustín burned, and L'Aigle, Berwick, Fougueux and Monarca were wrecked in a gale following the battle.

As Nelson lay dying, he ordered the fleet to anchor, as a storm was predicted. However, when the storm blew up, many of the severely damaged ships sank or ran aground on the shoals. A few of them were recaptured, some by the French and Spanish prisoners overcoming the small prize crews, others by ships sallying from Cádiz. Surgeon William Beatty heard Nelson murmur, "Thank God I have done my duty"; when he returned, Nelson's voice had faded and his pulse was very weak.[55] He looked up as Beatty took his pulse, then closed his eyes. Nelson's chaplain, Alexander Scott, who remained by Nelson as he died, recorded his last words as "God and my country."[56] It has been suggested by Nelson historian Craig Cabell that Nelson was actually reciting his own prayer as he fell into his death coma, as the words 'God' and 'my country' are closely linked therein. Nelson died at half-past four, three hours after being hit.[55]
 Battle of Trafalgar (1805) French and Spanish casualty rates by ship in sailing order, up to 84% for Fougueux |
|
| Data for this chart are in Trafalgar order of battle and casualties. Blue = French (the two ships that took no casualties were both French.) Red = Spanish The number is the order in the line |
Data for this chart are in Trafalgar order of battle and casualties. Yellow = HMS Africa Green = The Weather Column, led by Nelson Grey = Lee Column, led by Collingwood The number, is the order in the column. |

Towards the end of the battle, and with the combined fleet being overwhelmed, the still relatively un-engaged portion of the van under Rear-Admiral Dumanoir Le Pelley tried to come to the assistance of the collapsing centre. After failing to fight his way through, he decided to break off the engagement, and led four French ships, his flagship the 80-gun Formidable, the 74-gun ships Scipion, Duguay Trouin and Mont Blanc away from the fighting. He headed at first for the Straits of Gibraltar, intending to carry out Villeneuve's original orders, and make for Toulon.[57] On 22 October he changed his mind, remembering a powerful British squadron under Rear-Admiral Thomas Louis was patrolling the straits, and headed north, hoping to reach one of the French Atlantic ports. With a storm gathering in strength off the Spanish coast, he sailed westwards to clear Cape St Vincent, prior to heading north-west, and then swinging eastwards across the Bay of Biscay, aiming to reach the French port at Rochefort.[57] These four ships remained at large until their encounter with and attempt to chase a British frigate brought them in range of a British squadron under Sir Richard Strachan, which captured them all on 4 November 1805 at the Battle of Cape Ortegal.[57]
Storm and sortie
Cosmao sorties

Only eleven ships escaped to Cádiz, and, of those, only five were considered seaworthy. The seriously wounded Admiral Gravina passed command of the remainder of the fleet over to Captain Julien Cosmao on 23 October, who determined to make an attempt to recapture some of the prizes. He ordered the rigging of his ship, the 74-gun Pluton, to be repaired and reinforced her crew (which had been depleted by casualties from the battle), with sailors from the French frigate Hermione. Taking advantage of a favourable northwesterly wind, he took the Pluton, the 80-gun Neptune and Indomptable, the Spanish 100-gun Rayo and 74-gun San Francisco de Asis, together with five frigates and two brigs, out of the harbour towards the British.[58][59]
The British cast off the prizes
Soon after leaving port, the wind shifted to west-southwest, raising a heavy sea with the result that most of the British prizes broke their tow-ropes, and drifting far to leeward, were only partially re-secured. The combined squadron came in sight at noon, causing Collingwood to summon his most battle-ready ships to meet the threat. In doing so, he ordered them to cast off towing their prizes. He had formed a defensive line of ten ships by three o'clock in the afternoon and approached the Franco-Spanish squadron, covering the remainder of their prizes which stood out to sea.[59][60] The Franco-Spanish squadron chose not to approach within gunshot and then declined to attack.[61] Collingwood also chose not to seek action, and in the confusion of the powerful storm, the French frigates managed to retake two Spanish ships-of-the-line which had been cast-off by their British captors, the 112-gun Santa Ana and 80-gun Neptuno, taking them in tow and making for Cádiz.[62] On being taken in tow, the Spanish crews rose up against their British prize crews, putting them to work as prisoners.[54][63][64]
Despite this initial success the Franco-Spanish force, hampered by battle damage, struggled in the heavy seas. The Neptuno was eventually wrecked off Rota in the gale, while the Santa Ana reached port.[65] The French 80-gun ship Indomptable was wrecked on the 24th or 25th off the town of Rota on the northwest point of the bay of Cádiz.[64] At the time the Indomptable had 1,200 men on board but no more than 100 were saved. The San Francisco de Asís was driven ashore in Cádiz Bay, near Fort Santa-Catalina, although her crew was saved. The Rayo, an old three-decker with more than 50 years of service, anchored off Lucar, a few leagues to the northwest of Rota. There, she lost her masts; they had been damaged by shot earlier.[64] Heartened by the approach of the squadron, the French crew of the former flagship Bucentaure also rose up and retook the ship from the British prize crew, but she was wrecked later on 23 October. The Aigle escaped from the British ship HMS Defiance, but was wrecked off the port of Santa María on 23 October, while the French prisoners on the Berwick cut the tow cables, but caused her to founder off Sanlúcar on 22 October. The crew of the Algesiras rose up and managed to sail into Cádiz.[54]

Observing that some of the leewardmost of the prizes were escaping towards the Spanish coast, Leviathan asked for and was granted permission by Collingwood to try to retrieve the prizes and bring them to anchor. Leviathan chased the Monarca, but on 24 October she came across the Rayo, dismasted but still flying Spanish colours, at anchor off the shoals of San-Lucar.[66] At this point the 74-gun HMS Donegal, en route from Gibraltar under Captain Pulteney Malcolm, was seen approaching from the south on the larboard tack with a moderate breeze from northwest-by-north, and steered directly for the Spanish three-decker.[66] At about ten o'clock, just as the Monarca had got within little more than a mile of the Rayo, Leviathan fired a warning shot wide of the Monarca, to oblige her to drop anchor. The shot fell between the Monarca and the Rayo. The latter, conceiving that it was probably intended for her, hauled down her colours, and was taken by HMS Donegal, who anchored alongside and took off the prisoners.[66] Leviathan resumed her pursuit of the Monarca, eventually catching up and forcing her to surrender. On boarding her, her British captors found that she was in a sinking state, and so removed the British prize crew, and nearly all of her original Spanish crew members. The nearly empty Monarca parted her cable and was wrecked during the night. Despite the efforts of her British prize crew, the Rayo was driven onshore on 26 October and wrecked, with the loss of twenty-five men. The remainder of the prize crew were made prisoners by the Spanish.
Aftermath
In the aftermath of the storm, Collingwood wrote:
The condition of our own ships was such that it was very doubtful what would be their fate. Many a time I would have given the whole group of our capture, to ensure our own... I can only say that in my life I never saw such efforts as were made to save these [prize] ships, and would rather fight another battle than pass through such a week as followed it.
On balance, the allied counter-attack achieved little. In forcing the British to suspend their repairs to defend themselves, it influenced Collingwood's decision to sink or set fire to the most damaged of his remaining prizes.[62] Cosmao retook two Spanish ships of the line, but it cost him one French and two Spanish vessels to do so. Fearing their loss, the British burnt or sank the Santisima Trinidad, Argonauta, San Antonio and Intrepide.[54] Only four of the British prizes, the French Swiftsure and the Spanish Bahama, San Ildefonso and San Juan Nepomuceno survived to be taken to Britain.[62] After the end of the battle and storm only nine ships-of-the-line were left in Cádiz.[58][68]
Results of the battle

When Rosily arrived in Cádiz, he found only five French ships, rather than the 18 he was expecting. The surviving ships remained bottled up in Cádiz until 1808, when Napoleon invaded Spain. The French ships were then seized by the Spanish forces and put into service against France.
HMS Victory made her way to Gibraltar for repairs, carrying Nelson's body. She put in to Rosia Bay, Gibraltar and after emergency repairs were carried out, returned to Britain. Many of the injured crew were brought ashore at Gibraltar and treated in the Naval Hospital. Men who subsequently died from injuries sustained at the battle are buried in or near the Trafalgar Cemetery, at the south end of Main Street, Gibraltar.
One Royal Marine officer was killed on board Victory; Captain Charles Adair. Royal Marine Lieutenant Lewis Buckle Reeve was seriously wounded and lay next to Nelson.[69]
The battle took place the day after the Battle of Ulm, and Napoleon did not hear about it for weeks—the Grande Armée had left Boulogne to fight Britain's allies before they could combine a huge force. He had tight control over the Paris media and kept the defeat a closely guarded secret for over a month, at which point newspapers proclaimed it to have been a tremendous victory.[70] In a counter-propaganda move, a fabricated text declaring the battle a "spectacular victory" for the French and Spanish was published in the Herald and attributed to Le Moniteur Universel.[71][72]
Vice-Admiral Villeneuve was taken prisoner aboard his own flagship and taken back to Britain. After his parole in 1806 he returned to France, where he was found dead in his inn room during a stop on the way to Paris, with six stab wounds in the chest from a dining knife. It was officially recorded that he had committed suicide.
Despite the British victory over the Franco-Spanish navies, Trafalgar had negligible impact on the remainder of the War of the Third Coalition. Less than two months later, Napoleon decisively defeated the Third Coalition at the Battle of Austerlitz, knocking Austria out of the war and forcing the dissolution of the Holy Roman Empire. Although Trafalgar meant France could no longer challenge Britain at sea, Napoleon proceeded to establish the Continental System in an attempt to deny Britain trade with the continent. The Napoleonic Wars continued for another ten years after Trafalgar.[73]
Nelson's body was preserved in a barrel of brandy for the trip home to a hero's funeral.[49]

Consequences

Following the battle, the Royal Navy was never again seriously challenged by the French fleet in a large-scale engagement. Napoleon had already abandoned his plans of invasion before the battle and they were never revived. The battle did not mean, however, that the French naval challenge to Britain was over. First, as the French control over the continent expanded, Britain had to take active steps with the Battle of Copenhagen in 1807 and elsewhere in 1808 to prevent the ships of smaller European navies from falling into French hands. This effort was largely successful, but did not end the French threat as Napoleon instituted a large-scale shipbuilding programme that produced a fleet of 80 ships of the line at the time of his fall from power in 1814, with more under construction. In comparison, Britain had 99 ships of the line in active commission in 1814, and this was close to the maximum that could be supported. Given a few more years, the French could have realised their plans to commission 150 ships of the line and again challenge the Royal Navy, compensating for the inferiority of their crews with sheer numbers.[74] For almost 10 years after Trafalgar, the Royal Navy maintained a close blockade of French bases and anxiously observed the growth of the French fleet. In the end, Napoleon's Empire was destroyed before the ambitious buildup could be completed.
Nelson became – and remains – Britain's greatest naval war hero, and an inspiration to the Royal Navy, yet his unorthodox tactics were seldom emulated by later generations. The first monument to be erected in Britain to commemorate Nelson may be that raised on Glasgow Green in 1806, albeit possibly preceded by a monument at Taynuilt, near Oban in Scotland dated 1805, both also commemorating the many Scots crew and captains at the battle.[75][76] The 144-foot-tall (44 m) Nelson Monument on Glasgow Green was designed by David Hamilton and paid for by public subscription. Around the base are the names of his famous victories: Aboukir (1798), Copenhagen (1801) and Trafalgar (1805). In 1808, Nelson's Pillar was erected by leading members of the Anglo-Irish aristocracy in Dublin to commemorate Nelson and his achievements (between 10% and 20% of the sailors at Trafalgar had been from Ireland[77][78]), and remained until it was destroyed in a bombing by "Old IRA" members in 1966.[75] Nelson's Monument in Edinburgh was built between 1807 and 1815 in the form of an upturned telescope, and in 1853 a time ball was added which still drops at noon GMT to give a time signal to ships in Leith and the Firth of Forth. In summer this coincides with the one o'clock gun being fired. The Britannia Monument in Great Yarmouth was raised by 1819. Nelson's Column, Montreal began public subscriptions soon after news of the victory at Trafalgar arrived; the column was completed in the autumn of 1809 and still stands in Place Jacques Cartier.
London's famous Trafalgar Square was named in honour of Nelson's victory, and his statue on Nelson's Column, finished in 1843, towers triumphantly over it. The statue of Lord Nelson in Bridgetown, Barbados, in what was also once known as Trafalgar Square, was erected in 1813.
The disparity in losses has been attributed by some historians less to Nelson's daring tactics than to the difference in fighting readiness of the two fleets.[79] Nelson's fleet was made up of ships-of-the-line which had spent a considerable amount of sea time during the months of blockades of French ports, whilst the French fleet had generally been at anchor in port. However, Villeneuve's fleet had just spent months at sea crossing the Atlantic twice, which supports the proposition that the main difference between the two fleets' combat effectiveness was the morale of the leaders. The daring tactics employed by Nelson were to ensure a strategically decisive result. The results vindicated his naval judgement.
The Royal Navy proceeded to dominate the sea until the Second World War.[80] Although the victory at Trafalgar was typically given as the reason at the time, modern analysis by historians suggest that relative economic strength was an important underlying cause of British naval mastery.

100th anniversary
In 1905, there were events up and down the country to commemorate the centenary, although none were attended by any member of the Royal Family, apparently to avoid upsetting the French, with whom the United Kingdom had recently entered the Entente cordiale.[81] King Edward VII did support the Nelson Centenary Memorial Fund of the British and Foreign Sailors Society, which sold Trafalgar centenary souvenirs marked with the Royal cypher. A gala was held on 21 October at the Royal Albert Hall in aid of the fund, which included a specially commissioned film by Alfred John West entitled "Our Navy".[82] The event ended with God Save the King and La Marseillaise[83] The first performance of Sir Henry Wood's Fantasia on British Sea Songs occurred on the same day at a special Promenade Concert.[84]
200th anniversary
| Wikimedia Commons has media related to Trafalgar 200. |
In 2005, a series of events around the UK, as part of the Sea Britain theme, marked the bicentenary of the Battle of Trafalgar. The 200th anniversary of the battle was also commemorated on six occasions in Portsmouth during June and July, and at St Paul's Cathedral (where Nelson is entombed) and in Trafalgar Square in London in October (T Square 200), as well as across the UK.
On 28 June, the Queen was involved in the largest Fleet Review in modern times in the Solent, in which 167 ships from 35 nations took part. The Queen inspected the international fleet from the Antarctic patrol ship HMS Endurance. The fleet included six aircraft carriers – (modern capital ships): Charles De Gaulle, Illustrious, Invincible, Ocean, Príncipe de Asturias and Saipan. In the evening a symbolic re-enactment of the battle was staged with fireworks and various small ships playing parts in the battle.
Lieutenant John Lapenotière's historic voyage in HMS Pickle bringing the news of the victory from the fleet to Falmouth and thence by post chaise to the Admiralty in London, was commemorated by the inauguration of The Trafalgar Way and further highlighted by the New Trafalgar Dispatch celebrations from July to September, in which an actor played the part of Lapenotière and re-enacted parts of the historic journey.
On 21 October, naval manoeuvres were conducted in Trafalgar Bay, near Cádiz, involving a combined fleet from Britain, Spain and France. Many descendants of those men who fought and died in these waters, including members of Nelson's family, were present at the ceremony.[85]
In popular culture
.jpg)
- Le Chevalier de Sainte-Hermine (1869), by Alexandre Dumas, is an adventure story in which the main character is alleged to be the one who shot Nelson.
- In George Orwell’s proposed preface to Animal Farm (1945), entitled The Freedom of the Press, he compares the BBC not mentioning Trotsky when celebrating the twenty-fifth anniversary of the Red Army to commemorating the battle of Trafalgar without mentioning Nelson.[86]
- "Blackadder" - 1950 popular children's novel by John Keir Cross - the eponymous spy finds himself in a French ship's rigging, from where the reader is meant to infer that he fires the fatal shot at Nelson.
- In James Clavell's 1966 novel Tai-Pan, the Scots chieftain of Hong Kong, Dirk Struan, reflects on his experiences as a powder monkey onboard HMS Royal Sovereign at Trafalgar.
- In the unfinished novel Hornblower and the Crisis (1967) in the Horatio Hornblower series by C. S. Forester, Hornblower was to deliver false orders to Villeneuve causing him to send his fleet out of Cádiz and hence fight the battle. In Hornblower and the Atropos (1953), Hornblower is put in charge of Admiral Nelson's funeral in London.
- In Series 1, episode 11 of Monty Python's Flying Circus (1969), several Gumby characters argue that the battle was fought on dry land near Cudworth in Yorkshire, with Sir Francis Drake and the German fleet as combatants.
- In the Star Trek: The Next Generation episode "The Best of Both Worlds" (1990), Captain Jean-Luc Picard discusses with his confidant Guinan the naval tradition of touring a ship before a battle. Guinan points out that a captain would only do so for a hopeless battle; Picard mentions that Horatio Nelson toured HMS Victory before the Battle of Trafalgar. When Guinan points out that Nelson was killed in the battle, Picard retorts that the British still won the battle. In the film Star Trek Generations (1994), a painting reveals that one of Picard's ancestors fought at Trafalgar for the French.
- The Bee Gees ninth studio album was inspired by The Battle of Trafalgar and titled Trafalgar (1991).
- In William Kinsolving's 1996 novel Mister Christian, Fletcher Christian returns from the South Seas and serves on the Victory in the Battle of Trafalgar.
- In Sharpe's Trafalgar (2000), by Bernard Cornwell, Sharpe finds himself at the Battle of Trafalgar aboard the fictitious HMS Pucelle.
- Jonathan Willcocks composed a major choral work, "A Great and Glorious Victory," to mark the bicentenary of the battle in October 2005.
- In the 2006 novel His Majesty's Dragon, the first of the historical fantasy Temeraire series in which aerial dragon-mounted combat units form major divisions of European militaries during the Napoleonic Wars, the Battle of Trafalgar is actually a massive feint by Napoleon to distract British forces away from the aerial and seaborne invasion of Britain near Dover.
See also
- List of Royal Navy ships
- List of early warships of the English navy
- List of ships captured at the Battle of Trafalgar
- Bibliography of 18th-19th century Royal Naval history
- Trafalgar Day
Notes
- ↑ Adkin 2007, p. 524.
- 1 2 Adkins 2004, p. 190.
- ↑ Bennet, Geoffrey (2004). The Battle of Trafalgar. England: Pen & Sword Books Limited, CPI UK, South Yorkshire.
- ↑ Kongstam, Angus (2003) [2003]. "The New Alexander". Historical Atlas of the Napoleonic Era. London: Mercury Books. p. 46. ISBN 1 904668 04 6.
- ↑ Stilwell (Ed.) (2005) pp.22-24
- ↑ Willis (2013) p.247
- ↑ Adkins & Adkins (2006) p.134
- ↑ Stilwell (Ed.) (2005) p.107
- ↑ When offered his pick from the Navy List by Lord Barham (the First Lord of the Admiralty), Nelson famously replied "Choose yourself, my lord, the same spirit actuates the whole profession; you cannot choose wrong" (Allen 1853, p. 210).
- ↑ Stilwell (Ed.) (2005) p.104
- ↑ Best (2005) p.97
- 1 2 Best (2005) p.121
- 1 2 Lavery (2009) p.171
- ↑ Admirals of the time, due to the slowness of communications, were given considerable autonomy to make strategic as well as tactical decisions.
- ↑ Best (2005) p.137
- ↑ Best (2005) p.141
- ↑ Best (2005) p.142
- ↑ Stilwell (Ed.) (2005) p.32
- ↑ Best (2005) p.157
- ↑ Best (2005) p.145
- ↑ Best (2005) pp.161-162
- ↑ Lee (2005) p.268
- ↑ Lee (2005) p.273
- ↑ Lee (2005) p.283
- ↑ Lee (2005) pp.283-284
- ↑ Best (2005) p.170
- 1 2 Lee (2005) p.288
- ↑ Best (2005) p.190
- ↑ James p.22
- ↑ Lee (2005) p.278
- 1 2 Fremont-Barnes (2007) p.66
- ↑ Ireland (2000) p.52
- ↑ Best (2005) p.154
- 1 2 Best (2005) p.182
- 1 2 White (2002) p.238
- 1 2 White (2005) p.174
- ↑ White (2005) p.173
- ↑ Tracy (2008) p.215
- ↑ Willis (2013) p.266
- ↑ White (2002) p.239
- ↑ Best (2005) pp.182-183
- ↑ Stilwell (Ed.) (2005) pp.115-116
- ↑ Best (2005) p.178
- ↑ Best (2005) p.179
- ↑ Schom 1990, pp. 301–306.
- ↑ Lee (2005) pp.289-290
- ↑ Signal log of HMS Bellerophon, 21st October, 1805
- ↑ http://chasingnelson.blogspot.co.uk/2013/10/the-battle-of-trafalgar-logbook-of_22.html
- 1 2 Adkins 2004a, p. .
- ↑ "England Expects". The Nelson Society. Archived from the original on 24 March 2005. Retrieved 24 March 2005.
- ↑ "Auguste Mayer's picture as described by the official website of the Musée national de la Marine (in French)". Musee-marine.fr. Archived from the original on 26 May 2010. Retrieved 6 March 2011.
- ↑ Fraser 1906, pp. 114, 211–213.
- ↑ Corbett 1919, p. 440
- 1 2 3 4 Thiers 1850, p. 45
- 1 2 Hibbert 1994, p. 376.
- ↑ Hayward, p. 63.
- 1 2 3 Adkin 2007, p. 530.
- 1 2 Yonge 1863, p. 335.
- 1 2 Fremont-Barnes 2005, p. 81.
- ↑ Fremont-Barnes 2005, p. 82.
- ↑ Pocock 2005, p. 175.
- 1 2 3 Yonge 1863, p. 336.
- ↑ TB staff.
- 1 2 3 James, p. 362.
- ↑ (Adkins, p. 235)
- 1 2 3 James, p. 363.
- ↑ Tracy 2008, p. 249.
- ↑ Ward, Prothero & Leathers 1906, p. 234.
- ↑ Reeve's Naval General Service Medal with Trafalgar clasp and Muster List for HMS Victory are on show at the Royal Marines Museum, Southsea, Britain (BBC staff 2008).
- ↑ Adkins, Roy (2004). Trafalgar (2010 ed.). Abacus. p. 279. ISBN 978-0-349-11632-7.
- ↑ See for example: NC staff (July–December 1805). "First Bulletin of the Grand Naval Army [From the Moniteur] As it appeared in the Herald. Battle of Trafalgar". Naval Chronicle. Fleet Street, London: J. Gold. 14. cited by ACS staff 2009.
- ↑ Westmacott, Charles Molloy; Jones, Stephen (1806). The Spirit of the Public Journals: Being an Impartial Selection of the Most Exquisite Essays and Jeux D'esprits, Principally Prose, that Appear in the Newspapers and Other Publications, Volume 9. James Ridgeway. p. 322. Retrieved 27 Mar 2015.
Footnote of one claim: "This turned out to be really afferted afterwards by the French newspapers". The authors hence believe the rest to be a fabrication.
- ↑ Harding 1999, pp. 96–117.
- ↑ Glover 1967, pp. 233–252.
- 1 2 Spicer 2005
- ↑ Five of Nelson's 27 captains of the Fleet were Scottish as were almost 30% of the crew (MercoPress staff 2005)
- ↑ Cowan 2005.
- ↑ Poppyland staff 2012.
- ↑ Nicolson 2005, p. 9-10.
- ↑ Nelson's Navy: The Ships, Men, and Organization, 1793-1815Brian Lavery
- ↑ Review of "Nelson Remembered – The Nelson Centenary 1905" by David Shannon
- ↑ A.J.West and the Trafalgar Centenary 1905
- ↑ Review of "History, Commemoration and National Preoccupation: Trafalgar 1805–2005" (British Academy Occasional Paper)
- ↑ Arthur Jacobs, Henry J. Wood: Maker of the Proms, Methuen 1994 (p.104)
- ↑ Elmundo staff 2005.
- ↑ http://orwell.ru/library/novels/Animal_Farm/english/efp_go
References
- ACS staff (2009). "Battle of Trafalgar – propaganda". The Archives and Collections Society. Retrieved 15 March 2009.
- Adkin, Mark (2005). The Trafalgar Companion: A Guide to History's Most Famous Sea Battle and the Life of Admiral Lord Nelson. London: Aurum Press. ISBN 1-84513-018-9.
- Adkins, Roy (2004). Trafalgar: The Biography of a Battle. Little Brown. ISBN 0-316-72511-0.
- Adkins, Roy (2004a). Nelson's Trafalgar (1st ed.). London: Penguin Books. ISBN 9780143037958.
- Adkins, Roy; Adkins Lesley (2006). The War For All The World's Oceans. Lancaster Place, London.: Little, Brown Book Group. ISBN 0-316-72837-3.
- Allen, Joseph (1853). Life of Lord Viscount Nelson. George Routledge. p. 210.
- Best, Nicholas (2005) [2005]. Trafalgar. London: Weidenfeld and Nicholson. ISBN 0 297 84622 1.
- Corbett, By Sir Julian Stafford (1919). The campaign of Trafalgar. 2. Longmans, Green, and company. p. 538. Url
- Cowan, Veronica (21 December 2005). "First Sea Lord Admiral Sir Alan West on Trafalgar 2005". Culture24. Retrieved February 2012. Check date values in:
|access-date=(help); External link in|publisher=(help) - Elmundo staff (21 October 2005). "Los países que combatieron en Trafalgar homenajean a sus caídos en el 200 aniversario de la batalla (Countries that fought at Trafalgar pay tribute to their fallen on the 200th anniversary of the battle)" (in Spanish). Elmundo.es.
- Fraser, Edward (1906). The enemy at Trafalgar: ... New York: E.P.Dutton & Co. pp. 114, 211–213, 436. Url
- Fremont-Barnes, Gregory (2007) [2007]. The Royal Navy, 1793-1815. Oxford: Osprey Publishing. ISBN 978 1 84603 138 0.
- Fremont-Barnes, Gregory; Hook, Christa (Illustrator) (2005). Trafalgar 1805: Nelson's Crowning Victory. Osprey Publishing. ISBN 1-84176-892-8. Cite uses deprecated parameter
|coauthor=(help) - Glover, Richard (1967). "The French Fleet, 1807–1814; Britain's Problem; and Madison's Opportunity". The Journal of Modern History. 39 (3): 233–252. doi:10.1086/240080.
- Harding, Richard (1999). "Naval Warfare 1453–1815". In Black, Jeremy. European Warfare 1453–1815. Hampshire: Palgrave MacMillian. pp. 96–117. ISBN 978-0-333-69223-3.
- Hayward. For God and Glory. p. 63.
- Hibbert, Christopher (1995). Nelson: A Personal History. Basic Books. p. 472. ISBN 0-201-40800-7.
- Ireland, Bernard (2000). Naval Warfare in the Age of Sail. Hammersmith, London.: Harper Collins Publishing. ISBN 0-00-762906-0.
- Lavery, Brian (2009) [2009]. Empire of the Seas. London: Conway Publishing. ISBN 9781844861095.
- Lee, Christopher (2005) [2005]. Nelson and Napoleon. London: Headline Book Publishing. ISBN 0 7553 1041 1.
- MercoPress staff (4 June 2005). "Majestic Royal Navy display in Faslane". Falkland Islands: MercoPress. Retrieved February 2012. Check date values in:
|access-date=(help) - Nicolson, Adam (2005). Men of Honour: Trafalgar and the Making of the English Hero (U.S. title Seize the Fire: Heroism, Duty, and the Battle of Trafalgar). Harper Collins. ISBN 0-00-719209-6.
- Pocock, Tom (2005). Trafalgar: an eyewitness history. Penguin Classics. ISBN 0-14-144150-X.
- Poppyland staff (2012). "Poppyland Activity 1: Nelson's Crew at Trafalgar". Poppyland.co.uk. Retrieved 4 February 2009.
- Schom, Alan (1990). Trafalgar: Countdown to Battle, 1803–1805. New York. ISBN 0-689-12055-9.
- Spicer, Graham (3 August 2005). "England expects – on the trail of Admiral Lord Nelson". Culture24. Retrieved February 2012. Check date values in:
|access-date=(help); External link in|publisher=(help) - Stilwell, Alexander (Ed.) (2005) [2005]. The Trafalgar Companion. Oxford: Osprey Publishing. ISBN 1 84176 835 9.
- TB staff. "La Batalla de Trafalgar. Lo que queda tras la batalla (The Battle of Trafalgar. What remains after the battle)". Todo a Babor (in Spanish).
- Thiers, Adolphe Joseph (1850). History of the Consulate and the Empire of France Under Napoleon. London: Henery G. Bohn. Url
- Tracy, Nicholas (2008). Nelson's Battles: The Triumph of British Seapower (illustrated, revised ed.). Naval Institute Press. ISBN 978-1-59114-609-4.
- Ward, A.W.; Prothero, G.W.; Leathers, Stanley, eds. (1906). The Cambridge Modern History. IX. Cambridge University Press. p. 234.
- White, Colin (2005). Nelson the Admiral. Phoenix Mill, Stroud, Glos.: Sutton Publishing Limited. ISBN 0-7509-3713-0.
- White, Colin (2002). The Nelson Encyclopaedia. Park House, Russell Gardens, London.: Chatham Publishing, Lionel Leventhal Limited. ISBN 1-86176-253-4.
- Willis, Sam (2013). In the Hour of Victory - The Royal Navy at War in the Age of Nelson. London: Atlantic Books Ltd. ISBN 978-0-85789-570-7.
- Yonge, Charles D (1863). The history of the British navy: From the earliest period to the present time. II.
- Attribution
 This article incorporates text from a publication now in the public domain: Hanny, David (1911). "Trafalgar, Battle of". In Chisholm, Hugh. Encyclopædia Britannica. 27 (11th ed.). Cambridge University Press. pp. 153–155.
Further reading
- Clayton, Tim; Craig, Phil. Trafalgar: The Men, the Battle, the Storm. Hodder & Stoughton. ISBN 0-340-83028-X.
- Desbrière, Edouard, The Naval Campaign of 1805: Trafalgar, 1907, Paris. English translation by Constance Eastwick, 1933.
- Cayuela Fernández, José Gregorio, Trafalgar. Hombres y naves entre dos épocas, 2004, Ariel (Barcelona) ISBN 84-344-6760-7
- Frasca, Francesco, Il potere marittimo in età moderna, da Lepanto a Trafalgar, 1 st ed. 2008, Lulu Enterprises UK Ltd, ISBN 978-1-4092-4348-9, 2 nd ed. 2008, Lulu Enterprises UK Ltd, ISBN 978-1-84799-550-6, 3 rd ed. 2009, Lulu Enterprises UK Ltd, ISBN 978-1-4092-6088-2, 4th ed. 2009, Lulu Enterprises UK Ltd, ISBN 978-1-4092-7881-8.
- Gardiner, Robert (2006). The campaign of Trafalgar, 1803–1805. Mercury Books. ISBN 1-84560-008-8.
- Harbron, John D., Trafalgar and the Spanish Navy, 1988, London, ISBN 0-85177-963-8.
- Howarth, David, Trafalgar: The Nelson Touch, 2003, Phoenix Press, ISBN 1-84212-717-9.
- Huskisson, Thomas, Eyewitness to Trafalgar, reprinted in 1985 as a limited edition of 1000; Ellisons' Editions, ISBN 0-946092-09-5—the author was half-brother of William Huskisson
- Lambert, Andrew, War at Sea in the Age of Sail, Chapter 8, 2000, London, ISBN 1-55278-127-5
- Pocock, Tom, Horatio Nelson, Chapter XII, 1987, London, ISBN 0-7126-6123-9
- Pope, Dudley, England Expects (US title Decision at Trafalgar), 1959, Weidenfeld and Nicolson.
- Warner, Oliver, Trafalgar. First published 1959 by Batsford – republished 1966 by Pan.
- Warwick, Peter (2005). Voices from the Battle of Trafalgar. David & Charles Publishing. ISBN 0-7153-2000-9.
External links
| Wikimedia Commons has media related to Battle of Trafalgar. |
- Nelson's Navy
- Read about French Muster Rolls from the Battle of Trafalgar on The National Archives' website.
- Visit HMS Victory at Portsmouth Historic Dockyard
- HMS Victory Royal Navy Web Site
- Nelson's Memorandum – battle plan – in the British Library
- Interactive guide:Battle of Trafalgar educational presentation by Guardian Unlimited
- A. J. West's "Our Navy": Wreath laying on HMS Victory, October 1905
- BBC Battlefield Academy: Battle of Trafalgar game created by Solaris Media (now Playniac) for the bicentenary.
- BBC video (42 min.) of the re-enactment of the Battle of Trafalgar off Portsmouth on 28 June 2005
- Concert Overture – Trafalgar 1805
- The London Gazette Extraordinary, 6 November 1805 original published dispatches, Naval History: Great Britain, EuroDocs: Primary Historical Documents From Western Europe, Brigham Young University Library. Retrieved 27 July 2006
- BBC staff (21 October 2008). "Hero's medal marks Trafalgar Day". BBC News. Archived from the original on 11 January 2009. Retrieved 6 January 2009.