Coalition forces of the Napoleonic Wars

The Coalition Forces of the Napoleonic Wars were composed of Napoleon Bonaparte's enemies: the Austrian Empire, Kingdom of Prussia, Kingdom of Spain, Kingdom of Naples and Sicily, United Kingdom,[1] Kingdom of Sardinia, Dutch Republic, Russian Empire, the Ottoman Empire, Kingdom of Portugal, Kingdom of Sweden, various Confederation of the Rhine and Italian states at differing times in the wars. At their height, the Coalition could field formidable combined forces of about 1,740,000 strong. This outnumbered the 1.1 million French soldiers. The breakdown of the more active armies are: Austria, 570,000; Britain, 250,000; Prussia, 300,000; and Russia, 600,000.
British Forces
The British Army forces consisted of 250,000 troops at their height. This is notable as it consisted of 2% of the entire British population during that time. Integral divisions of the British army were the King's German Legion (18,000 men), the Brunswick troops, and several other troops from France, Switzerland and the Netherlands. While Great Britain played a major role in various campaigns on land, at sea the Royal Navy was the dominant part of the allied naval power, and succeeded in destroying French naval power in a series of major sea battles culminating in the Battle of Trafalgar in 1805.
Infantry
Gaining experience under the Duke of Wellington in the Peninsular War and forged into a disciplined, honed weapon of war, they advanced to become a very prominent force in the Napoleonic Wars. The redcoats, as they were called, principally employed tactics such as disciplined platoon fire and (sometimes) bayonet charges and saw much success through these methods.
These foot soldiers were typically equipped with the tower-pattern musket, or 'Brown Bess', whose inaccuracy was compensated by the technique of mass firing by platoons.
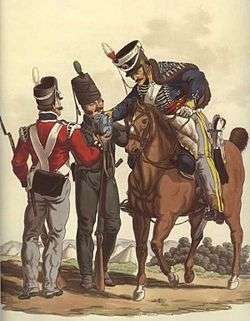
Light infantry
The British and German elite light infantry held a distinct advantage over their counterparts on the battlefield as they were equipped with Baker rifles. Having grooved barrels, these rifles achieved great target accuracy over a considerable distance and in this respect were superior to the muskets used by the French voltigeurs. Napoleon Bonaparte's rationale for choosing to equip his soldiers with muskets was their faster loading speed, a decision not without consequence for battlefield strategy. The British and German light battalions were deployed in pairs of two soldiers, forming a skirmish curtain, fighting quite independently and using all the cover they could find. These were new tactics, frowned on by more conservative officers, but very effective against enemy officers, who were often the first targets of the skirmishers.
Line infantry

The line, column and square formations were the most recognised tactical formations in use during the Napoleonic era.[2] Each of these formations had its own unique purpose in attacking or counter-attacking and no doubt played a large role in battlefield tactics. The line formation was the most favoured amongst the British infantry. Lined up in this way, all men were able to fire at the same time, reaching a maximum firepower of about 1000 to 1500 bullets per minute.[3] The column formation, favoured by the French, was unable to achieve any such output since only the men in the first row of the column (about 60) were able to fire their rifles at once.[4] While the line formation worked well in engagements with infantry, it was very vulnerable whenever the enemy employed cavalry to attack the formation from the rear or at force, causing chaos and horrendous casualties. In the event of cavalry involvement, battalions would therefore hasten to reorganise their lines to square formation to cover their back against a much more mobile force.
The square formation seems to have been the best protection against cavalry as horses were very reluctant to push into a row of bayonets three or more lines deep. We know of only a few battles during which square formations were overrun by cavalry, one being the Battle of Salamanca, during which three French squares were broken up by the King's German Legion's heavy dragoons.
The bayonet was used to finish off actions brought to near completion by the musketry and also in skirmishes, as reported by contemporary observers: opposing regiments when formed in line and charging with fixed bayonets, 'never' meet a struggle hand to hand and foot to foot; and this for the best possible reason, that one side turns and runs away as soon as the other comes close enough to do mischief.[5] Here, fear of the bayonet, it seems, rather than the bayonet itself tended to be seen as the deciding factor in the outcome of a battle. On occasion, however, the bayonet could be used extensively as was the case during the Battle of Fuentes de Onoro.
The British infantry pay rates ranged from 22 shillings six pence per day for a colonel to as low as one shilling per day for a private.
Cavalry
Britain's war effort against France was always hampered by a shortage of cavalry. Its lack of numbers accompanied by poor leadership and indiscipline wasted not only good opportunities but also lives. The cavalry consisted of a few important ranks. Each played a different role in ensuring the army was an effective and formidable war machine.
The British cavalry developed a few crucial tactics to out-do these opponents. Against infantry the British planned a cavalry charge just after the enemy's infantry volley. This would minimise the number of muskets available to shoot at the cavalry as the infantry would be busy reloading. The infantry square formation was the best formation for outmaneuvering the cavalry.
- Household regiments – One of the distinct branches of British heavy cavalry. The Life Guards and the Royal Horse Guards were of little use during the early years of the Napoleonic Wars, but they made up for this with their heroics at the Battle of Waterloo.
- Heavy dragoons – The second branch of the British heavy cavalry. These mounted infantryman and heavily armed cavalrymen included seven regiments of Dragoon Guards and six of Dragoons. Being large men on large horses, the British heavy dragoons were used as shock troops in battle. They would throw themselves into the fray to bolster a weakening line, as at Waterloo, or smash through the enemy formations and rout the enemy. Dragoons occasionally fought on foot using carbines, shorter versions of infantry muskets.
- Light Dragoons – The skills required of light cavalry (patrolling, reconnaissance, and screening) had been picked up during active service in the Peninsular War. The best of the British units was the King's German Legion, which performed excellent service in the Peninsular War, especially when working with the light division for outpost work there was no cavalry equal to his German hussars[6] and made history by breaking French Infantry squares at Garcia Hernandez.
- Hussars – Hussars were introduced into the British army after 1806, when four Light Dragoon regiments, the 7th, 10th, 15th and 18th, were styled hussars, as well as the three regiments of hussars King's German Legion.
Artillery
Cannons
Britain had a small but highly effective artillery arm (the Royal Artillery) that was exceedingly well trained but suffered from having only light guns. British cannon barrels were made of brass, with the carriages, wheels, and timbers painted grey and metal pieces painted black. The basic guns were from three to six pounders, and the British found themselves at a distinct disadvantage against French cannon. In fact, the Duke of Wellington forbade his gunners to engage in counter-battery fire against the superior French weapons and ordered them to focus on firing at enemy troops. The artillery was divided in horse artillery and foot artillery. Each cannon was manned by five gunners.
The anti-personnel bias of British artillery was boosted by the invention of a fused spherical case-shot, designed by General Sir Henry Shrapnel to explode over the heads of enemy troops and shower them with musket balls.
Ranges
| Gun Type (caliber) | Maximum (metres) | Effective (metres) | Firing Canister |
|---|---|---|---|
| 3-pounder | 1000 | 320–400 | approx. 275 |
| 6-pounder | 1100–1350 | 550–640 | 320–360 |
| 9-pounder | 1550 | 725–825 | 410 |
| Gun Type (caliber) | Maximum (metres) | Effective (metres) | Firing Canister |
|---|---|---|---|
| 5.5-inch | 1550 | 640 | 460 |
Rockets
Another British invention was the Congreve Rocket, which was intended to shoot a barrage of 12-pounder explosives in the general direction of the enemy.
Unfortunately, the rockets were not very accurate and although they did see action in Iberia as well as in Germany during the Battle of the Goerhde and the Battle of Leipzig, they were not viewed as being particularly effective. Mostly they effected terror in the enemy troops, who were unfamiliar with this kind of weapon. The French initially thought that the rocket troops were lancers, as the firing device seemed from a distance to be a lance.
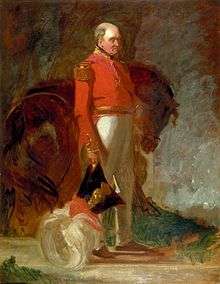
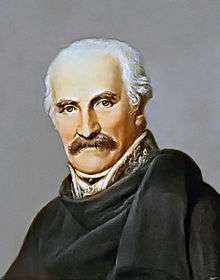
Commanders
 |
 |
| Duke of Wellington | Sir Henry Paget |
 |
 |
| Sir Rowland Hill | Sir John Moore |
- Arthur Wellesley, 1st Duke of Wellington
- Robert Craufurd
- Thomas Graham, 1st Baron Lynedoch
- Henry Paget, 1st Marquess of Anglesey
- Rowland Hill, 1st Viscount Hill
- Sir Isaac Brock
- Stapleton Cotton, 1st Viscount Combermere
- Sir Thomas Picton
- Sir John Moore
- William I of the Netherlands as Dutch Commander
- Sir Edward Pakenham
- John Le Marchant
- Colin Halkett
- Charles Alten
Allied forces
At the beginning of the wars the tactics of the allied forces were different from the British tactics. For example, they tried to use the column, but as they almost always lost against the French, they had to develop another system. Their approach became more and more similar to the British systems, although with some differences: the Prussian line was three man deep, in contrast to the two man deep line of the British army.
Austrian Empire
Kingdom of Naples and Sicily
Commanders included:
- Karl Philipp, Prince of Schwarzenberg
- Archduke Charles, Duke of Teschen
- Karl Mack von Leiberich
- Archduke John of Austria
Kingdom of Portugal
The army of Portugal was in great need of modernisation. Quite a number of British officers joined the Portuguese army for that reason, rising in rank. They formed the army after the example of the British army and formed a force with great fighting spirit and skills. The caçadores were as effective as the British light infantry and fought side by side with their allies. The Portuguese units were attached to the British regiments, the Duke of Wellington being the commander of the joint forces.
Commanders included :
- William Beresford
- Francisco de Paula Leite
- Bernardim Freire de Andrade
- Miguel Pereira Forjaz
- Carlos Frederico Lecor
- Francisco Silveira
Kingdom of Prussia
Commanders included:
- Gebhard Leberecht von Blücher
- Charles William Ferdinand, Duke of Brunswick
- Frederick Louis, Prince of Hohenlohe-Ingelfingen
Russian Empire
.jpg)
Commanders included:
- Michael Andreas Barclay de Tolly
- Mikhail Illarionovich Kutuzov
- Count Bennigsen
- Pyotr Bagration
- Peter Wittgenstein
Kingdom of Spain
.jpg)
After the defeat of Spain and the deportation of the king and his family to France, the Spanish army was divided in several parts between 1812 and 1814.
- The 1st army in Catalonia was dissolved by the French in 1811, but gathered again and in 1813 was 16,000 man strong, under General Copons.
- The 2nd army in Valencia was defeated and dissolved, but had gathered again in 1813 under general Elio and was then 30,000 man strong. It incorporated the former guerrilla troops led by El Empecinado.
- The 3rd army in Murcia, 21,000 man strong, was under the Prince of Anglona in 1814.
- The 4th army, between 46,000 men and 30,000 man strong, was under the command of the Duke of Wellington.
- The 5th to 9th army were integrated into the 4th army.[7]
The Spanish troops included about 160,000 men in 1813. Also very active were the Spanish guerilla troops, which in 1812 were the strongest Spanish forces.[8] They fought most independently of the time, but were also co-ordinated by the British. There was a guerilla force on the British right flank in the Battle of Fuentes de Onoro.
Commanders included :
Kingdom of Sweden
See also
References and notes
Sources
- Chartrand, René: Spanish Army of the Napoleonic Wars (3) 1812–1815 (German translation and excerpt) Osprey 2002 ISBN 84-8372-786-2
- Haythornthwaite, Philip: Weapons & Equipment of the Napoleonic Wars Arms and Armour 1996 ISBN 1-85409-495-5
Further reading
- Crauford, Alexander H.: General Crauford and his light division (reprint Naval & Military Press 2006) ISBN 1-84574-013-0
External links
- Richard Moore. "The Napoleonic Guide". Retrieved 3 December 2005.