Battle of Albuera
Coordinates: 38°43′N 6°49′W / 38.717°N 6.817°W
| ||||||||||||||||||||||||||||||

The Battle of Albuera (16 May 1811) was a battle during the Peninsular War. A mixed British, Spanish and Portuguese corps engaged elements of the French Armée du Midi (Army of the South) at the small Spanish village of Albuera, about 20 kilometres (12 mi) south of the frontier fortress-town of Badajoz, Spain.
From October 1810 Marshal Masséna's Army of Portugal had been tied down in an increasingly hopeless stand-off against Wellington's Allied forces, safely entrenched in and behind the Lines of Torres Vedras. Acting on Napoleon's orders, in early 1811 Marshal Soult led a French expedition from Andalusia into Extremadura in a bid to draw Allied forces away from the Lines and ease Masséna's plight. Napoleon's information was outdated and Soult's intervention came too late; starving and understrength, Masséna's army was already withdrawing to Spain. Soult was able to capture the strategically important fortress at Badajoz on the border between Spain and Portugal[12] from the Spanish, but was forced to return to Andalusia following Marshal Victor's defeat in March at the Battle of Barrosa. However, Soult left Badajoz strongly garrisoned. In April, following news of Masséna's complete withdrawal from Portugal, Wellington sent a powerful Anglo-Portuguese corps commanded by Sir William Beresford to retake the border town. The Allies drove most of the French from the surrounding area and began the Siege of Badajoz.
Soult rapidly gathered a new army from the French forces in Andalusia and, joining with the troops retreating before Beresford, he marched to relieve the siege. With intelligence of another approaching force—a Spanish army under Gen. Joaquín Blake—he planned to turn Beresford's flank and interpose his army between the two. However, Soult was again acting on outdated information; unknown to the Marshal, the Spaniards had already linked up with the Anglo-Portuguese corps, and his 24,000 troops now faced a combined Allied army 35,000 strong.
The opposing armies met at the village of Albuera. Both sides suffered heavily in the ensuing struggle and the French finally withdrew on 18 May. Beresford's army was too battered and exhausted to pursue, but was able to resume the investment of Badajoz. Despite Soult's failure to relieve the town, the battle had little strategic effect on the war. Just one month later, in June 1811, the Allies were forced to abandon their siege by the approach of the reconstituted French Armies of Portugal and Andalusia.
Background
Despite his victory over elements of Marshal André Masséna's Army of Portugal at the Battle of Bussaco in September 1810, Viscount Wellington was forced by Masséna's subsequent maneuvering to withdraw his numerically inferior force behind the extensive series of fortifications he had prepared around Torres Vedras to protect the approaches to Lisbon. By 10 October 1810 only the British light division and some cavalry patrols remained outside the "Lines".[13] Wellington manned the fortifications with "secondary troops"—25,000 Portuguese militia, 8,000 Spaniards and 2,500 British marines and artillerymen—keeping his main field army of British and Portuguese regulars dispersed in order to rapidly meet a French assault on any point of the Lines.[14]
Masséna's Army of Portugal concentrated around Sobral, apparently in preparation to attack. However, after a fierce skirmish on 14 October in which the strength of the Lines became apparent, the French dug themselves in rather than launch a costly full-scale assault. They remained entrenched for a month before falling back to a position between Santarém and Rio Maior.[15] Following Masséna's withdrawal, Wellington moved the 2nd Division under Lt. Gen. Hill, along with two Portuguese brigades and an attachment of Dragoons, across the Tagus to protect the plains of Alentejo—both from Masséna and a possible attack from Andalusia by the French Army of the South.[16]
Napoleon had previously sent dispatches to Marshal Soult, commander of the Army of the South, urging him to send assistance to Masséna.[17] The Emperor's orders were based on outdated intelligence and called for only a small force; by the time Soult received them the situation had changed considerably.[18] Soult now knew a successful attack against Lisbon was beyond his means with the forces proposed—there were 30,000 Allied troops and six major fortresses between his army and the Portuguese capital—but he had received orders nonetheless and felt obliged to do something.[17] He therefore gathered an army of 20,000 men, mainly from V Corps, and launched an expedition into Extremadura with the limited aim of capturing the fortress at Badajoz and hopefully drawing some of the Allied forces away from their impregnable positions in the Lines.[19] Along with V Corps, this venture also pulled both infantry and cavalry from Marshal Victor's I Corps who were besieging Cádiz at the time. Soult ordered more of Victor's men to fill the gaps left by his use of V Corps; this was bitterly opposed by Victor since it severely weakened his own forces, leaving him with only 15,000 men besieging a city garrisoned by around 26,000 Allied troops.[20]
Following a successful campaign in Extremadura, on 27 January 1811 Soult began his investment of Badajoz. Almost immediately the Spanish Army of Extremadura arrived in the vicinity with some 15,000 troops under the command of Gen. Mendizabal. Soult's army, too small to surround Badajoz, was unable to prevent 3,000 of Mendizabal's men from reinforcing the fortress and the remainder occupying the heights of San Cristóbal. This posed a major threat to the French, so Soult moved at once to engage. In the ensuing Battle of the Gebora the French inflicted 1,000 casualties on the Spanish field army and took 4,000 prisoners, at a cost to themselves of only 400 casualties. The remnants of Mendizabal's defeated army fled towards Badajoz or into Portugal.[21]
The garrison of Badajoz, ably commanded by Gen. Rafael Menacho, initially put up strong resistance and by 3 March the French had made little progress against the powerful fortress. On that day, however, Menacho was killed on the ramparts by a chance shot; command of the garrison fell to Brig. Gen. José Imaz and the Spanish defense started to slacken.[22] The walls were finally breached on 10 March. Soult was anxious to press the siege since he had learned that Masséna, in command of a disintegrating army plagued by sickness, starvation and an unusually harsh Portuguese winter, had retreated from Portugal. Concerned that the British would now be free to send a contingent to relieve Badajoz, Soult sent a deputation into the town to demand the garrison's surrender. Imaz duly capitulated and the French took possession of the fortress on 11 March.[23]
On 12 March, news of Victor's defeat at the Battle of Barrosa reached Soult and he left Badajoz to return to Andalusia, anxious that the siege of Cádiz had been lifted. Reaching Seville on 20 March he was relieved to find that Victor's siege lines still held and Andalusia remained under French control.[24] Before his departure Soult had consolidated his gains in Extremadura by garrisoning Badajoz with 11,000 French troops under the command of Marshal Édouard Mortier.[25]
Prelude
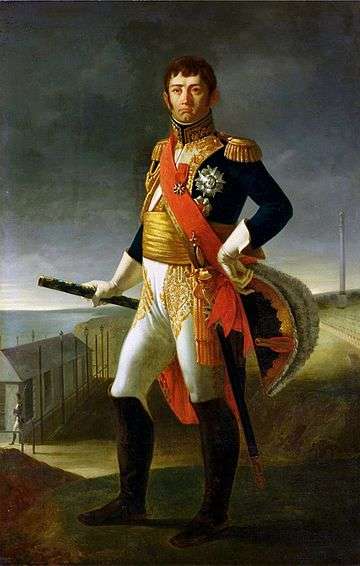
.jpg)
With no political considerations to get in the way, the Allies soon learnt of Soult's investment of Badajoz, and with the threat from Masséna diminished by his withdrawal towards Spain, Wellington prepared to send his 2nd and 4th divisions (now under the command of General William Beresford) to relieve the siege. The orders were first issued on 8 March, but countermanded the next day due to false reports of Masséna offering battle at Tomar.[26] Following further delays as Beresford's two divisions regrouped, the relieving force were ordered to hurry to Badajoz on 15 March. Around this time though, Wellington received news of the town's surrender; the urgency had diminished and Beresford's expedition could proceed at a more moderate pace.[27]
Mortier keeps busy
Marshal Édouard Mortier, commanding the Badajoz garrison, made good use of the Allied delays. Leaving six battalions to hold the fortress, in early March he moved against the nearby Portuguese town of Campo Maior with around 7,000 men and three batteries borrowed from the siege-train stationed at Badajoz. The French captured the outlying Fort São João on 14 March (the night of their arrival) but the Campo Maior fortress proved a harder proposition. Despite being manned by only 800 militia and Ordenanças, commanded by Major José Talaya, the town held out for seven days—surrendering only when an entire face of the bastion crumbled under the bombardment from Mortier's artillery.[28] Mortier also sent two cavalry regiments under General Marie Victor Latour-Maubourg to invest Alburquerque; the 6,000 strong garrison there surrendered before French reinforcements needed to be brought up.[29]
Major Talaya's prolonged defence of Campo Maior gave Beresford's divisions time to arrive before the captured fortress had been slighted. On returning to Badajoz after his successful foray into Portugal, Mortier had left one infantry and three cavalry regiments at Campo Maior, under Latour-Maubourg, to dismantle its defences; Beresford's appearance on 25 March caught the French by surprise. However, despite the Allies having 18,000 troops at their disposal, Latour-Maubourg calmly formed up his command and retreated towards Badajoz.[30] Beresford sent 1,500 cavalry, under the command of Brigadier General Robert Long after the French. Most of the French cavalry were driven off by a charge of the 13th Light Dragoons; however, the pursuit of Latour-Maubourg's force then faltered. It was poorly co-ordinated and the greater part of the French force managed to reach the safety of Badajoz. The reason behind this failure was subsequently disputed between supporters of Brigadier Long and General Beresford.[31]
Allies invest Badajoz
Beresford now began the task of positioning his army to invest Badajoz, but a series of mishaps delayed the Allied advance into Spain. The Guadiana, a major river of Spain and Portugal that delineates part of the border, lay across Beresford's line of march. Wellington had promised a stock of Spanish pontoon boats so that a bridge could be erected, but these were not forthcoming.[32] Instead, a bridge had to be fashioned in situ—a task that would take until 3 April to complete. Furthermore, the rations promised to Beresford, to be taken from the town of Estremoz, had been consumed by the remnants of Mendizabal's Army of Extremadura, which had settled in the region following their defeat by Soult at the start of the year. Beresford's troops eventually had to draw on rations from the fortress-town of Elvas in order to feed themselves. Finally, the shoes of the 4th Division had completely worn out following two weeks of marching, and replacements from Lisbon would take a week to arrive. These delays gave the Badajoz garrison time to work on the fortifications, taking them from a state of serious disrepair on 25 March to being tenable on 3 April.[33] Beresford began to bring his army forward on 4 April, but a sudden flood swept away his makeshift bridge across the Guadiana, trapping the Allied vanguard on the eastern bank. This could have proved disastrous for Beresford, but Mortier had been recalled to Paris leaving Latour-Maubourg in command at Badajoz, and he was more concerned with repairing the fortress's defences than confronting the Allied army.[34] After a minor success involving the capture of an entire squadron of the 13th Light Dragoons, Latour-Maubourg retired before Beresford's superior forces, leaving 3,000 men garrisoning Badajoz and 400 in Olivenza.[35]
By 8 April new bridges had been thrown across the Guadiana and the following day Beresford's army moved to Olivenza; they were now over the border and 24 kilometres (15 mi) south of Badajoz. While the British 4th Division tackled the small French garrison there, the main Allied army followed Latour-Maubourg south while sending covering forces to watch the Badajoz garrison from Valverde and Albuera.[36] Beresford coordinated his movements with the remnants of the Spanish Army of Extremadura (now under the command of General Castaños), adding 3,000 infantry and 1,000 cavalry to his strength. On 15 April, Olivenza fell to the 4th Division, which technically put Beresford in a position to commence the more important task of besieging Badajoz.[36] However, neither Beresford nor Wellington had provided a siege-train for the expedition, so one had to be improvised on the spot. The solution adopted was to take sufficient artillery pieces of various qualities and vintages from the fortress of Elvas, but this expedient caused yet another delay in Allied progress.[37] Beresford took the opportunity presented by this delay to have his forces clear southern Extremadura of French forces and Latour-Maubourg was pushed back to Guadalcanal.[38] Beresford left his cavalry and a brigade under Lieutenant Colonel John Colborne, along with a detachment of Spanish horse, to watch Latour-Maubourg's movements and dissuade him from returning to Extremadura.[39] Wellington was so concerned by the lack of progress that he decided to pay a flying visit to the region.[40] He and Beresford conducted a reconnaissance of Badajoz on 22 April and by the time he left for the north, he had prepared for Beresford a detailed set of memorandum concerning how he should conduct the impending siege and the rest of the campaign.[41] Beresford followed the instructions slowly but surely and finally began the Siege of Badajoz on 4 May.[42]
A positive development for the Allies during this time was the appearance of another Spanish force in the region. The Spanish Regency at Cádiz had sent General Joaquín Blake, with the two divisions of Zayas and Lardizábal, by sea to Ayamonte on the mouth of the Guadiana. Landing on 18 April, Blake's army moved to join General Francisco Ballesteros at the Spanish town of Xeres.[43]
Although Blake was himself a member of the Spanish Regency, he was junior to Castaños in the military hierarchy (but senior to Ballasteros). He consequently did not protest when General Castaños agreed that Marshal Beresford, who was also junior to Castaños in rank, should command the combined Allied armies in any battle because there were more men in the Anglo-Portuguese force.[42]
Armies gather
From the moment the French were forced to retreat before Beresford, Soult knew that Badajoz was at risk and he was determined that he would not lose the one tangible gain of his winter campaign. By 9 May, he felt that time was running out, so he set out for Badajoz with all the men of I Corps and IV Corps of the Army of the South he could spare from the siege of Cadiz and the occupation of the rest of Andalusia. Combined with the men of V Corps under Latour-Maubourg on the Andalusian border, Soult had a force of approximately 23,000 men and 35 artillery pieces cannon moving towards Badajoz.[44] His army was much smaller than that of the Allies, but he hoped the quality of his troops would compensate for his lack of numbers.
Beresford was alerted to the French advance by reports received on 12 May from Spanish patriots in Seville, who had sent word of Soult's departure. Beresford kept up the pretence of besieging Badajoz by sending an unsuccessful demand for surrender to the French commander on the afternoon of that same day, but he realized he would now not have time to finish the job, so he ordered the withdrawal of his siege guns and supplies.[45] On 13 May, the Spanish cavalry attached to Colborne's brigade came into contact with the French force and, in accordance with orders given by Wellington in April, they fell back while sending word of Soult's new position to Beresford. Later that day Long's British cavalry also encountered the advancing French and hastily pulled back—although Long, too, was following Wellington's orders not to engage, Beresford considered his withdrawal somewhat premature and thought Long could have delayed the French by forcing them to deploy.[46]
Also on the 13th, Beresford moved the British 2nd Division, Major General John Hamilton's Portuguese division and three artillery batteries from Badajoz to Valverde—an ideal position to observe the three routes open for Soult's approach. Wellington's orders left Beresford full discretion to fight Soult or to retreat and he was personally inclined to the latter course of action. However, when Beresford met with Blake and Castaños, the two most senior Spanish generals, at Valverde on 14 May, he allowed himself to be persuaded that the numerical superiority the Allied army had over Soult justified risking a battle.[47] The Allied leaders consequently agreed to concentrate at Albuera, which was the location chosen by Wellington as best suited for an attempt to resist any French advance to relieve Badajoz.[48]
By 15 May it was clear to Beresford that Soult was taking the central route to Badajoz, which ran through Santa Marta and the village of Albuera. He made further adjustments to his deployment, moving the 2nd Division and Hamilton's Portuguese to defend the village, where they were joined by Alten's KGL brigade and a further Portuguese brigade composed of garrison and light troops temporarily formed for the campaign.[49] Soult's movements became even clearer when his Chasseurs à cheval and hussars engaged Long's cavalry at Santa Marta—once again Long retreated in what Beresford considered to be unreasonable haste.[50] Major General William Lumley took over from Long as the Allied cavalry commander. Accounts differ as to the reason for this, some claiming it was because of Long's incompetence,[51] and others stating that it was simply down to Lumley's seniority.[52] The immediate reason for Beresford's decision seems to have been that Long himself suggested that the appointment of Lumley would resolve questions of seniority that had arisen between Long and the commanders of the Spanish cavalry. The actual change of command did not take place until the morning of the 16th because Lumley did not arrive at the battlefield until then.[53]
There were no further engagements that day, so Beresford was able to complete his dispositions. The front of the Allied position was defined by a series of small watercourses flowing from south to north. Two of these, the Nogales (sometimes called the Feria) and Chicapierna brooks, meet just south of the village to form the Albuera river, but none of these were formidable obstacles and the river itself could be crossed at two bridges and a ford. Alten's men were placed in Albuera itself, while Hamilton's division along with most of the Portuguese cavalry formed the Allied left wing to the north of the village and Major General William Stewart's 2nd Division formed up on a hill just to the west of Albuera. The right wing of the Allied army was to be supplied by Castaños's and Blake's four Spanish infantry divisions, while the Allied cavalry and artillery along with the 4th Division would provide a strong strategic reserve.[54] To the west of the Chicapierna and the Albuera, the land rises to a low, treeless north-south ridge crowned by several knolls that become progressively higher to the south. After the battle, Beresford was severely criticized for failing to occupy two of these high points, the first of which lies approximately one mile southwest of the village and the second some 500 yards further south.[55]
Blake's divisions were delayed in coming forward and only arrived at around midnight 15–16 May, although they were in position in time for the opening of battle later that morning. Meanwhile, Lowry Cole's 4th Division,[56] and de España's Spanish brigade marched from Badajoz to Albuera in the early hours of 16 May.[57]
Meanwhile, Soult was making his own plans. He knew that Blake intended to join forces with Beresford, but he thought that the Spanish divisions were still several days march away. Based on that erroneous premise, Soult decided that his best course of action would be to turn the Allies' southern flank, thus driving a wedge between the two parts of Beresford's army. Soult hoped that as a result he could defeat his opponents in detail, overcoming Beresford's force and then turning south to deal with Blake's divisions.[58]
Battle

Beresford deployed his troops on the reverse slopes of such hills as could be found on the battlefield; unable to see the Allied army, Soult was still unaware that Blake's Spanish divisions had come up during the night. Thus, on the morning of 16 May 1811, the Marshal proceeded with his attempt to turn the Allied right flank.[58] To approach Albuera village directly, the French would have to cross the Albuera River via a small bridge, and Soult's first move was to launch a strong feint attack in this direction. He sent Godinot's infantry brigade, flanked by Briche's light cavalry and supported by artillery, across the bridge towards the village. Four platoons of Vistulan Lancers also crossed the river, but they were driven back by the 3rd Dragoon Guards. A Portuguese gun battery had been positioned to cover the approaches to the bridge, and as Godinot's skirmishers advanced they became engaged with Alten's KGL battalions, who were defending Albuera.[59]
At the same time two brigades of dragoons and Werlé's infantry brigade showed themselves on Godinot's left, advancing out of an olive wood in front of Blake's position to Alten's right.[60] With a large concentration of French troops now menacing the village, the Allied commanders took the bait exactly as Soult had planned, and sent reinforcements to Alten's aid.[58]
French flank attack
While the Allies were bracing themselves for a frontal assault on their centre and right, Soult was preparing his real thrust. The two V Corps divisions of Generals Girard and Gazan, preceded by a cavalry brigade, swung left to begin the Marshal's flanking move—their progress was concealed by intervening olive woods, and the first the Allies knew of them was when four French cavalry regiments burst from the southern end of the woods, crossed two brooks, and scattered Loy's Spanish cavalry on the right of Beresford's lines.[61] Alarmed, Beresford rode forward to observe the French manoeuvres; when Godinot's cavalry support and Werlé's brigade began to move away from Albuera and toward Girard's rear, Soult's true intentions became clear.[62]
Beresford immediately issued new orders. He directed Blake to swing his forward line around to face the approaching French.[63] Lumley's cavalry was sent to support Loy's horse and hold Blake's right flank, while Stewart's 2nd Division was sent south from its location behind Albuera to take up a new position behind Blake in readiness to provide support if needed. Cole's 4th Division was ordered to form up behind the cavalry, and Hamilton's Portuguese moved to the Allied centre to hold Albuera and act as a reserve.[64]
Blake however did not follow Beresford's orders; he still believed that the French attack would come at his front. Keeping his forward line in position, he instead moved four battalions from Zayas's division to form his new southern-facing front.[65] Zayas deployed these battalions, from the Spanish second line, in two groups. Two battalions of Spanish Guards were formed up, in line, at the top of a steep incline while the remaining two formed close columns behind them; a single battery of Spanish artillery supported the whole position.[66]
Beresford, on hearing of Blake's limited redeployment, rode back to personally supervise the operation. He merged Zayas's second pair of battalions with the first pair, forming a front line four battalions strong. He then sent orders for Lardizabal to bring up three of his battalions to support Zayas's right, and for Ballesteros to bring a further two in support of the left.[66] However, these reinforcements did not arrive in time to meet the first French attack—Zayas's four battalions had to face two entire French divisions alone.[67]
Thin Spanish line holds
While Beresford had been redeploying his army, a "majestic movement changed the whole aspect of the French front".[68] Two brigades of dragoons galloped from the French right-centre, passed behind V Corps, and joined Latour-Maubourg's cavalry on the left. At the same time Werlé's division closed up with the rear of V Corps, becoming the French reserve. Soult had concentrated his entire infantry strength, except for Godinot's 3,500 men who were still engaged at Albuera, and all his cavalry save Briche's light horse, into one front marching on Blake's right flank.[68]
The two divisions of V Corps advanced one behind the other against Zayas's position. The first of these divisions, that of Girard, moved in ordre mixte—four battalions in column flanked on either side by a battalion in line, and further flanked by a battalion and a half in column—while Gazan's division moved in battalion column.[69] Girard's tirailleurs engaged Zayas line and gradually thinned the Spanish front rank.[70] When Girard's main column came within about 50 metres (55 yd) of the Spaniards, the skirmishers split to the left and right and the battalions behind them opened fire. The Spaniards held their ground, exchanging volleys with the French, and eventually repelled Girard's first attack.[71]
Despite their resistance Zayas's men, possibly the best troops in the Spanish army at the time,[67] were being slowly forced back. However, they held long enough for Ballesteros and Lardizabal to come up, and for Stewart's 2nd Division to advance to their support.[72] Stewart brought John Colborne's 1st Brigade up, followed by the Division's two other brigades. The 3rd Regiment of Foot (the Buffs) took the lead, followed by the 48th and the 66th. Colborne's brigade formed up on the French left, and supported by a battery of KGL cannon the British opened fire, forcing Girard's two flanking battalions to face outwards in order to return fire.[73]
Destruction of Colborne's brigade
The musketry duel that developed between Colborne's brigade and Girard's left flank was so intense that both sides faltered. The French began to break, and were only kept in place by their officers beating them back with swords as they tried to retreat.[73] The left of Colborne's brigade, assailed by both musket fire and grapeshot from Girard's supporting guns, tried to force the issue with a bayonet charge but were unsuccessful. On the right Colborne's men continued to trade volleys with the French and, seeing their resolve wavering, also fixed bayonets and charged.[74]

As the brigade moved forward a blinding hail- and rain-shower hit the battlefield, rendering both sides' muskets useless.[75] Under cover of the reduced visibility Latour-Maubourg launched two Polish cavalry regiments at Colborne's exposed right flank. Ploughing through the unprepared British infantry, the 1st Vistulan Lancers and the 2nd Hussars virtually annihilated Colborne's first three regiments. Only the fourth, the 31st Regiment of Foot, was able to save itself by forming into squares.[72] The cavalry pressed on against Colborne's supporting KGL artillery battery and captured its guns (although all but the howitzer were subsequently recovered).[76]
Having captured five regimental flags and eight cannon the Uhlans swept past the 31st's square, scattering Beresford and his staff, and attacked the rear of Zayas's line.[77] Zayas met this assault unflinchingly while continuing to direct fire at Girard.[78] By this time the rainstorm had cleared and Lumley, commanding Beresford's horse, could finally make out the devastation caused by the French and Polish cavalry. He sent two squadrons of the 4th Dragoons to disperse the Uhlans, which they did, but the British troopers were in their turn driven off by a fresh hussar regiment that Latour-Maubourg had sent to cover the lancers' retreat.[79] Closing on the action, the 29th Regiment of Foot (the lead regiment of Stewart's second brigade) opened fire on the scattered Vistula lancers.[80] Most of this fusillade actually missed its intended targets and instead struck the rear ranks of Zayas's men. The Spaniards nevertheless stood firm; their actions very likely saved the allied army from destruction.[78]
Some British sources claim that the Polish cavalrymen refused to accept any surrender by the British infantry, and deliberately speared the wounded as they lay. Tradition reports that the British 2nd Division swore to give no quarter to Poles following Albuera. According to Beresford, of the 1,258 men lost by Colborne's first three regiments, 319 were killed, 460 were wounded and 479 were taken prisoner.[81] According to Soult's report the Vistula Lancers had 130 casualties out of 591 troopers.
Hoghton's ordeal
The fighting on the Allied right now paused as both sides sought to regroup. Girard's division had suffered considerably in its battle with Zayas, and Colborne's actions, although ultimately disastrous, had caused significant French casualties.[82] Girard now regarded his division as a spent force and brought up Gazan's 2nd Division to take its place. Advancing in column, Gazan's battalions had to struggle through the remnants of Girard's retiring units. As a result, many of the 1st Division's survivors were swept up and incorporated into Gazan's column, which grew by accretion into a dense mass of 8,000 men, losing much of its cohesion in the process.[83] The ensuing disruption and delay gave the Allies time to re-form their own lines.[82] Beresford deployed Hoghton's brigade behind Zayas's lines and Abercrombie's to the rear of Ballesteros, then moved them forward to relieve the Spaniards.[84] Joseph Moyle Sherer, an officer serving under Abercrombie, recounts how a young Spanish officer rode up and "begged me ... to explain to the English that his countrymen were ordered to retire [and] were not flying."[85]
Following this hiatus the second phase of the battle began—if anything even more bloodily than the first.[82] The French only deployed a skirmish line against Abercrombie's brigade, so the weight of the renewed assault fell on Hoghton. Despite being joined by the sole survivors of Colborne's brigade (the 31st Foot), just 1,900 men stood in line to face the advancing corps.[84] Hoghton's three battalions (the 29th Regiment of Foot, 1/48th Regiment of Foot and 1/57th Regiment of Foot), suffered huge casualties, with 56 officers and 971 men killed or wounded from their complement of 95 officers and 1,556 men.[86]
Ordinarily in a duel between Allied line and French column, the greater volume of fire laid down by the line (where every single weapon could be brought to bear on the front and flanks of the narrower column) could be expected to be the decisive factor. In this case however, the French were well supported by artillery. More than compensating for the firepower disadvantage of his infantry formation, Girard brought guns up to just 275 metres (300 yd) from Hoghton's line—close enough to enfilade it with a crossfire of grape and canister.[87] Early in this engagement Colonel William Inglis of the 57th Foot was wounded by grapeshot from the French artillery. He refused to be carried to the rear and lay with the Colours; throughout the battle his voice could be heard calmly repeating "Die hard 57th, die hard!"[88] In following his exhortations, the 57th earned their nickname: the "Die-Hards".[85]
Under this combined arms assault Hoghton's brigade lost two thirds of its strength. The Brigadier himself was killed, and as casualties rose its shrinking line could no longer cover the frontage of the attacking column. However, the French were in no condition to press home their numerical advantage; British volley fire had taken its toll and Girard lost 2,000 men during the confrontation.[89] He had tried to form his unwieldy corps-sized column into line to bring his full firepower to bear and overwhelm Hoghton's brigade, but his deploying companies were constantly driven back into the column by the intense British musketry.[90]
Soult's retreat
_map.jpg)
Although the French attacks were being held, the result of the battle was still far from certain. Soult had Werlé's divisional-sized brigade in reserve, and most of Latour-Maubourg's cavalry had not been engaged. However, the presence of Cole's fresh 4th Division, still formed up in readiness behind Lumley's squadrons, seems to have persuaded Soult not to use his strong force of horsemen.[91] In his subsequent dispatch to the Emperor, Soult claimed that he had only at that point learned that Blake had joined with Beresford and he faced a much larger Allied force than expected.[92] The Marshal, having outmanoeuvred the Allies with his flank attack, went on the defensive: the cavalry were refused permission to charge, and Werlé remained in reserve.[82]
On the Allied side Beresford was proving no more incisive. Anxious to reinforce Hoghton and Abercrombie, he tried to bring up de España's independent brigade, but they refused to move within range of the French.[93] Leaving Cole's division in place (according to Beresford, to protect the Allied flank from further cavalry attack, although Wellington was of the opinion that Beresford was actually securing his line of retreat[94]), Beresford instead called upon Hamilton's Portuguese Division, but Hamilton had moved closer to Albuera to support Alten in fending off Godinot's attack, and the orders took a long time to reach him. Hamilton's brigades only started moving half an hour after the orders had been sent.[93] With his right under heavy pressure and casualties mounting, Beresford finally sent for Alten's KGL, ordering 3,000 Spaniards to Albuera to relieve them and take over the defence there. Alten hastily regrouped and marched south to the Allies' right wing, but Godinot took Albuera before the Spaniards could arrive, exposing another Allied flank to the French.[82]
It was at this critical point that the decisive move of the battle was made by General Cole. Standing idle under explicit orders from Beresford,[95] he had nevertheless been considering advancing against the French left flank, but he was wary of moving his infantry across open country in the face of 3,500 French cavalry.[96] His mind was made up though when Colonel Henry Hardinge, of the Portuguese Quarter-master-general's department, rode up and urged him to immediately advance.[97] After a brief consultation with Lumley, Cole began to redeploy his division from column into line. Mindful of the dangers presented by Latour-Maubourg's horsemen, Cole flanked his line at either end with a unit in column: on the right were the division's massed light companies, including those from Brigadier Kemmis's brigade,[56] while the first battalion of the Lusitanian Legion took station on the left.[97] Lumley formed up the whole of the Allied cavalry to the rear and right, accompanied by a battery of horse artillery, and the whole mass, some 5,000 infantrymen, advanced on V Corps' left flank.[96]
The sight of the approaching Allied line forced Soult's hand—if Cole's division was not stopped, defeat was certain. He sent four regiments of Latour-Maubourg's dragoons to charge the Portuguese section of Cole's line, and committed the whole of Werlé's reserve to protect V Corps' flank.[98] The dragoons swept down on Harvey's Portuguese brigade fully expecting to destroy it as they had Colborne's. The inexperienced Portuguese, however, stood firm and drove away the cavalry without even forming square.[99] Having once been repulsed, Latour-Maubourg's dragoons made no further attack on Cole's division, and the Allied line marched on. The Fusilier brigade and Lusitanian Legion on the division's left soon encountered Werlé's brigade, which outnumbered them two to one.[100] Despite his advantage in numbers, Werlé had formed his nine battalions into three columns of regiments, and could not bring as many muskets to bear as the Allies. Three separate regimental musket duels ensued, as the 23rd Royal Welch Fusiliers and the two battalions of the 7th Fusiliers each took on a column.[98] During the fire-fight the French tried once more to extend into line, but as before the concentrated Allied fire prevented their deployment. After 20–30 minutes of bitter conflict they finally broke and ran.[100] The Fusiliers had lost more than half their numbers, mainly to artillery fire, while Werlé's brigade had suffered 1,800 casualties.[98]
Meanwhile, Abercrombie had wheeled his brigade round to face the right of the beleaguered V Corps and charged; Girard's and Gazan's men fled to the rear, joining the fugitives from Werlé's brigade.[101] The Allied 4th Division and parts of the 2nd went after the retreating French, leading Beresford to exclaim "Stop! Stop the Fifty Seventh; it would be a sin to let them go on!"[102] This admonition was unnecessary though: Latour-Maubourg quickly placed his cavalry between the chasing Allied divisions and the fleeing French infantry, and aborting their pursuit the British and Portuguese instead drew up on the heights they had just won. Soult also moved up his final reserve—two strong Grenadier battalions—to cover the retreat, and although these suffered heavily from Allied artillery fire, they and the cavalry ensured there was little further fighting.[101] After some delay Beresford brought up three Portuguese brigades and drove the Grenadiers back, but by this time Soult had massed his artillery in a line against the Allies and Beresford did not further commit his forces.[103]
As a postscript to the battle, Alten's KGL, who had not had time to join the southern front, returned to Albuera and drove out what French force remained in the village. After six or seven hours of bitter conflict, the battle had come to an end.[103]
Aftermath
On the morning of 17 May both sides formed up again. Beresford's orders indicated that he would retreat if Soult advanced.[104][105] All day Soult held his ground, long enough to arrange for transportation of his wounded to Seville.[106] It was not apparent to Beresford that there was little chance of Soult resuming hostilities, even when Kemmis's 1,400 strong brigade (previously stranded on the north bank of the Guadiana) joined the Allied army on the battlefield at dawn. Beresford also had the relatively unscathed Portuguese division, Alten's KGL and several Spanish battalions ready for duty; Soult, in contrast, only had Godinot's brigade and Latour-Maubourg's cavalry in a fit state to fight.[107] News that Wellington was marching to Elvas with a further two divisions hastened the Marshal's decision to retreat, as well as persuading Beresford not to launch a premature offensive against Soult's superior artillery and cavalry.[106]
Soult marched away before dawn on 18 May, leaving several hundred wounded behind for the Allies to treat[108] and Beresford, despite a large advantage in numbers and a day's rest, was nevertheless unable to pursue. So many were injured in the battle that two days later British casualties were still waiting to be collected from the field. The chapel at Albuera was filled with wounded Frenchmen, and the dead still lay scattered across the ground.[107] In proportion to the numbers involved, the Battle of Albuera was the bloodiest of the whole Peninsular War.[109]
The losses on both sides were horrific, and while Soult had failed in his aim of relieving the siege of Badajoz, neither side had demonstrated the will to press for a conclusive victory.[110] Allied losses amounted to 5,916: 4,159 British, 389 Portuguese and 1,368 Spaniards.[5] In his despatch of 21 May 1811, Soult estimated British casualties as 5,000 with 800 to 1,000 captured; Spanish as 2,000 with 1,100 captured; Portuguese as 700 to 800.[111] French casualties are harder to ascertain—Soult initially declared 2,800 in his dispatch to Napoleon, but the official figure drawn up on 6 July revised that number upward to 5,936. British historians dispute this, comparing Soult's figure of 241 officer casualties with regimental returns that total 362.[8] Sir Charles Oman extrapolated this figure to come up with the total number of French casualties, which he puts at approximately 7,900. In comparison, the French historians Belmas and Lapène place Soult's losses at 7,000.[112] Some of the British dead from the battle, including Major General Daniel Hoghton, are buried in the British Cemetery, Elvas.[113]
Reviewing Beresford's after action report, Wellington was unhappy with its despondent tone and commented to a staff officer "This won't do. It will drive the people in England mad. Write me down a victory."[114][115] The report was duly rewritten, although Wellington privately acknowledged that another such battle would ruin his army.[116] Soult, on the basis of higher allied casualties, also claimed "a signal victory".[105] He generously paid tribute to the steadfastness of the allied troops, writing "There is no beating these troops, in spite of their generals. I always thought they were bad soldiers, now I am sure of it. I had turned their right, pierced their centre and everywhere victory was mine – but they did not know how to run!"[117]
Consequences
Although he failed to lift the siege of Badajoz, Soult's campaign had managed to temporarily relieve it. On 12 May Beresford, when learned that Soult had reached Llerena, directed that the siege be abandoned and by the night of the 13th the siege train, artillery and supplies were withdrawn to Elvas and such material that could not be moved was burned.[118] General Philippon, the garrison's commander, took this opportunity to sally out and destroy the surrounding Allied trenchworks and batteries. On 18 May Beresford sent Hamilton's Portuguese division, along with some cavalry, back to Badajoz. A show of Badajoz's investment[119] was resumed the following day.[106] but Soult knew well that Beresford could no longer hurt Badajoz.[120] Beresford's corps was joined by Wellington's field army during June 1811, but even with this reinforcement time was fast running out. The French Army of Portugal, now reconstituted under Marshal Auguste Marmont, had joined up with Soult's Army of the South, and Wellington was forced to pull his 44,000 men back across the border to Elvas. On 20 June the combined French force, over 60,000 strong, lifted the siege.[121]
The Battle of Albuera had little effect on the overall course of the war, but it had shown that British and Spanish troops could work together. On the other hand, Anglo-Spanish political relations suffered following the battle. Wellington placed most of the blame for the losses on Blake, while a dispatch read in the Spanish cortes implied that the British had played only a minor role in the battle, despite their much higher losses.[122]
Notes
- ↑ Esdaile 2002, p. 340. "A bloody stalemate...".
- ↑ Edwards, Capt. R.F., R.E. Editor. Professional Papers of the Corps of Royal Engineers, Vol. XXV, W.J. Mackay & Co, Ltd., 1900, The Evolution of the Defence, By Colonel M.H.G. Goldie R.E., p. 58, describes Albuera indecisive.
- ↑ Griswold, Rufus Wilmot. Napoleon and the Marshals of the Empire, Philadelphia, 1865, Vol. II, p. 50, "...the drawn battle of Albuera...".
- ↑ Gates 1986, p. 472.
- 1 2 3 Oman 1911, Appendix XV.
- ↑ The Nafziger Collection of Orders of Battle
- 1 2 The Nafziger Collection of Orders of Battle
- 1 2 Oman 1911, Appendix XVI.
- ↑ Napier (1831, p. 171), gives 7,000.
- ↑ Gurwood, John, ed. The dispatches of Field Marshal the Duke of Wellington, Vol. V. London, MDCCCXLIV, Appendix: French Official Reports, etc. pp.770 to 771. Soult's despatch mentions over 1,000 prisoners.
- ↑ Beresford's report of 18 May 1811 to Wellington gives "about 2,000 dead, 900 to 1,000 prisoners. An intercept of a dispatch from Gazan reports the French have some 4,000 wounded. Gurwood: Dispatches, pp. 39 & 40.
- ↑ Oliver, Michael. BATTLE OF ALBUERA 1811: Glorious Field of Grief, Pen and Sword, 2007, ISBN 1844154610
- ↑ Weller 1962, pp. 141–142.
- ↑ Weller 1962, p. 144.
- ↑ Weller 1962, pp. 145–146.
- ↑ Oman 1911, p. 4.
- 1 2 Gates 1986, p. 245.
- ↑ Oman 1911, pp. 28–29.
- ↑ Glover 1974, p. 142.
- ↑ Oman 1911, pp. 30–31.
- ↑ Gates 1986, pp. 245–248.
- ↑ Oman 1911, p. 56.
- ↑ Oman 1911, pp. 57–61.
- ↑ Oman 1911, p. 62.
- ↑ Gates 1986, p. 249.
- ↑ Oman 1911, p. 248.
- ↑ Oman 1911, pp. 249–251.
- ↑ Oman 1911, pp. 253–255.
- ↑ Gates 1986, p. 252.
- ↑ Gates 1986, p. 253.
- ↑ The cavalry clash at Campo Maior was to become a very controversial action. Beresford considered that Long had lost control of his light cavalry, which had pursued fleeing French cavalry for up to seven miles (11 km) until they came within range of the fortress guns of Badajoz. Beresford also claimed that his taking personal command of the heavy dragoon brigade had prevented Long from ordering them to attempt a suicidal charge against French infantry squares (Oman 1911, pp. 258–265). Long was of the opinion, and was subsequently supported in this by the historian Napier (Napier 1842, pp. 309–310), that if Beresford had released the British brigade of heavy dragoons he would have been able to drive off the remaining French cavalry, who were in close support of their infantry, and consequently force the French infantry itself to surrender (McGuffie 1951, pp. 73–81).
- ↑ Two complete bridge equipages had been kept at Badajoz, but they were now in French hands. Only five pontoon boats were found, but the engineers estimated that 20 were needed to bridge the Guadiana. All other boats in Extremadura had been burnt on Wellington's orders when Soult entered the region (Oman 1911, p. 166).
- ↑ Oman 1911, pp. 266–267.
- ↑ Gates 1986, p. 254.
- ↑ Dempsey 2008, pp. 61–62.
- 1 2 Dempsey 2008, p. 62.
- ↑ Dempsey 2008, p. 64..
- ↑ Dempsey 2008, p. 63.
- ↑ Oman 1911, p. 277.
- ↑ Oman 1911, p. 279.
- ↑ Dempsey 2008, pp. 64–67.
- 1 2 Dempsey 2008, p. 69.
- ↑ Fortescue 1917, p. 142.
- ↑ Dempsey 2008, p. 74.
- ↑ Dempsey 2008, p. 71.
- ↑ Oman 1911, pp. 369–370.
- ↑ Dempsey 2008, p. 77.
- ↑ Dempsey 2008, p. 65.
- ↑ Oman 1911, p. 371.
- ↑ Oman 1911, p. 372.
- ↑ Oman (1911, p. 372) and Glover (1974, p. 158), citing a letter from Benjamin d'Urban, and Napier (1831, p. 164).
- ↑ Fortescue (1917, p. 186), citing d'Urban, McGuffie (1951, p. 106) and Fletcher (1999, p. 149) (citing Fortescue).
- ↑ Dempsey 2008, p. 106.
- ↑ Gates 1986, pp. 257–258.
- ↑ Dempsey 2008, p. 80.
- 1 2 Glover 1974, p. 163; Brigadier Kemmis's brigade had been stranded on the north bank of the Guadiana, and only his light companies accompanied Cole.
- ↑ Oman 1911, pp. 376–377.
- 1 2 3 Gates 1986, p. 258.
- ↑ Fortescue 1917, p. 191.
- ↑ Oman 1911, p. 378.
- ↑ Oman (1911, p. 378); however, Fortescue (1917, p. 192) suggests that the French were spotted by an aide-de-camp of Zayas as they marched through the woods.
- ↑ Fortescue 1917, p. 192.
- ↑ The Spanish normally fought in two lines, each three ranks deep (Glover 1974, p. 160).
- ↑ Fortescue 1917, pp. 192–193.
- ↑ Weller 1962, p. 175.
- 1 2 Fortescue 1917, p. 193.
- 1 2 Esdaile 2002, p. 344.
- 1 2 Oman 1911, p. 381.
- ↑ Fortescue (1917, p. 194) describes the ordre mixte, while Esdaile (2002, p. 344) gives the disposition of the Corps as a whole.
- ↑ Fortescue 1917, p. 195.
- ↑ Fortescue 1917, pp. 195–196. Beresford reported that the Spanish held for an hour and a half (Fortescue 1917, p. 196, footnote).
- 1 2 Weller 1962, p. 176.
- 1 2 Oman 1911, p. 383.
- ↑ Fortescue (1917, p. 197) and Oman (1911, p. 383).
- ↑ Oman (1911, p. 383) describes the sudden shower, while Weller (1962, p. 177, footnote) explains why muskets are useless in the wet.
- ↑ Fortescue 1917, pp. 197–198.
- ↑ Muzás (2002, para. 2) claims six colours were taken, but then goes on to acknowledge that Lieutenant Latham saved the Buff's King's Colour and that the Uhlans only took the flagstaff.
- 1 2 Gates 1986, p. 259.
- ↑ Fortescue 1917, p. 198.
- ↑ Oman 1911, p. 385.
- ↑ Oman 1911, p. 384.
- 1 2 3 4 5 Gates 1986, p. 260.
- ↑ Oman 1911, pp. 385–386.
- 1 2 Oman 1911, p. 386.
- 1 2 Esdaile 2002, p. 346.
- ↑ Oman 1911, pp. 386–387.
- ↑ Weller 1962, pp. 177–178.
- ↑ Glover 1974, p. 162.
- ↑ Oman 1911, p. 387.
- ↑ Fortescue 1917, p. 201.
- ↑ Fortescue 1917, p. 202.
- ↑ Oman 1911, p. 388; Fortescue (1917, p. 202) however argues that Soult already knew of Blake's presence and, an irresolute commander on the battlefield, simply hesitated to commit the reserves.
- 1 2 Weller 1962, pp. 178–179.
- ↑ Weller 1962, p. 178, footnote 3.
- ↑ Wade et al. 1841, p. 5.
- 1 2 Oman 1911, p. 390.
- 1 2 Fortescue 1917, pp. 203–204.
- 1 2 3 Oman 1911, pp. 390–392.
- ↑ Esdaile 2002, p. 347.
- 1 2 Fortescue 1917, pp. 204–205.
- 1 2 Oman 1911, pp. 392–393.
- ↑ Glover 1974, p. 164.
- 1 2 Fortescue 1917, p. 206.
- ↑ Edwards, Peter. Albuera: Wellington's Fourth Peninsular Campaign, Crowood Press, 2008, ISBN 1861269463, pp.174 & 176. Similarly, Fortescue (1917, pp. 209–212)
- 1 2 Dunn-Pattison 1909, p. 108.
- 1 2 3 Oman 1911, pp. 395–397.
- 1 2 Fortescue 1917, p. 209.
- ↑ Oman (1911, p. 397) and Fortescue (1917, p. 209); Soult's transport was used up carrying the rest of his wounded, and he could not move those left.
- ↑ Oman 1911, p. 393.
- ↑ Gates 1986, p. 261.
- ↑ Gurwood, John, ed..The dispatches of Field Marshal the Duke of Wellington, Vol. V. London, MDCCCXLIV, Appendix: French Official Reports, etc. pp.770 to 771.
- ↑ Weller 1962, p. 185.
- ↑ Hoghton, Daniel, Oxford Dictionary of National Biography, E. M. Lloyd, Retrieved 11 June 2008
- ↑ Roberts, p. 63
- ↑ Herold 2002, p. 227.
- ↑ Hibbert 1997, p. 106.
- ↑ Southey 1837, p. 241.
- ↑ Fortescue (1917, p. 148)
- ↑ Napier, (1831, Vol. III), p.173
- ↑ Napier, (1831, Vol. III), p.173.
- ↑ Weller 1962, pp. 187–189.
- ↑ Esdaile 2002, pp. 348–349.
References
- Dempsey, Guy (2008), Albuera 1811 – The Bloodiest battle of the Peninsular War, Frontline Books, ISBN 978-1-84832-499-2;
- Dunn-Pattison, R P (1909), Napoleon's Marshals, Little, Brown & co.;
- Esdaile, Charles (2002), The Peninsular War, Penguin Books (published 2003), ISBN 978-0-14-027370-0;
- Ewards, Peter (2008), Albuera: Wellington's Fourth Peninsular Campaign, 1811, Crowood Press, ISBN 978-1-86126-946-1;
- Fletcher, Ian (1999), Galloping at Everything: The British Cavalry in the Peninsula and at Waterloo 1808–15, Spellmount Publishers Ltd, ISBN 978-1-86227-016-9;
- Fortescue, Sir John (1917), A History of the British Army, VIII, Macmillan, retrieved 13 September 2007;
- Gates, David (1986), The Spanish Ulcer: A History of the Peninsular War, Pimlico (published 2002), ISBN 978-0-7126-9730-9;
- Glover, Michael (1974), The Peninsular War 1807–1814: A Concise Military History, Penguin Classic Military History (published 2001), ISBN 978-0-14-139041-3;
- Griswold, Rufus Wilmot (1865), Napoleon and the Marshals of the Empire, I, Philadelphia;
- Gurwood, John (1844), The dispatches of Field Marshal the Duke of Wellington, V, London;
- Herold, Christopher (2002), The Age of Napoleon, Houghton Mifflin Co., ISBN 978-0-618-15461-6;
- Hibbert, Christopher (1997), Wellington: A Personal History, Perseus Books, ISBN 978-0-7382-0148-1;
- McGuffie, T. H., ed. (1951), Peninsular Cavalry General: (1811–13) The Correspondence of Lieutenant General Robert Ballard Long, George G. Harrap;
- Muzás, Luis (2002), Trophies of Albuera (May 16, 1811), The Napoleon Series, retrieved 10 October 2007;
- Napier, Sir William (1842), History of the War in the Peninsula, II (4th ed.), Carey and Hart, retrieved 22 May 2008;
- Napier, Sir William (1831), History of the War in the Peninsula, III, Frederic Warne and Co, retrieved 9 October 2007;
- Oman, Sir Charles (1911), A History of the Peninsular War: Volume IV, December 1810 to December 1811, Greenhill Books (published 2004), ISBN 978-1-85367-618-5;
- Oman, Sir Charles (1913), Wellington's Army, 1809–1814, Greenhill Books (published 1993), ISBN 978-0-947898-41-0;
- Roberts, Andrew (2001), Napoleon and Wellington : the Battle of Waterloo and the great commanders who fought it, Simon & Schuster, ISBN 978-0-7432-2832-9;
- Southey, Robert (1837), History of the Peninsular War, V, John Murray;
- Wade, Thomas; Napier, Sir William; Hardinge, Sir Henry; Cole, Sir Galbraith Lowry (1841), The Correspondence of Colonel Wade, Colonel Napier, Major-General Sir H Hardinge and General the Hon. Sir Lowry G. Cole relating to the Battle of Albuera, T & W Boone, retrieved 31 January 2008;
- Weller, Jac (1962), Wellington in the Peninsula, Nicholas Vane.
- The Nafziger Collection of Orders of Battle
External links
| Wikimedia Commons has media related to Battle of Albuera. |