Battle of Teugen-Hausen
| Battle of Teugen-Hausen | |||||||
|---|---|---|---|---|---|---|---|
| Part of the War of the Fifth Coalition | |||||||
 Battle of Teugen-Hausen | |||||||
| |||||||
| Belligerents | |||||||
|
|
| ||||||
| Commanders and leaders | |||||||
|
|
| ||||||
| Units involved | |||||||
|
|
| ||||||
| Strength | |||||||
|
Teugen-Hausen: 18,000[1] Dünzling: 12,300[2] Arnhofen: 5,000[2] |
Teugen-Hausen: 28,000[3] Dünzling: 4,000[2] Arnhofen: 7,600[2] | ||||||
| Casualties and losses | |||||||
|
Teugen-Hausen: 3,862[3] Dünzling: 1,084[2] Arnhofen: 400[2] |
Teugen-Hausen: 4,000[3] Dünzling: 233[2] Arnhofen: 227[2] | ||||||
The Battle of Teugen-Hausen or the Battle of Thann was an engagement that occurred during the War of the Fifth Coalition, part of the Napoleonic Wars. The battle was fought on 19 April 1809 between the French III Corps led by Marshal Louis-Nicolas Davout and the Austrian III Armeekorps commanded by Prince Friedrich Franz Xaver of Hohenzollern-Hechingen. The French won a hard-fought victory over their opponents when the Austrians withdrew that evening. The site of the battle is a wooded height approximately halfway between the villages of Teugn and Hausen in Lower Bavaria, part of modern-day Germany.
Also on 19 April, clashes occurred at Arnhofen near Abensberg, Dünzling, Regensburg, and Pfaffenhofen an der Ilm. Together with the Battle of Teugen-Hausen, the fighting marked the first day of a four-day campaign which culminated in the French victory at the Battle of Eckmühl.
Austria's invasion of the Kingdom of Bavaria caught Emperor Napoleon I of France's Franco-German army by surprise. Though the advance of Archduke Charles' Austrian army was slow, mistakes by Napoleon's subordinate Marshal Louis-Alexandre Berthier placed Davout's corps in great peril. As Davout withdrew southwest from Regensburg on the south bank of the Danube, Charles tried to intercept the French with three powerful attacking columns.
The first Austrian column missed the French altogether, while Davout's cavalry held off the second column. The third column crashed head-on into one of Davout's infantry divisions in a meeting engagement. Generals of both armies led their troops with courage and skill as the troops fought over two ridges. French reinforcements finally pushed the Austrians off the southern ridge late in the afternoon and Charles ordered a retreat that night. This opened a clear path for Davout to join the main body of the French army on 20 April.
Background
Austrian plans
On 8 February 1809, the Austrian Empire determined to make war on Napoleon. Led by Foreign Minister Johann Philipp Stadion, Count von Warthausen, the brilliant diplomat Klemens Wenzel, Prince von Metternich, and Empress Maria Ludovika, the war party pointed to the 1808 French disaster at the Battle of Bailén in Spain. However, Archduke Charles wished to put off the war in order to fully mobilize and find allies.[4]

Archduke Charles, appointed Generalissimo after the debacle of the War of the Third Coalition in 1805, had tried for three years to improve the Austrian army.[5] Historian David G. Chandler wrote, "Charles was the very best man available to Austria" to lead her army.[6] He expanded the number of regular soldiers to 340,000 and created a large body of 240,000 landwehr troops. He upgraded the artillery corps, adopted the corps organization, and revised the infantry drillbook, incorporating more French-style tactical evolutions. Serious deficiencies remained, however, in Austrian staffwork, in the landwehr organization, and among the non-German nationalities. At the start, only 15,000 of the best landwehr formations were added to the field army while the rest were relegated to garrison duty or the reserves.[7] The Habsburgs did not wish to arm the population for fear of an insurrection and therefore the landwehr was never fully utilized. In Hungary, the nobles and people were cool toward the war and contributed as little as possible.[8]
Archduke Charles and the Hofkriegsrat sent 50,000 in two corps to Italy under General der Kavallerie Archduke John and 40,000 more in one corps to Galicia under Feldmarschall-Leutnant Archduke Ferdinand Karl Joseph of Austria-Este. Charles massed the remaining regular army in Bohemia and along the Danube for the main effort.[9]
Charles' 206,906-strong Hauptarmee was organized into six army corps and two reserve corps. The I Armeekorps was led by General der Kavallerie Count Heinrich von Bellegarde and numbered 27,653 men. The II Armeekorps commanded by Feldzeugmeister Johann Kollowrat counted 28,168 soldiers. The III Armeekorps consisted of 29,360 troops under Feldmarschall-Leutnant Prince Friedrich Franz Xaver of Hohenzollern-Hechingen. The IV Armeekorps of Feldmarschall-Leutnant Prince Franz Seraph of Orsini-Rosenberg controlled 27,800 soldiers. The V Armeekorps was commanded by Feldmarschall-Leutnant Archduke Louis and numbered 32,266 men. The VI Armeekorps was made up of 35,693 troops under Feldmarschall-Leutnant Johann von Hiller. The I Reserve Armeekorps was directed by General of Cavalry Johann I Joseph, Prince of Liechtenstein and counted 18,063 men. The II Reserve Armeekorps was directed by Feldmarschall-Leutnant Michael von Kienmayer and controlled 7,975 soldiers.[10][11]
Originally, Archduke Charles deployed six corps in Bohemia with only two corps south of the Danube. This proved to be too ambitious for the Austrian high command, so four corps were transferred south of the Danube. Accordingly, the I and II Armeekorps remained in Bohemia; the III, IV, and I Reserve Armeekorps formed a central mass under Charles; and the V, VI, and II Reserve Armeekorps made up the southern flank guard.[12]
Operations
.jpg)
On 9 April 1809, Archduke Charles gave notice to the French ambassador at Munich and Marshal François Joseph Lefebvre that Austria and France were at war. The next morning, Charles' army began crossing the Inn River in an invasion of the Kingdom of Bavaria. Only Lefebvre's VII Corps of three Bavarian divisions were available to oppose the Austrian onslaught. Fortunately for the Franco-Bavarians, it took six days for their enemies to reach the Isar River near Landshut.[13]
Napoleon did not expect the Austrians to declare war, but when it became obvious that war was imminent, he believed that hostilities would start after 15 April. From Paris, Napoleon ordered Marshal Louis-Alexandre Berthier to form the Grande Armée d'Allemagne (Grand Army of Germany) from French and Allied units located on the Danube front. To Berthier he sent orders to concentrate at Regensburg if the Austrians invaded Bavaria after 15 April. If, however, his enemies attacked before the deadline, the army was to assemble farther west at Donauwörth.[14] By misfortune, an order that Napoleon sent on 10 April did not arrive until the 16th. A second order, elaborating on the first order, arrived late on the 13th. Berthier was an excellent chief of staff to Napoleon, but as an army commander he was out of his element. In the confusion, he misinterpreted the out-of-sequence instructions and ordered a forward concentration at Regensburg.[15]
Berthier commanded Davout, who had been sensibly concentrating rearward, to collect his corps at Regensburg on the left wing. Meanwhile, the right wing of the Grande Armée was 120 kilometres (75 mi) distant, with only a thin line of Bavarians holding the center. On the right wing, General Nicolas Oudinot's II Corps was ordered to move toward Regensburg, while Marshal André Masséna's IV Corps was directed to move from Ulm to Augsburg.[15]
On 16 April, the Austrians forced a crossing over the Isar at Landshut. Early the next morning, Napoleon reached the front to take over from his harried subordinate Berthier. He quickly ordered a new concentration near Ingolstadt. To this end, the emperor recalled Davout's III Corps from Regensburg on the south bank of the Danube. Lefebvre's Bavarians must hold the center until Davout got away.[16]
It was not until 18 April that Napoleon realized that 80,000 Austrians menaced Davout. He decided to send Masséna toward Landshut to threaten Archduke Charles' rear in an attempt to take the pressure off Davout. Meanwhile, the emperor instructed Oudinot to support Lefebvre, and directed General of Division Dominique Vandamme's small Württemberg corps to march east from Ingolstadt. For his part, Archduke Charles was aware that he had a chance to destroy Davout's corps.[17]
Order of battle
French forces

- III Corps: Maréchal Louis-Nicolas Davout (34,672, 47 guns)[18]
- Corps Artillery Reserve: Général de Division Antoine Hanicque (359)
- (2) 12 pdr foot batteries (12 guns)
- 2nd Division: Général de Division Louis Friant (11,440)
- Brigade: Général de Brigade Jacques Gilly
- 10ème Régiment d'Infanterie Légère
- 33ème Régiment d'lnfanterie de Ligne
- Brigade: Général de Brigade Louis Grandeau
- 108ème Régiment d'lnfanterie de Ligne
- Brigade: Général de Brigade Claude Hervo
- 111ème Régiment d'lnfanterie de Ligne
- Brigade: Général de Brigade Joseph Barbanègre
- 48ème Régiment d'lnfanterie de Ligne
- Divisional Artillery: 8 pdr foot battery (8 guns)
- Brigade: Général de Brigade Jacques Gilly
- 4th Division: Général de Division Louis Vincent Le Blond de Saint-Hilaire (11,330)
- Brigade: Général de Brigade Guillaume Latrille de Lorencez
- 10ème Régiment d'Infanterie Légère
- 3ème Régiment d'lnfanterie de Ligne
- 57ème Régiment d'lnfanterie de Ligne
- Brigade: Général de Brigade Jean-Marie Destabenrath
- 72ème Régiment d'lnfanterie de Ligne
- 105ème Régiment d'lnfanterie de Ligne
- Divisional Artillery: 8 pdr foot battery (8 guns), 6 pdr horse battery (7 guns)
- Brigade: Général de Brigade Guillaume Latrille de Lorencez
- 3rd Division: Général de Division Charles-Étienne Gudin de La Sablonnière (11,543)
- Brigade: Général de Brigade Claude Petit
- 7ème Régiment d'Infanterie Légère
- Brigade: Général de Brigade Pierre Boyer
- 12ème Régiment d'Infanterie de Ligne
- 21ème Régiment d'Infanterie de Ligne
- Brigade: Général de Brigade Jean Duppelin
- 25ème Régiment d'lnfanterie de Ligne
- 85ème Régiment d'lnfanterie de Ligne
- Divisional Artillery: 8 pdr foot battery (6 guns), 4 pdr horse battery (6 guns)
- Brigade: Général de Brigade Claude Petit
- Corps Artillery Reserve: Général de Division Antoine Hanicque (359)
Austrian forces

- III Armeekorps: Feldmarschall-Leutnant Friedrich Franz Xaver Prince of Hohenzollern-Hechingen[19] (18,000)[1]
- Artillery reserve: Oberst Johann Smola
- 6 pdr position battery (6 guns)
- (3) 12 pdr position batteries (18 guns)
- Light division: Feldmarschall-Leutnant Josef Philipp Vukassovich
- Brigade: General-Major Moritz Liechentstein
- Archduke Karl Legion (1st and 3rd bns)
- Archduke Ferdinand Hussar Regiment No. 3 (8 sqns)
- 3 pdr brigade battery (8 guns)
- Brigade: General-Major Josef Pfanzelter (detached)
- Peterwardeiner Grenz IR No. 9 (2 bns) (one bn detached)
- Hessen-Homburg Hussar Regiment No. 4 (8 sqns) (two sqns detached)
- 3 pdr Grenz brigade battery (8 guns)
- Divisional artillery: 6 pdr Cavalry Battery (6 guns)
- Brigade: General-Major Moritz Liechentstein
- Division: Feldmarschall-Leutnant Franz Joseph, Marquis de Lusignan
- Brigade: General-Major Nikolaus Kayser
- Schröder IR No. 7 (3 bns)
- Wenzel Colloredo IR No. 56 (3 bns)
- 6 pdr brigade battery (8 guns)
- Brigade: General-Major Ludwig Thierry (detached)
- Kaiser IR No. 1 (3 bns) (detached)
- Lindenau IR No. 29 (3 bns) (detached)
- 6 pdr brigade battery (8 guns) (detached)
- Divisional artillery: 6 pdr position battery (6 guns)
- Brigade: General-Major Nikolaus Kayser
- Division: Feldmarschall-Leutnant Franz Xaver Saint-Julien
- Brigade: General-Major Alois Liechentstein
- Manfredini IR No. 12 (3 bns)
- Würzburg IR No. 23 (3 bns)
- 6 pdr brigade battery (8 guns)
- Brigade: General-Major Josef Bieber
- Kaunitz IR No. 20 (3 bns)
- Württemberg IR No. 38 (3 bns)
- 6 pdr brigade battery (8 guns)
- Divisional artillery: 6 pdr position battery (6 guns)
- Brigade: General-Major Alois Liechentstein
- Artillery reserve: Oberst Johann Smola
Key
- IR = infantry regiment
- bn, bns = infantry battalion(s)
- sqns = cavalry squadrons
- pdr = pounder, where 3, 4, 6, 8, or 12 represents the weight of the cannonball in pounds
Battle
Deployments
Archduke Charles hoped that 19 April would bring a great success. His orders for that morning were for the center of his army to attack Davout in an effort to trap the French III Corps against the Danube.[20] By a stroke of luck Charles obtained a copy of Davout's marching orders for the 19th. By 5:00 AM, the Austrian commander issued the marching orders for the day from his headquarters in Rohr in Niederbayern.[21] Charles directed three major columns to intercept the French. He sent the right and center columns northeast toward Langquaid. From there, the right column would pass near Eckmühl (Eggmühl) and turn north for Regensburg where it would rendezvous with General-Major Peter von Vécsey's II Armeekorps brigade. The center column would guide left in the direction of Dünzling. Charles instructed the left column to march via Bachel, Hausen, Teugn, and Bad Abbach.[22]

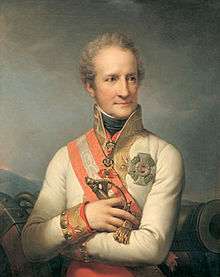
On the right marched General of Cavalry Johann I Joseph, Prince of Liechtenstein with the three heavy cavalry brigades of his I Reserve Armeekorps. Attached to this command was General-Major Andreas Schneller's II Reserve Armeekorps cuirassier brigade[23] and Feldmarschall-Leutnant Karl Friedrich von Lindenau's V Armeekorps infantry division.[24] In the center, Feldmarschall-Leutnant Prince Franz Seraph of Rosenberg-Orsini led the IV Armeekorps,[23] followed by General-Major Prince Victor Rohan's division-sized 13,904-man grenadier brigade belonging to the I Reserve Armeekorps.[25] On the left, Feldmarschall-Leutnant Prince Friedrich Franz Xaver of Hohenzollern-Hechingen advanced with his III Armeekorps, minus two detachments of about 7,000 troops.[26]
Altogether, the archduke committed 65,000 soldiers to destroy the French III Corps. Liechtenstein's right column moved north on the main road to Regensburg. Rosenberg advanced toward the hamlet of Dünzling, while Hohenzollern's proposed route went through the villages of Haugen and Saal an der Donau.[26] At Saal, the Feking stream emptied into the Danube, creating a potential bottleneck. If the Austrians held the Saal defile, Davout's escape route would be cut off.[23]
North of the Danube, General of Cavalry Count Heinrich von Bellegarde's I Armeekorps was still distant. Feldzeugmeister Johann Kollowrat's II Armeekorps assembled on the Danube's north bank, opposite Regensburg, which was defended by a small French garrison.[24] South of III Armeekorps, Feldmarschall-Leutnant Archduke Louis' V Armeekorps, minus Lindenau's division, had orders to contain Marshal François Joseph Lefebvre's Bavarian VII Corps near Abensberg. Feldmarschall-Leutnant Michael von Kienmayer's II Reserve Armeekorps, minus its cuirassier brigade, remained at Pfeffenhausen in support of Louis. Feldmarschall-Leutnant Johann von Hiller's VI Armeekorps was on the extreme left wing.[27] Hiller posted Major Scheibler and 1,200 troops at Pfaffenhofen an der Ilm to look out for Marshal André Masséna's forces.[28] At the beginning of the war, Feldmarschall-Leutnant Franz Jellacic's division was detached from Hiller in order to capture Munich and provide a link between Bavaria and the Tyrol. Hiller ordered Jellacic to rejoin him on 18 April, but the latter never arrived because Charles ordered him back to Munich.[29] Jellacic's luckless command would continue its wanderings until being smashed at the Battle of Sankt Michael on 25 May.[30]
Archduke Charles ordered Hohenzollern to detach troops in order to provide a link between the III and V Armeekorps. Hohenzollern obeyed, sending General-Major Ludwig Thierry's brigade on this assignment, then he erred in sending a second 1,000-man detachment under General-Major Josef Pfanzelter to link III Armeekorps and Thierry. After the two detachments, only 18,000 troops remained to carry out the III Armeekorps' main mission.[1]
Davout sent the III Corps trains along the river road from Regensburg to Abensberg. General of Division Louis Friant's 2nd Division, General of Division Charles-Étienne Gudin de La Sablonnière's 3rd Division, and General of Division Raymond-Gaspard de Bonardi de Saint-Sulpice's 2nd Heavy Cavalry Division protected the wagon train. Flank protection was provided by General of Division Charles Antoine Morand's 1st Division, General of Division Louis Vincent Le Blond de Saint-Hilaire's 4th Division, and General of Division Louis-Pierre Montbrun's Light Cavalry Division. The corps commander also directed one battalion to make a night march in order to secure the all-important Saal defile.[23] Regensburg was defended by Colonel Louis Coutard's 2,000-strong 65th Line Infantry Regiment.[31]
Dünzling, Arnhofen, and other clashes
Johann Liechtenstein's blow on the right flank hit only air, as no French troops stood between him and Regensburg.[23] Near Dünzling and Schneidert, Rosenberg bumped into Montbrun's cavalry, reinforced by two infantry battalions. With less than 4,000 troops, Montbrun conducted a brilliant delaying action against the IV Armeekorps all day, using the wooded terrain to good advantage.[32]
Rosenberg's corps was weakened early in the campaign by the detachment of Feldmarschall-Leutnant Joseph von Dedovich's division to besiege Passau.[33] On 19 April Rosenberg marshaled 16 infantry battalions and 15 cavalry squadrons.[34] At 9:00 AM near Schneidert, three kilometers east of Haugen, General-Major Karl Wilhelm von Stutterheim's IV Armeekorps advance guard brigade brushed against the 12th and 21st Line Infantry of Gudin's division as they marched west. Continuing to the northeast, Rosenberg began to "fritter away" forces to guard his flanks and rear. He left one battalion and one squadron with the grenadiers, one battalion and four squadrons to hold Schneidert, five battalions to guard his line of march, and one battalion to hold a hill at Moosholzen.[35] After holding the Austrians near Moosholzen and Dünzling until evening, Montbrun fell back northwest to Peising near Abbach.[36] Montbrun reported 233 total casualties while inflicting much heavier losses on his opponents. The Austrians lost 116 killed, 452 wounded, 357 captured, and 159 missing for a total of 1,084.[2]
As the link between Archduke Louis and Hohenzollern, Thierry had his reinforced brigade on the road at 6:00 am. When he reached high ground near Abensberg, he saw Bavarian troops massing nearby and soon became embroiled in a skirmish with them near the village of Arnhofen, northeast of Abensberg. In this contest, the Bavarian light cavalry mauled Thierry's four squadrons of attached dragoons.[37] Elements of Crown Prince Louis' 1st Bavarian Division and General Karl Philipp von Wrede's 2nd Bavarian Division were involved. The Bavarians admitted 13 killed, 201 wounded, and 13 captured out of 7,600 troops engaged, while claiming to have captured one cannon and 400 Austrian prisoners. Thierry withdrew his brigade southeast to Offenstetten.[2]
At Regensburg, the 65th Regiment evacuated the fortified bridgehead on the north bank of the Danube and withdrew into the suburb of Stadt-am-Hof. Under an artillery barrage, Kollowrat launched an assault against the town which burst through a gate and into the streets. However, the French defenders ambushed the Austrian column and drove it out of the suburb. After an all-day fight, the French held Stadt-am-Hof and Regensberg, but ran dangerously low on small-arms ammunition. Coutard begged Davout for a resupply but it would never arrive.[38] A hastily organized convoy was captured by Austrian cavalry the following morning.[39]
Far to the southwest at Pfaffenhofen an der Ilm, General Nicolas Oudinot fell on Scheibler's isolated VI Armeekorps detachment with the leading formations of his II Corps. Attacking with an infantry division and Pierre Colbert's cavalry brigade, the French routed the Austrians and took 200 prisoners.[28]
Teugn and Hausen
Sometime after 9:00 am, Saint-Hilaire's advance elements blundered into the III Armeekorps marching column at Hausen. Feldmarschall-Leutnant Vukassovich quickly deployed two battalions of light infantry, the Peterwardeiner Grenz and the Archduke Charles Legion, and flushed the French from the village, chasing them north. By the time the French commanders reacted, Vukassovich installed General-Major Moritz Liechtenstein's brigade on a wooded ridge approximately halfway between Hausen and Teugn. (Half of Pfanzelter's brigade of Vukassovich was detached.)[40] He was joined there by Feldmarschall-Leutnant Franz Joseph, Marquis de Lusignan and the brigade of General-Major Nikolaus Kayser. (Lusignan's other brigade, Thierry's was detached to the left.)[41]

To gain time for Saint-Hilaire's division to deploy out of marching column, Davout hurled the 2,000 troops of the 3rd Line Infantry Regiment at Vukassovich and Lusignan's 6,000 soldiers and 12 cannon. The entire 3rd Line deployed into skirmish formation and swarmed uphill. Its attack failed to dislodge the Austrians, but it allowed time for the 57th Line Infantry Regiment (called "the Terrible") to organize a second assault.[40] The 57th Line's charge carried the first ridge, but stalled before a second ridge. In the teeth of intense musketry and cannon fire, the highly trained French infantry deployed into line and returned fire. By this time the 3rd Line had reformed behind the 57th and took position on its right. Farther to the right, the 10th Light Infantry surged forward against the Austrian left flank where they forced an Austrian battery to retire to the rear. The new attack faltered and fell back to the first ridge when it ran into a strong position on the second ridge.[42]
By this time both sides had received reinforcements. On the French side, the last two units of Saint-Hilaire's division, the 72nd and 105th Line Infantry Regiments deployed near Teugn.[43] For the Austrians, General-Major Alois Liechtenstein brought up the first brigade of Feldmarschall-Leutnant Franz Xaver Saint-Julien's division.[41] Hohenzollern launched a frontal attack on the 57th Line. At the same time he sent half of Alois Liechtenstein's brigade through the woods to envelop the French left flank. Davout's Chief of staff General of Division Jean Dominique Compans alertly sent the 72nd Line to stop the flanking move. The French caught the Austrians just as they began to deploy from column into line and hustled them back into the trees.[44]
Lusignan, Saint-Julien, and Alois Liechtenstein called for another effort. One of Vukassovich's hussar regiments swept out of the woods, heading for the 57th Line's flank. The left battalion of the 57th formed square and drove off the horsemen. With their generals displaying front-line leadership, the Austrian attack roared out of the woods and fell on the French troops lining the first ridge. The push collapsed in the face of converging musketry from the defenders' concave line and a thrust against its left flank by the 3rd Line.[32]
Alois Liechtenstein bravely led the Würzburg Infantry Regiment # 23 in another charge, this time against one French flank. This thrust finally succeeded in shoving the French off the first ridge, though Liechtenstein fell badly wounded. A lull ensued in which Davout personally rallied Saint-Hilaire's exhausted survivors.[45]
Davout's artillery arrived about 3:00 pm, having been delayed by a staff blunder. Backed by artillery support for the first time, the tired French infantry retook the first ridge. An artillery colonel scouted the woods on the Austrian right flank and found a promising position to post his guns. When he reported his discovery to Saint-Hilaire, the two improvised a new attack. Saint-Hilaire waved his men forward in a new frontal attack while a horse artillery battery slipped into position unnoticed by the Austrians.[46]
The advance guard of Friant's division soon appeared, aiming for the Austrian right flank. Suddenly, the French unmasked their hidden battery, opening a destructive enfilade fire. The shocked Austrians rapidly lost ground. About this time, the last of Saint-Julien's brigades under General-Major Josef Bieber put in an appearance. A counterattack by one of Bieber's regiments halted the French pursuit, though Moritz Liechtenstein was wounded. At 5:00 pm a violent thunderstorm swept across the area, ending the battle.[47]
Results
According to historian James R. Arnold, the Austrians admitted 527 killed, 2,470 wounded, and 466 captured, for a total of 3,463. The French reported 2,345 casualties, mostly in Saint-Hilaire's division.[48] Digby Smith puts Austrian casualties at 3,862 and French losses at about 4,000.[3] Francis Loraine Petre gives Austrian casualties as 3,846 and French losses as 4,376. The latter total includes French losses at Dünzling.[49] Austrian general officers suffered unusually heavy losses, attesting to "front-line leadership that heretofore had been rare."[48] The brothers Alois and Moritz Liechtenstein, Bieber, and Lusignan were all wounded.[3] Lusignan sustained a dangerous head wound which forced his permanent retirement from military service.[50]
After receiving an unfavorable report of the battle from Hohenzollern, Archduke Charles ordered him to retreat. This act conceded the victory to Davout, since this gave the French Marshal a clear line of communication with his Bavarian allies.[48] At 10 pm on the 19th, Lefebvre sent the important information to Napoleon that he could see Davout's campfires near Teugn. To the Emperor, this meant that the III Corps had escaped entrapment.[51] The Battle of Abensberg was fought the next day.[52]
Historical note
Napoleon's name for the battle of the 19th was "Thann". Francis Loraine Petre remarked, "The 'battle of Hausen-Teugen' would have been more appropriate."[53] Herrnwahlthann or Thann[54] is two kilometers southwest of Haugen.[note 1]
Notes
- Footnotes
- ↑ The distance and direction can be discerned by using Google Earth.
- Citations
- 1 2 3 Arnold, p 84
- 1 2 3 4 5 6 7 8 9 10 Smith, p 289
- 1 2 3 4 5 Smith, p 288
- ↑ Chandler, p 663
- ↑ Chandler, p 664
- ↑ Chandler, p 667
- ↑ Chandler, pp 664–666
- ↑ Arnold, p 36
- ↑ Chandler, p 673
- ↑ Bowden & Tarbox, pp 65–73
- ↑ Arnold, p 235. Arnold's strengths are used and are estimated in some cases. They do not include artillerists or sappers.
- ↑ Chandler, pp 676–677
- ↑ Chandler, p 677
- ↑ Arnold, p 59
- 1 2 Chandler, pp 678–679
- ↑ Chandler, pp 679–681
- ↑ Chandler, pp 682–683
- ↑ Bowden & Tarbox, p 58-59
- ↑ Bowden & Tarbox, p 67-68
- ↑ Arnold, pp 78–79
- ↑ Petre, pp 108–109
- ↑ Petre, p 109
- 1 2 3 4 5 Arnold, p 83
- 1 2 Arnold, p 74 map
- ↑ Arnold, p 235
- 1 2 Arnold, pp 83–84
- ↑ Arnold, p 79
- 1 2 Arnold, p 98
- ↑ Arnold, p 78
- ↑ Schneid, pp 86–87
- ↑ Arnold, p 100
- 1 2 Arnold, p 90
- ↑ Epstein, p 58
- ↑ Petre, p 110
- ↑ Petre, p 111
- ↑ Petre, pp 111–112
- ↑ Arnold, pp 93–94
- ↑ Arnold, pp 101–102
- ↑ Arnold, pp 119–120
- 1 2 Arnold, p 85
- 1 2 Arnold, p 250
- ↑ Arnold, pp 86–87
- ↑ Arnold, p 88
- ↑ Arnold, p 89
- ↑ Arnold, p 90-91
- ↑ Arnold, p 91
- ↑ Arnold, p 91-92
- 1 2 3 Arnold, p 93
- ↑ Petre, p 118
- ↑ Smith-Kudrna, Lusignan, Franz Joseph Marquis
- ↑ Arnold, p 95
- ↑ Smith, p 290
- ↑ Petre, p 112
- ↑ Petre, p 114
References
Books
- Arnold, James R. (1990). Crisis on the Danube. New York, N.Y.: Paragon House. ISBN 1-55778-137-0.
- Bowden, Scotty; Tarbox, Charlie (1980). Armies on the Danube 1809. Arlington, Texas: Empire Games Press. Cite uses deprecated parameter
|coauthors=(help) - Chandler, David G. (1966). The Campaigns of Napoleon. New York, N.Y.: Macmillan.
- Epstein, Robert M. (1994). Napoleon's Last Victory and the Emergence of Modern War. Lawrence, Kansas: University Press of Kansas. ISBN 0-7006-0664-5.
- Petre, F. Loraine (1976). Napoleon and the Archduke Charles. New York, N.Y.: Hippocrene Books.
- Rothenberg, Gunther E. (1982). Napoleon's Great Adversaries, The Archduke Charles and the Austrian Army, 1792–1814. Bloomington, Ind.: Indiana University Press. ISBN 0-253-33969-3.
- Schneid, Frederick C. (2002). Napoleon's Italian Campaigns: 1805–1815. Westport, Conn.: Praeger Publishers. ISBN 0-275-96875-8.
- Smith, Digby (1998). The Napoleonic Wars Data Book. London: Greenhill. ISBN 1-85367-276-9.
Coordinates: 48°54′N 12°01′E / 48.900°N 12.017°E