Raid on Yarmouth
| ||||||||||||||||||||||||||||||||

The Raid on Yarmouth, which took place on 3 November 1914, was an attack by the Imperial German Navy on the British North Sea port and town of Great Yarmouth. Little damage was done to the town since shells only landed on the beach, after German ships laying mines offshore were interrupted by British destroyers. HMS D5, a submarine, was sunk by a German mine as it attempted to leave harbour and attack the German ships. A German armoured cruiser was sunk after striking two German mines outside its home port.
Background
In October 1914, the Imperial German Navy sought ways to attack the British fleet. The Royal Navy had more ships than Germany, so it was felt inadvisable to enter into a fleet to fleet engagement. Instead, the Germans looked to attack British ships individually or in small groups. The Kaiser had given orders that no major fleet action was to take place but small groups of ships might still take part in raids.[1]
The raids had several objectives. One was to lay mines to sink passing British ships. Another was to pick off any small ships encountered or to entice larger groups into giving chase and lead them back to where the German High Seas Fleet would be waiting in ambush, in relatively safe waters near Germany. A further consideration was that raiding British coastal towns might force the British to alter the disposition of its ships to protect them. The British kept the greater part of the Grand Fleet together, so it would always have superiority whenever it engaged the Germans. The German navy hoped to encourage the British to split more ships from the main fleet for coastal defence, giving Germany more chances to catch isolated ships.[2]
Prelude
The Yarmouth raid was carried out by the German battlecruiser squadron (Admiral Franz von Hipper) with the battlecruisers SMS Seydlitz, Von der Tann and Moltke, the slightly smaller armoured cruiser SMS Blücher and the light cruisers SMS Strassburg, Graudenz, Kolberg and Stralsund. On this occasion, mines were to be laid off the coast of Yarmouth and Lowestoft and the ships were to shell Yarmouth.[3]
Raid
At 16:30 on 2 November 1914, the battlecruiser squadron left its base on the Jade River. Two squadrons of German battleships followed slightly later, to lie in wait for ships that the battlecruisers might have lured. By midnight, the squadron was sufficiently north to be passing fishing trawlers from various countries. By 06:30 on 3 November, the patrol sighted a marker buoy at "Smith's Knoll Watch", allowing them to determine their exact position and close in to Yarmouth.[4] The Yarmouth coast was patrolled by the minesweeper HMS Halcyon and the old destroyers HMS Lively and Leopard. Halcyon spotted two cruisers, which she challenged. The response came in the form of shellfire from small and then larger guns. Arthur Hungerford Pollen wrote that
Private letters speak of salvoes falling short and over in the most disconcerting manner, and of the ship being so drenched with water as to be in danger of foundering. One man was lost through a fragment of a shell.— Pollen[5]
Lively—some 2 mi (1.7 nmi; 3.2 km) behind—started to make smoke to hide the ships. German shooting was less accurate than it might have been because all the battlecruisers fired upon her at once, making it harder for each ship to see their fall of shot and correct their aim. At 07:40, Hipper ceased firing at Lively and directed some shells toward Yarmouth, which hit the beach. Once Stralsund had finished laying mines, the ships departed.[6]
Halcyon—out of immediate danger—radioed a warning of the presence of German ships. The destroyer HMS Success moved to join them, while three more destroyers in harbour started to raise steam. The submarines HMS E10, D5 and D3—inside the harbour—moved out to join the chase, but D5 struck a mine and sank. At 08:30, Halcyon returned to harbour and provided a report of what had happened.[7]
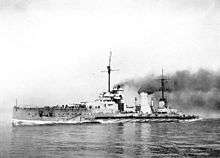
At 09:55, Admiral Beatty was ordered south with a battlecruiser squadron and squadrons of the Grand Fleet following from Ireland. By then, Hipper was 50 mi (43 nmi; 80 km) away, heading home. German ships waited overnight in Schillig Roads for fog to clear before returning to harbour. In the fog, the armoured cruiser SMS Yorck—which was travelling from the Jade Bay to Wilhelmshaven—went off course and hit two mines. A number of the crew survived by sitting on the wreck of the ship, which had sunk in shallow water but at least 235 men were killed (reports vary).[8]
Aftermath
Admiral Hipper was awarded an Iron Cross but refused to wear it, feeling little had been accomplished. Although the results were not spectacular, German commanders were heartened by the ease with which Hipper had arrived and departed and were encouraged to try again. The lack of reaction from the British had been due partly to news that morning of a much more serious loss at the Battle of Coronel and because Admiral John Jellicoe, commander of the Grand Fleet, was on a train returning to his ships at the time of the raid.[9] According to Winston Churchill, the First Lord of the Admiralty, the British could not believe there was nothing more to the raid than briefly shelling Yarmouth and were waiting for something else to happen.[10]
Order of Battle
Royal Navy
- HMS Halcyon, minesweeper, flagship
- HMS Lively, destroyer
- HMS Leopard, destroyer
- HMS Success, destroyer
- HMS E10, submarine
- HMS D5, submarine
- HMS D3, submarine
Imperial German Navy
- SMS Seydlitz, battlecruiser, flagship
- SMS Von der Tann, battlecruiser
- SMS Moltke, battlecruiser
- SMS Blücher, armoured cruiser
- SMS Strassburg, light cruiser
- SMS Graudenz, light cruiser
- SMS Kolberg, light cruiser
- SMS Stralsund, light cruiser
See also
Notes
References
- Churchill, W. S. C. (1923). The World Crisis, 1911–1914. I (3rd ed.). London: Thornton Butterworth. OCLC 769844622.
- Corbett, J. S. (2009) [1938]. Naval Operations (PDF). History of the Great War based on Official Documents. I (2nd repr. Imperial War Museum and Naval & Military Press ed.). London: Longmans, Green. ISBN 1-84342-489-4. Retrieved 4 September 2016.
- Marder, Arthur J. (1965). The War Years to the Eve of Jutland: 1914–1916. From the Dreadnought to Scapa Flow. II. London: Oxford University Press. OCLC 865180297.
- Massie, R. (2004). Castles of Steel: Britain, Germany, and the Winning of the Great War at Sea. London: Jonathan Cape. ISBN 0-224-04092-8.
- Pollen, A. J. H. (1919). The British Navy in Battle (PDF). Garden City, NY: Doubleday. OCLC 710122. Retrieved 21 January 2016.
- Ward, J. M. (1992) [1989]. Dawn Raid. The Bombardment of The Hartlepools, Wednesday, December 16th, 1914 (2nd ed.). Bishop Auckland: Printability. ISBN 1-872239-01-3.
Coordinates: 52°34′N 1°44′E / 52.57°N 1.74°E