Battle of Poelcappelle
| ||||||||||||||||||||||||||||||

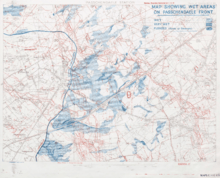
The Battle of Poelcappelle was fought in Flanders on 9 October 1917 by the British and German armies, during the First World War and marked the end of the string of highly successful British attacks in late September and early October 1917, during the Third Battle of Ypres. Only the supporting attack in the north achieved a substantial advance. On the main front the German defences withstood the limited amount of artillery fire managed by the British after the attack of 4 October. The ground along the main ridges had been severely damaged by shelling and rapidly deteriorated in the rains, which began again on 3 October, turning some areas into a swamp.
Dreadful ground conditions had more effect on the British, who needed to move large amounts of artillery and ammunition to support the next attack. The battle was a defensive success for the German army, although costly to both sides.[lower-alpha 1] The weather and ground conditions put severe strain on all the infantry involved and led to many wounded being stranded on the battlefield. Early misleading information and delays in communication led Plumer and Haig to plan the next attack on 12 October (First Battle of Passchendaele) under the impression that a substantial advance had taken place at Passchendaele ridge, when most of the captured ground had been lost to German counter-attacks.
Background
Strategic background
The attack being prepared by the Third Army at Cambrai for late November, the troubles in the French Army stemming from the Nivelle Offensive in April and the forthcoming French attack at Battle of La Malmaison on the Aisne, made it important that the British kept the initiative in Flanders, whence large numbers of German divisions had been drawn from the French front. At Verdun on 20 August, the French had achieved a substantial success. There was no German counter-stroke or counter-offensive as the local Eingreif divisions had been sent to Flanders.[3] By October 1917, many German divisions on the rest of the Western Front had been engaged in Flanders, some more than once; maintaining pressure in Flanders also constrained German operations on the Russian and Italian fronts. After the Battle of Broodseinde on 4 October, the first of the Black Days of the German Army, Field Marshal Sir Douglas Haig, Commander-in-Chief (C-in-C) of the British Expeditionary Force (BEF), believed that the German forces opposite Ypres were close to collapse, due to the large number of Germans taken prisoner and encouraging intelligence gleaned from the battlefield.[4][5]
Tactical developments

On 28 September, Haig met General Gough and General Plumer, commanders of the Fifth and Second Armies to explain his intentions. After the victories of 20 and 26 September, the fine weather, the disarray of the German defenders and the limited prospect of German reinforcements from the Russian front, Haig decided that the attack on 4 October would conclude the period of strictly limited advances. The following step would be a deeper advance, with provision made for exploitation. Haig wanted reserve formations of infantry, artillery, cavalry and tanks to be ready to extend a successful attack. Gough and Plumer replied over the next couple of days, that they felt that Haig's proposals were premature and that exploitation would not be feasible, until Passchendaele ridge had been captured from Passchendaele northwards to Westroosebeke. Gough and Plumer thought that this would probably take two more steps at three-day intervals and then another four days to repair roads over the captured ground. Haig considered that although a collapse of the German defence was necessary to allow an exploitation of the attack due on 10 October, which was not certain he desired the arrangements to be made, since they would also be available for a later date.[6]
At another conference on 2 October, Haig announced that operations at Ypres would continue for as long as the weather permitted, that six fresh divisions were being moved from quiet fronts to the Fifth Army and that the Canadian Corps was being moved to the Second Army. The arrangements to be made for immediate exploitation, should the attack intended for 10 October be as successful as hoped, were that each attacking division was to keep its reserve brigade lightly equipped and accompanied by two 60-pdr batteries, two 6-inch howitzer batteries and four field artillery brigades. If the brigades conducting the morning attack reported a big success, their reserve brigades would prolong the advance in the afternoon. The reserve brigades of the attacking divisions of I and II Anzac corps, were to reach Drogenbroodhoek in the south, 3,000 yards (2,700 m) beyond Broodseinde, Passchendaele station on the Morslede road in the centre and gain touch with the Fifth Army, on the Westroosebeke road north of Passchendaele.[7] A reserve division of each corps was to be at readiness behind the front, which the Director-General of Transportation Major-General Nash, undertook to have on the battlefield in 3 1⁄2 hours, if given three hours' notice. The divisions in corps reserve would be ready by the following morning, to advance beyond the reserve brigades, if German resistance crumbled. A cavalry division was given to each army, to operate with the reserve divisions and two tank battalions were attached to the Second Army and a tank brigade to the Fifth Army, to exploit the firmer going should the advances take place.[7]
Prelude
British offensive preparations

In the early morning of 4 October, news arrived at British Headquarters (HQ) of the great success of the attack. Brigadier-General Charteris, Chief Intelligence Officer at General Headquarters, was sent from Haig's Advanced HQ to the Second Army HQ to discuss a possible exploitation. Plumer did not agree that exploitation was possible, because eight more uncommitted German divisions were behind the battlefield and there were another six beyond them; Plumer preferred to wait until the expected German counter-attacks that day had been defeated. German artillery fire was still heavy and the Flandern II and Flandern III Stellungen (defence lines) behind the attack front could be occupied by the fresh German divisions. An attack on these defensive lines would need close artillery support, which would be impossible because the British artillery was behind a severely battered strip of muddy ground 2 miles (3.2 km) wide. As the magnitude of the victory became apparent, Plumer had second thoughts but by 2:00 p.m., accepted that the moment had passed. On the Fifth Army front, an attempt to get further forward was ordered by Gough and then cancelled, after a local German counter-attack was reported to have pushed the 4th Division off 19 Metre Hill.[8]
Rain fell again on 4 October, continued on 5 and 6 October then became a downpour on 7 October. On 5 October, General Birdwood commander of I Anzac Corps, told Plumer that the exploitation would not be possible, as the Corps light railway and the Westhoek to Zonnebeke road could not carry forward all the artillery necessary. On 7 October Haig cancelled the exploitation attack to the second objectives (red line), intended for the afternoon of 9 October.[lower-alpha 2] The rain stopped that night and the ground began to dry on 8 October, until late afternoon when another downpour began.[9] From 4–9 October, over 30 millimetres (1.2 in) of rain fell, in a month when average rainfall was 75 millimetres (3.0 in).[11] According to the Official Historian, the Corps Chief Engineers and divisional Commanders Royal Engineers (CRE), considered that the ground conditions did not create serious transport difficulties to the front line until 4 October and in some places up to 12 October, except in some areas where the ground became impassable, particularly in the area behind II Anzac Corps, near the Steenbeek and its tributaries, which was described as "a porridge of mud". Duck-board tracks extended to 1-mile (1.6 km) short of the front line, beyond which was a taped row of stakes, illuminated with lamps at night but pack animals trampled many of the tracks and stakes into the mud.[12]

Extension of the plank roads behind I and II Anzac Corps, proved impossible during the rain which began on 4 October, the planks sinking or floating away. The field artillery of II Anzac Corps, was not able to move forward as planned from west of the Steenbeek to the Zonnebeke–Winnipeg road. Platforms were improvised to keep them out of the mud but the failure to move forward left them 6,000 yards (5,500 m) from the morning objective, 1,000 yards (910 m) out of range of the German field artillery beyond Passchendaele. The field batteries for the 66th Division were placed beyond Frezenburg, along the Zonnebeke road 1-mile (1.6 km) short of the intended positions. Conditions for the gunners deteriorated rapidly, with dugouts flooding in the rain. A sharp increase in illness led to breakdowns in the system of reliefs, just when the workload was at its height. Instead of the usual 90 field pieces in the 66th Division, one field brigade only got 25 guns into action and the other was unable to fire until after the attack began.[13][lower-alpha 3] The 49th Division field guns were still along the Wieltje–Gravenstafel road, west of the Steenbeek, with only a few forward on the other side behind Hill 35. Transport of ammunition by pack-animal, was only possible to guns kept within 100–150 yards (91–137 m) of roads. Journeys previously an hour long took from 6–16 hours and the ammunition arrived coated with slime.[15] The effect of the rain was not uniform and further north, in the area of XIV Corps and the French First Army, the ground had not been damaged as much by shell-fire. Despite considerable difficulty, the field artillery was moved to within 4,000 yards (3,700 m) of the final objective and ample ammunition and field stores were brought forward. XIV Corps had 49 batteries of 312 × 18-pounder guns in groups, one for each division, the Guards group having 23 batteries; the medium and heavy artillery being grouped similarly.[16]
Plan of attack

The arrangements agreed by Haig, Gough and Plumer on 2 October, the effect of the victory of 4 October and the disarray of the German defenders, led to the attack planned for 10 October being advanced to 9 October, with a second attack being arranged for 12 October. Attacking a front of 13,500 yards (12,300 m), it was intended to capture Passchendaele ridge in two stages.[17] The first objective (red line) would be captured by a morning attack, which if successful and the cause of a general withdrawal by the Germans, would be followed-up by the reserve brigades of the attacking divisions, which would advance to the second objective (blue line) in the afternoon. On 7 October Haig cancelled the afternoon attack to the blue line due to the wet weather.[18]
On the southern flank of the attack, X Corps was to attack to hold German reserves around Becelaere and Gheluvelt. To the north, I Anzac Corps was to advance on the right flank of the main attack, with the 1st and 2nd Australian divisions, the 4th and 5th Australian divisions being in reserve. Further north, II Anzac Corps with the New Zealand and 3rd Australian divisions in reserve, was to attack two objectives, the 66th Division advancing along the main ridge, north of the Ypres–Roulers railway to just short of Passchendaele village and the 49th Division on either side of the Ravebeek stream, up Wallemolen spur to the Bellevue pillboxes. If the first objectives were reached, the reserve brigades were to attack the second objectives in the afternoon. The second objectives were 800–1,000 yards (730–910 m) ahead of the red line, beyond the village and the main ridge respectively. The reserve divisions were ready to move rapidly forward, by train from west of Ypres to continue the attack the next day.[19]
On the Fifth Army front, XVIII Corps with a brigade each from the 48th and 11th divisions, was to advance 1,200 yards (1,100 m) up Poelcappelle spur and towards Westroosebeke on the main ridge. XIV Corps was to advance to the south edge of Houthoulst Forest with the 4th, 29th and Guards divisions, as the French First Army conformed on its left. Raids and artillery bombardments were arranged along the rest of the front, to deceive the Germans as to the objectives of the attacks.[20]
German defensive preparations
Opposite I Anzac Corps the 233rd Division held the line, with the 220th Division as its counter-attack (Eingreif) division.[lower-alpha 4] To the north against II Anzac Corps, were the 195th Division and part of 16th Division, with the 20th Division and 45th Reserve Divisions as Eingreif divisions; further north was the 227th Division.[22] The 18th Division held Flandern I Stellung near Poelcappelle and the 119th Division held Houthoulst Forest.[23] The Germans were also hampered by the weather but as their positions were on the edge of the beaten zone, routes to their front line were in better condition until closer to the front. A German soldier wrote,
The ground was unbelievably boggy, we just hardly got forward. The man to my front threatened to disappear in the darkness, so I moved quicker, only to get stuck up to my knees in the morass.... but then the man behind me got stuck as well in the filthy mess.... At long last the two of us were extracted from the bog.— Fähnrich Britten[24]
On 7 October, the 4th Army headquarters rescinded the policy of a reinforced front defence zone, to avoid another disaster like 4 October. Front line regiments were dispersed again, with their reserve battalions moved back behind the artillery protective line. More artillery was to be used against British artillery, to protect the Eingreif divisions as they advanced. The Eingreif divisions were placed closer to the front line, to intervene as swiftly as possible once an attack commenced, despite the risk of being devastated by the British artillery.[25] On 9 October Ludendorff issued a memorandum to all Western Front divisions, complaining that Eingreif divisions were being misused. Dispersal, poorly-timed attacks, disorganisation and poor co-ordination with the artillery, had led to high casualties. Ludendorff emphasised that the reserve units of ground holding divisions, should conduct hasty attacks (Gegenstöße) to push attackers out of their area. Eingreif units should not be used to reinforce ground-holding divisions for hasty counter-attacks but were to be used only for properly organised counter-attacks (Gegenangriffe). As far as possible the Eingreif divisions were to avoid casualties, unless lost ground was tactically important enough to recapture.[26]
Battle
Second Army
| Date | Rain mm |
Temp (°F) |
Outlook |
|---|---|---|---|
| 3 | 1.2 | 64 | overcast |
| 4 | 4.6 | 60 | overcast |
| 5 | 3.1 | 52 | cloud |
| 6 | 2.1 | 47 | cloud |
| 7 | 10.4 | 53 | cloud |
| 8 | 14.6 | 54 | overcast |
| 9 | 0.0 | 53 | clear |
In the X Corps area to the south, the 15th Brigade of the 5th Division attacked Polderhoek Château. The brigade reached the château ruins behind a creeping barrage and engaged the pill-boxes in the vicinity but mud clogged many weapons. German machine-gun fire from Gheluvelt forced the brigade back to the start line and a new attack prepared for the night was later cancelled.[28] Further north the 95th Brigade attacked astride the Reutelbeek, advanced past Cameron Covert and was then stopped by German machine-gun fire. (The 21st Division, between the 5th and 7th Division, was not part of the attack.)[29] Two battalions of the 22nd Brigade of the 7th Division managed to assemble on time, despite the sodden ground and advanced at 5:20 a.m. to the blue line, which had been the final objective of the 21st Division in the attack of 4 October.[30] Within 30 minutes, green flares on the objective (blue line) showed that it had been captured. A report arrived that the commanding ground around Reutel had been captured and that many Germans had been shot while fleeing. The advance had been held up at Juniper Cottage and German guns in a gap near Judge Copse also held up the infantry; a reserve platoon was sent up but was also unable to clear the copse. Eventually two companies captured the area by attacking from the south-east. The Germans shelled the area all night and all next day but no counter-attack was attempted.[31]
In the I Anzac Corps area north of X Corps, the 1st Australian Division raided Celtic Wood and only fourteen of 85 men returned unwounded.[32] The 2nd Australian Division was to cover the right flank of the 66th Division south of the Ypres–Roulers railway, by pivoting to its right. The 6th Australian Brigade on the right flank, attacked towards Daisy and Dairy woods on a 1,200-yard (1,100 m) front but were quickly stopped by German machine-gun fire, until later in the day when the woods were outflanked from the north and the objective was reached.[33] Two battalions of the 5th Australian Brigade advanced 1,200 yards (1,100 m) to the north-west end of the Keiberg Spur; the battalions were understrength and were unable properly to mop up German troops who had been by-passed. German reinforcements infiltrated behind the Australians, endangering them with encirclement. Before troops from the 66th Division could come up, the Australian brigade withdrew 800 yards (730 m) with many casualties; during the withdrawal, British troops were seen advancing north of the railway. By the time reinforcements were ready to attempt another advance to support them, the British troops had also retired and the 5th Australian Brigade consolidated on the first objective.[34]
The main attack was conducted by the II Anzac Corps. Two brigades each from 66th Division and the 49th Division, assembled behind Frezenberg and Potijze, about 2.5 miles (4.0 km) from the jumping off line. The brigades were expected to cover the distance in five hours but the dark, rain, state of the ground and fitful German artillery fire caused serious delays. Both divisions reported at 2:30 a.m. that some battalions would not be ready for zero hour at 5:20 a.m. and that all of the 197th Brigade on the right flank would be late. Staff officers were sent out to hurry on every man capable of going faster, rather than keeping units together.[34] When the creeping barrage began, the troops who had arrived spread out and followed the barrage. The creeping barrage was difficult to follow, because much of the field artillery was out of action, some of the rest fired inaccurately from unstable platforms and many high-explosive shells were smothered by the mud.[35]
The 66th Division battalions of the 197th Brigade on the right, advanced quickly on sandy going, despite lagging far behind the creeping barrage. German infantry from the 195th Division were found in shell holes and many were taken prisoner as the British reached the final objective (blue line) at 10:00 a.m., a patrol finding Passchendaele village empty. Soon after arriving at the final objective, the rain stopped and in the better visibility, German machine-guns and field artillery began to fire from the right flank. At midday both flanks of the brigade were swung back to find neighbouring units, which the troops in the centre followed, under the impression that it was a general withdrawal and all the brigade ended up at the red line. After stopping a German counter-attack in the late afternoon, the division withdrew slightly, to gain touch with the 49th Division on the left and find cover from the machine-guns on the Bellevue Spur. The 198th Brigade on the left had to struggle through mud and flooded trenches north of the Ravebeek. German machine-gun fire from the pill-boxes at Bellevue 500–800 yards (460–730 m) away, stopped the infantry half way to the red line, despite a further attempt to advance by the supporting battalions.[36]
The German pill-boxes at Bellevue were able to fire on the 198th Brigade, because the attack by the 148th Brigade on the right of the 49th Division stalled in the swamp astride the Ravebeek and only a few parties managed to get across. The creeping barrage was thin and moved at 100 yards (91 m) in six minutes, which proved too fast for the infantry. The barrage was lost on the right flank, at the marshy edges of the Stroombeek and German riflemen and machine-gunners fired through the British barrage, particularly from Bellevue and the Yetta Slopes. "Peter Pan" on the left was captured by the 146th Brigade and by 6:40 a.m., the first objective (red line) had been reached.[37] An attempt by following waves to leap-frog through the troops on the red line failed, due to the volume of fire from the Bellevue pillboxes. One attack got to within 40 yards (37 m) of Bellevue and a later attempt at a flanking attack was stopped by machine-gun fire. The attack on the Yetta Houses, was also raked by machine-gun fire and on the left stopped 100 yards (91 m) short of the objective.[38]
The 147th Brigade was alerted and put on one hour's notice by 7:30 a.m. and during the morning and troops from the supporting battalions of the attacking brigades filled gaps in the line.[37] The final position reached was 100–200 yards (91–183 m) beyond the first objective, from which a line of posts ran from south of Wolf Farm to the eastern edge of Wolf Copse and from there to the south-east of Wolf Copse, with an advanced post 150 yards (140 m) south-east of the copse. A support line was dug along the first objective and several small counter-attacks were driven off.[38] Troops from a reserve battalion were sent up to the vicinity of Peter Pan and more troops occupied the old British front line. Around 9:00 a.m., a company managed to work round Peter Pan and capture the pillboxes, which allowed the advance to continue up to a field of barbed wire, 150 yards (140 m) from Bellevue. More wire had been spread around the pill-boxes, which at this point were part of Flandern I Stellung and more German machine-guns had been hidden in shell-holes. After several attempts to advance, the troops dug in half-way up the slope.[39]
The 146th Brigade found a bridge on the Gravenstafel road and got forward several hundred yards up the Wallemolen spur beyond the Ravebeek, before being stopped at 9:30 a.m., by the machine-guns in the Bellevue pill-boxes and a field of uncut wire 25–40 yards (23–37 m) wide in front of the pill-boxes, which obstructed all of the divisional front. At about 1:00 p.m. a reconnaissance report from a contact patrol aircraft crew had the 66th and 49th divisions at the final objective. Despite the scepticism of the brigade staff officers, both divisions were ordered to push forward reserves to consolidate the line.[40] In ignorance of the cause of the check, the 49th Division headquarters sent forward the 147th Brigade and the rest of the supporting battalions of the attacking brigades, which were either pinned down or held back on Gravenstafel spur, as the cause of the check was realised. In the afternoon the 148th and 146th brigades were near the red line, having had 2,500 casualties.[41] The right of the 66th Division rested on the railway beyond Keerselaarhoek below the main ridge, then north past Augustus Wood to the Ravebeek. The 49th Division line began in the valley at Marsh Bottom, then along the bottom of the Bellevue slopes above the Ravebeek, to Peter Pan and Yetta Houses, then on to the XVIII Corps boundary of the 144th Brigade of the 48th Division at Adler Farm. Small groups were isolated further up the Bellevue slopes, on the western edge of Wolf Copse, Wolf Farm and a cemetery on the northern boundary.[42]
Fifth Army

In the XVIII Corps area, a brigade each of the 48th Division and 11th Division, took 14 1⁄2 hours on the night of 7/8 October, to reach the front line through mud and rain. When the brigades attacked, they were swept by machine-gun fire from the fresh German 16th Division, which had crept forward in the dark and occupied shell-hole positions so close to the British jumping-off line, that the British barrage overshot them. The British infantry lost the barrage, which was as ineffective as elsewhere due to shells being smothered and moving too fast at 100 yards (91 m) in four minutes. The German counter-barrage arrived after a delay of seven minutes and was equally ineffective. The British destructive bombardment on German positions, was much more damaging than the creeping bombardment and caused considerable German casualties.[43]
The German pillboxes were mostly untouched and a great amount of small-arms fire from them, caused many British casualties from cross-fire and traversing fire, while positions dug into the ruins of Poelcappelle, were used to fire in enfilade against the British attackers. The British advance was stopped 100–200 yards (91–183 m) beyond the front line on the left, at the Brewery near Polcappelle, from which the troops withdrew to the jumping-off trenches to reorganise.[43] As this retirement was seen, the survivors of other units on the left flank and in the centre conformed. On the right flank, the German defence had been far less determined and more ground could have been taken but for the failure on the left. The ground was consolidated and reinforcements were brought up between Pheasant Farm and Retour Crossroads. Prisoners reported many casualties in the German division opposite, due to it being fresh and willing to fight to hold its ground. After the fighting ended, both sides recovered wounded during a local truce.[44]
In the XIV Corps area, the 4th Division attacked with one brigade on an 800-yard (730 m) front. The limited progress of the XVIII Corps attack to the south, restricted the advance to just beyond Poelcappelle and a new line was consolidated beyond the Poelcappelle–Houthoulst road.[45] To the north the 29th Division, had a final objective 1,650 yards (1,510 m) forward on the right and 2,500 yards (2,300 m) on the left. The attacking troops moved up the night before in torrential rain, the Newfoundland Battalion on the left flank, taking 4 1⁄2 hours, to move 6 miles (9.7 km) to the front line. The advance was made in three stages, with an hour to consolidate behind standing and smoke barrages, at the first and intermediate objectives. The rain stopped at midnight and the attack began at 5:20 a.m. On the right, German machine-guns at Olga Farm caused many casualties and a delay but the first objective was reached on time. The surviving troops advanced on Condé House by rushes from shell-holes and took 200 prisoners when they reached it.[46]
Fire from two German pill-boxes stopped the advance and a German counter-attack began from the pill-boxes. The German infantry attacked in eight waves and were engaged by rifle and machine-gun fire. At 8:55 a.m., the barrage for the advance to the third (final) objective began and smothered the remaining German infantry; German resistance collapsed and the final objective was reached at 10:00 a.m. The left brigade advanced to the right of Bear Copse, which was specially bombarded by Stokes mortars, which induced the German garrison to surrender. The Broembeek was crossed by the Newfoundland battalion, which advanced up the Ypres–Staden railway, captured German dug-outs in the embankment and reached the first objective on time. The advance to the second objective found much reduced German resistance and the final objective 700 yards (640 m) further on was reached. A counter-attack was defeated at noon and then a retirement of 200 yards (180 m) was made, in the face of another counter-attack later in the afternoon but German infantry left the area vacant.[47][48]
The Guards Division was to cross the Broembeek and close up to Houthoulst Forest, on a front from the Ypres–Staden railway, to the junction with the French army near Craonne Farm. Before the attack 355 mats, 180 footbridges and enough wire to cover 3,000 yards (2,700 m) of front was carried forward by the pioneer battalion; much digging was done but the rain destroyed trenches as they were built. The two attacking brigades moved up late on 7 October in torrential rain, which stopped at midnight on 8/9 October and the morning dawned fine with a drying wind. The barrage came down prompt at 5:30 a.m. and after four minutes began to creep forward at a rate of 100 yards (91 m) in eight minutes. Crossing the Broembeek was easier than expected, as the German infantry nearby surrendered readily.[49]
Little German resistance was encountered on the right, except from a German pill-box at Egypt House, whence the Guards pulled their right flank back under sniper fire, as they waited for Newfoundland troops of 29th Division to come up. The left brigade bypassed a German strong-point and reached the final objective, taking the strong-point later in the afternoon. Consolidation was hampered by German snipers in Houthoulst Forest and German aircraft appeared over the new front line, which was 2,500 yards (2,300 m) forward on the Veldhoek–Vijwegen spur. No counter-attack was made until the evening, beyond the right flank on the 29th Division front, which withdrew a short distance. On the left of the Guards Division, German troops massing at the junction with the French 2nd Division to the north, were dispersed by machine-gun fire from gunners, who had advanced to the final objective with the infantry and by British artillery fire.[49]
Ire Armée
.jpg)
The French First Army, between the British Fifth Army to the south and the Belgian Army further north, had attacked on 31 July, south of the inundations and advanced to the west of Wydendreft and Bixschoote. On 1 August, the French division on the left flank had captured ground from the Martjevaart and St. Jansbeek to Drie Grachten. The axis of the French advance was along the banks of the Corverbeek, towards the south and south-eastern fringes of Houthulst Forest, the villages of Koekuit and Mangelaere and blockhouses and pillboxes, which connected the forest with the German line southwards towards Poelcappelle. On the left flank, the French were covered by the Belgian Army, which held the ground about Knocke and the Yser inundations. On 9 October, the French 2e Division d'Infanterie of I Corps was to attack towards Houthulst Forest, in conjunction with the British XIV Corps attack on Poelcappelle. The French artillery subjected the German defences east and south-east of Houthulst Forest, to a three-day bombardment.[50] At 5.30 a.m., a creeping-barrage began to move very slowly forwards over a "sea" of mud. The artillery-fire was so effective, that despite an extremely slow infantry advance, the French objectives were reached by 10:00 a.m. with few casualties.[50]
After crossing the flooded Broembeek at the confluence with the Steenbeek near St. Jean, just before the point where the Steenbeek becomes the St. Jansbeek, through a wide and shallow depression filled with mud, the 2e Division d'Infanterie captured the villages of St. Jean, Veldhoek and Mangelaere on the outskirts of the forest and drove back the Germans from several fortified farms and pillboxes.[50] The average depth of the advance was 1.25-mile (2.01 km) and was accomplished in four hours, despite the ground conditions, with fewer than 500 casualties; I Corps took 300 prisoners. Despite rain, low cloud and high winds, French airmen had flown low, strafed German infantry and carried out tactical reconnaissance. On the right of the French, the British Guards Division co-operated in the capture of Koekuit, having also had to cross the mud of the Broembeek. German counter-attacks recovered a strong point on at the north end of the French attack front, until a local counter-attack by the French recovered the position. On the left flank of the Franco-British offensive, complete success had been gained and the troops were able to consolidate their positions.[51]
Air operations
The bright dry weather at Ypres during September ended and high winds, rain and low cloud obscured the battlefield on 4 October. Heavy rain fell on 7 and 8 October and severely hampered air operations and no artillery observation was achieved by the British from 5–9 October.[52][13] German artillery behind the Passchendaele Ridge and Gheluvelt Plateau was not detected and very little British counter-battery fire was achieved.[53] Wire cutting by the artillery which did get into action was inadequate, in the areas where there was no ground observation.[19] Little flying was attempted during 9 October but II and V brigade aircrews, managed fifteen contact and seventeen counter-attack patrols at very low level. The progress of the attack was reported with some accuracy and 354 zone calls were made against German artillery and parties of infantry, 21 German artillery batteries were engaged for destruction and 33 for neutralisation.[lower-alpha 5] Over the XIV Corps area, aircraft from 9 Squadron flew through the barrage to observe the infantry advance and had five aircrew casualties. Aircraft of the army wing, made reconnaissance flights over the German lines and shot down four German fighters, for one loss and one pilot wounded.[55][lower-alpha 6]
German 4th Army
The 233rd Division, opposite I Anzac Corps did not need the support of the 220th (Eingreif) Division. To counter-attack the II Anzac Corps, the 16th Division and 195th Division in the front line were supported by parts of the 20th Division and 45th Reserve Division.[22] The 240th (Eingreif) Division was sent forward at midday, to support the 6th Bavarian Division near Polecappelle.[57] The division moved forward on approach routes which were under an "enormous" weight of fire and managed to regain some captured ground. At 7:00 p.m. the British attacked again, the battle eventually subsiding with minor gains of ground by each side.[58] After numerous German counter-attacks during the night, the final positions of the British divisions except near Reutel, opposite Passchendaele and near Houthoulst Forest, were the same as their starting positions. The writers of Der Weltkrieg, the German Official History considered that the battle was a costly defensive success.[59]
Aftermath
Analysis

On Passchendaele Ridge and the Wallemolen Spur, inadequate artillery support, the German pill-boxes and extensive uncut barbed-wire of the Flandern I Stellung (Flanders I Position), rain, mud, shell-hole machine-gun nests and counter-attacks, led the attackers being forced back towards their start lines. The brigades from the 66th and 49th divisions of the II Anzac Corps, began the attack exhausted from the conditions of the approach march and some units had not arrived when the attack began, although on the right of the 66th Division, German troops surrendered readily to the depleted British battalions. In I Anzac Corps, the Australian divisions were understrength after the attack of 4 October and the strain of holding the front until the attack. From 30 September – 14 October, BEF shell consumption (most being fired at Ypres) fell from 2.5 million–1.6 million shells by the field artillery, 510,000–350,000 shells by the medium artillery and 153,000–119,000 shells by the heavy artillery, although German accounts mention "heavy", "indescribably heavy" and "drumfire" bombardments.[60][61]
The attacking troops were subjected to more German artillery fire than in recent battles, due to the reduced amount of counter-battery fire from the British artillery and inadequate air observation, during the poor weather from 4–8 October. It places the rain had helped mask the advance but when it stopped, German machine-gunners and field artillery could see British and Australian infantry and inflicted many casualties. Many wounded soldiers were left stranded on the battlefield, under sniper fire in the mud and rain.[41] The battle was also costly for the Germans and Crown Prince Rupprecht wrote of the "oppressive superiority" of the British artillery, even though the 4th Army had fired 27 trainloads of ammunition during the attack. Units had become mixed up, suffered "very high wastage" and "confusion reigns". Rupprecht and Kuhl feared that ground would have to be conceded, to delay the British by making them redeploy their artillery.[62] In the north near Houthoulst Forest, the attack had forced back the German line up to 2,500 yards (2,300 m) and 2,100 German soldiers had been taken prisoner.[63]
The strain was reflected in a 4th Army order of General Sixt von Armin on 11 October, acknowledging that although fresh ground holding divisions had defeated attacks, some British troops had advanced a considerable distance, with the result that ground was lost, despite the intervention of Eingreif divisions. Armin noted that more German troops were trickling to the rear, even on quiet days and ordered that "the sternest measures" should be taken against them and be made public. Despite the difficulties and the cost, the German defenders had obtained a considerable defensive success but with the attack on 12 October (the First Battle of Passchendaele), the Battle of Poelcappelle caused a "crisis in command".[64] German losses had risen to 159,000 men, which jeopardised the front and "mentally shocked" the survivors. With operations pending in Italy and an offensive expected from the French on the Aisne front, fresh divisions were not available for the 4th Army.[65]
Casualties
The 7th Division had 3,877 casualties from 1–10 October.[66] The Official Historian noted 6,957 casualties in the 66th, 49th and 2nd Australian divisions and 10,973 casualties in the Fifth Army from 9–14 October, which included the First Battle of Passchendaele on 12 October.[67] In the Ravebeek valley in the 66th Division area, some of the wounded drowned in shell-holes, which had filled with rain.[68] On 12 October an Australian officer found,
The slope .... was littered with dead, both theirs and ours.... Here I found about fifty men alive, of the Manchesters.... Some had been there four days already....— Lieutenant W. G. Fisher[69]
The next day he reported that
... some of the Manchesters were there yet, seven days wounded and not looked to.... Our men gave all their food and water away, but that was all they could do.— Lieutenant W. G. Fisher (13 October)[70]
The New Zealand Division found wounded of the 49th Division,
... famished and untended on the battlefield.... Those that could not be brought back were dressed in the muddy shell holes.... On the morning of the 12th many of these unfortunate men were still lying upon the battlefield, and not a few had meantime died of exposure in the wet and cold weather.... Even before the attack, dressing stations and regimental aid posts as well as the battlefield itself were crowded with the wounded of the 49th Division.— Colonel H. Stewart[71]
J. E. Edmonds the British official historian quoted from the German Official History, that German losses were very recht (considerable) and that the ordeal "bore no relation to the advantage obtained.".[59] Calculations of German losses by Edmonds have been severely criticised ever since.[72] In volume XIII of Der Weltkrieg (1942), the German official historians recorded 35,000 casualties, including 13,000 missing for the ten-day reporting period from 1–10 October.[73]
Subsequent operations
The 66th Division repulsed a counter-attack on 10 October. Numerous British divisional reliefs took place before 12 October and a dummy German raid was reported that morning.[27] The First Battle of Passchendaele took place on 12 October. The attack took ground in the north but early gains around Passchendaele were mostly lost to German counter-attacks. The battle was a German defensive success, although costly to both sides. British attacks were postponed until the weather improved and communications behind the front had been restored. Two German divisions intended for Italy were diverted to Flanders, to replace "extraordinarily high" losses.[74]
Victoria Cross
- Corporal W. Clamp, 6th Green Howards.[75]
- Private F. G. Hancock, 4th Worcesters.[23]
- Sergeant J. Lister, 1st Lancashire Fusiliers.[23]
- Sergeant J. Molyneux, 2nd Royal Fusiliers.[23]
- Lance-Sergeant J. H. Rhodes, 3rd Grenadier Guards.[59]
Notes
- ↑ In the worst weather conditions of the campaign, which occurred in the five weeks after the Battle of Broodseinde, the number of troops engaged by the British amounted to no more than those involved in the Battle of Pilckem Ridge on 31 July.[1] British losses in October 1917 were the third highest of the war after July 1916 and April 1917..[2]
- ↑ At a meeting described by the Official Historian J. E. Edmonds.[9] The existence of the meeting was questioned in 1996 by Prior and Wilson.[10]
- ↑ A gun was "in action", when it was able to open fire on S.O.S. lines and had 200 rounds at hand.[14]
- ↑ The US Army Intelligence Department listed nine German Divisions, the 4th Bavarian Division, 15th Division, 16th Division, 18th Division, 119th Division, 195th Division, 227th Division, 233rd Division and 240th Division in the battle.[21]
- ↑ "Zones" were based on lettered squares of the army 1:40,000 map; each map square was divided into four sections 3,000 square yards (2,500 m2). The observer used a call-sign of the map square letter then the zone letter to signal to the artillery. All guns and howitzers up to 6 inches (150 mm) able to bear on the target, opened rapid fire using corrections of aim from the air observer.[54]
- ↑ From 30 January 1916, each British army had a Royal Flying Corps brigade attached, which was divided into wings, the "corps wing" with squadrons responsible for close reconnaissance, photography and artillery observation on the front of each army corps and an "army wing", which by 1917 conducted long-range reconnaissance and bombing, using the aircraft types with the highest performance.[56]
Footnotes
- ↑ Davidson 1953, p. 67.
- ↑ Bourne & Sheffield 2005, p. 335.
- ↑ Edmonds 1948, p. 231.
- ↑ Edmonds 1948, pp. 325–326, 316.
- ↑ Beach 2005, p. 222.
- ↑ Edmonds 1948, p. 296.
- 1 2 Edmonds 1948, pp. 297–298.
- ↑ Edmonds 1948, pp. 315–317.
- 1 2 Edmonds 1948, p. 325.
- ↑ Prior & Wilson 1996, p. 160.
- ↑ Prior & Wilson 1996, p. 159.
- ↑ Edmonds 1948, pp. 327–329.
- 1 2 Prior & Wilson 1996, p. 161.
- ↑ Stewart 1921, p. 278.
- ↑ Edmonds 1948, pp. 327–328.
- ↑ Edmonds 1948, p. 327.
- ↑ Bean 1933, p. 885.
- ↑ Edmonds 1948, pp. 323, 327.
- 1 2 Prior & Wilson 1996, p. 163.
- ↑ Edmonds 1948, pp. 323–325, 330–337.
- ↑ US WD 1920.
- 1 2 Bean 1933, p. 900.
- 1 2 3 4 Edmonds 1948, p. 336.
- ↑ Sheldon 2007, p. 225.
- ↑ Wynne 1939, p. 309.
- ↑ Sheldon 2007, pp. 226–227.
- 1 2 McCarthy 1995, pp. 112–113.
- ↑ Hussey & Inman 1921, p. 182.
- ↑ McCarthy 1995, p. 103.
- ↑ Edmonds 1948, p. 334.
- ↑ Atkinson 1927, pp. 419–420.
- ↑ Bean 1933, p. 899.
- ↑ Edmonds 1948, p. 333.
- 1 2 Bean 1933, p. 886.
- ↑ Edmonds 1948, p. 330.
- ↑ Edmonds 1948, pp. 332, 334.
- 1 2 Magnus 1920, p. 141.
- 1 2 Wyrall 1924, pp. 122–124.
- ↑ Wyrall 1924, pp. 126–130.
- ↑ Bean 1933, p. 888.
- 1 2 Edmonds 1948, p. 332.
- ↑ Stewart 1921, p. 276.
- 1 2 Edmonds 1948, pp. 334–335.
- ↑ Wyrall 1924, pp. 130–131.
- ↑ Edmonds 1948, pp. 335–336.
- ↑ Gillon 1925, pp. 139–140.
- ↑ Gillon 1925, pp. 141–142.
- ↑ Headlam 1924, p. 276.
- 1 2 Headlam 1924, pp. 271–276.
- 1 2 3 The Times 1918, p. 121.
- ↑ The Times 1918, pp. 122–123.
- ↑ Jones 1934, pp. 203–204.
- ↑ Groom 2002, p. 213.
- ↑ Jones 1928, pp. 175–176.
- ↑ Jones 1934, pp. 204–205.
- ↑ Jones 1928, pp. 147–148.
- ↑ Sheldon 2007, p. 214.
- ↑ Sheldon 2007, pp. 214–215.
- 1 2 3 Edmonds 1948, p. 337.
- ↑ Brown 1996, pp. 241–243.
- ↑ Sheldon 2007, pp. 208–226.
- ↑ Sheldon 2007, pp. 228–229.
- ↑ Boraston 1919, p. 129.
- ↑ Sheldon 2007, pp. 241–243.
- ↑ Liddle 1997, p. 327.
- ↑ Atkinson 1927, p. 422.
- ↑ Edmonds 1948, pp. 345, 334, 337.
- ↑ MacDonald 1978, p. 200.
- ↑ Bean 1933, pp. 906–907.
- ↑ Bean 1933, p. 927.
- ↑ Stewart 1921, pp. 279–280, 293.
- ↑ McRandle & Quirk 2006, pp. 667–701.
- ↑ Reichsarchiv 1942, p. 96.
- ↑ Terraine 1977, p. 301.
- ↑ Edmonds 1948, p. 335.
References
- Books
- Atkinson, C. T. (2009) [1927]. The Seventh Division 1914–1918 (Naval & Military Press ed.). London: John Murray. ISBN 1-84342-119-4.
- Bean, C. E. W. (1941) [1933]. The Australian Imperial Force in France, 1917. Official History of Australia in the War of 1914–1918. IV (11th ed.). Canberra: Australian War Memorial. ISBN 0-702-21710-7. Retrieved 23 March 2014.
- Boraston, J. H. (1920) [1919]. Sir Douglas Haig's Despatches. London: Dent. OCLC 633614212.
- Bourne, J. M.; Sheffield, G. (2005). Haig: War Diaries and Letters. London: Weidenfeld & Nicolson. ISBN 0297847023.
- Davidson, J. H. (2010) [1953]. Haig: Master of the Field (Pen & Sword ed.). London: Peter Nevill. ISBN 1-84884-362-3.
- Die Kriegführung im Sommer und Herbst 1917. Die Ereignisse außerhalb der Westfront bis November 1918. Der Weltkrieg 1914 bis 1918: Militärischen Operationen zu Lande. XIII (Die digitale landesbibliotek Oberösterreich ed.). Berlin: Mittler. 2012 [1942]. OCLC 257129831. Retrieved 17 November 2012.
- Edmonds, J. E. (1991) [1948]. Military Operations France and Belgium 1917: 7 June–10 November Messines and Third Ypres (Passchendaele). History of the Great War Based on Official Documents by Direction of the Historical Section of the Committee of Imperial Defence. II (Imperial War Museum and Battery Press ed.). London: HMSO. ISBN 0-89839-166-0.
- Gillon, S. (2002) [1925]. The Story of 29th Division A Record of Gallant Deeds (Naval & Military Press ed.). London: Thos Nelson & Sons. ISBN 1-84342-265-4.
- Groom, W. (2002). A Storm in Flanders: The Ypres Salient, 1914–1918 Tragedy and Triumph on the Western Front. New York: Atlantic Monthly Press. ISBN 0-87113-842-5.
- Headlam, C. (2010) [1924]. History of the Guards Division in the Great War 1915–1918. I (Naval & Military Press ed.). London: John Murray. ISBN 1-84342-124-0.
- Histories of Two Hundred and Fifty-one Divisions of the German Army which Participated in the War (1914–1918). Washington: United States Army, American Expeditionary Forces, Intelligence Section. 1920. ISBN 5-87296-917-1. Retrieved 23 March 2014.
- Hussey, A. H.; Inman, D. S. (2002) [1921]. The Fifth Division in the Great War (PDF) (Naval & Military Press ed.). London: Nisbet. ISBN 1-84342-267-0. Retrieved 8 September 2013.
- Jones, H. A. (2002) [1928]. The War in the Air, Being the Story of the Part Played in the Great War by the Royal Air Force (PDF). II (Imperial War Museum and Naval & Military Press ed.). London: Clarendon Press. ISBN 1-84342-413-4. Retrieved 23 August 2015.
- Jones, H. A. (2002) [1934]. The War in the Air Being the Part Played in the Great War by the Royal Air Force (PDF). IV (Imperial War Museum and Naval & Military Press ed.). Oxford: Clarendon Press. ISBN 1-84342-415-0. Retrieved 23 August 2015.
- Liddle, P. (1997). Passchendaele in Perspective: The 3rd Battle of Ypres. Barnsley: Pen & Sword. ISBN 0-85052-588-8.
- MacDonald, L. (1993) [1978]. They Called it Passchendaele (Penguin ed.). London: Michael Joseph. ISBN 0-14016-509-6.
- McCarthy, C. (1995). The Third Ypres: Passchendaele, the Day-By-Day Account. London: Arms & Armour Press. ISBN 1-85409-217-0.
- Magnus, L. (2004) [1920]. The West Riding Territorials in the Great War (Naval & Military Press ed.). London: Kegan Paul, Trench, Trubner. ISBN 1-84574-077-7.
- Prior, R.; Wilson, T. (1996). Passchendaele: The Untold Story. Yale University Press. ISBN 0-300-06692-9.
- Sheldon, J. (2007). The German Army at Passchendaele. London: Pen and Sword. ISBN 1-84415-564-1.
- Stewart, H. (2009) [1921]. The New Zealand Division 1916–1919: A Popular History Based on Official Records (N & M Press ed.). Auckland: Whitcombe and Tombs. ISBN 1-84342-408-8. Retrieved 23 March 2014.
- Terraine, J. (1984) [1977]. The Road to Passchendaele: The Flanders Offensive 1917, A Study in Inevitability. London: Leo Cooper. ISBN 0-43651-732-9.
- Wynne, G. C. (1976) [1939]. If Germany Attacks: The Battle in Depth in the West (Greenwood Press, NY ed.). London: Faber & Faber. ISBN 0-8371-5029-9.
- Wyrall, E. (2002) [1924]. The West Yorkshire Regiment in the War, 1914–1918. II (Naval & Military Press ed.). London: J. Lane. ISBN 1-84342-210-7.
- Encyclopaedias
- The Times History of the War (PDF). XVI. London: The Times. 1914–1921. OCLC 642276. Retrieved 14 November 2013.
- Journals
- McRandle, J.; Quirk, J. (2006). "The Blood Test Revisited: A New Look at German Casualty Counts in World War I". The Journal of Military History (July 2006 ed.). Lexington Va. 70 (3): 667–701. doi:10.1353/jmh.2006.0180. ISSN 0899-3718.
- Theses
- Beach, J. (2005). British Intelligence and the German Army 1914–1918 (PhD). 2004: London University. OCLC 500051492. Retrieved 19 July 2014.
- Brown, I. M. (1996). The Evolution of the British Army's Logistical and Administrative Infrastructure and its Influence on GHQ's Operational and Strategic Decision-Making on the Western Front, 1914–1918 (Thesis). London: King's College London (University of London). ISBN 0-27595-894-9. Retrieved 19 July 2014.
Further reading
- Fuller, J. F. C. (1920). Tanks in the Great War, 1914–1918 (PDF). New York: E. P. Dutton. OCLC 559096645. Retrieved 27 March 2014.
External links
| Wikimedia Commons has media related to Battle of Poelcappelle. |
- A brief description of the battle - Australian War Memorial
- A brief description of the main attack - Australian War Memorial
- The Ypres Salient – Battle of Poelcappelle
- Order of Battle – France and Flanders 1917, Battle # 98 – Order of Battle for the Battle of Poelcappelle