Battle of Halidon Hill
| Battle of Halidon Hill | |||||||
|---|---|---|---|---|---|---|---|
| Part of the Second War of Scottish Independence | |||||||
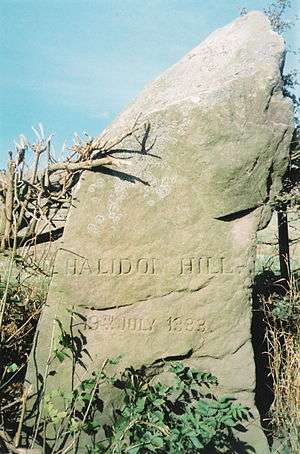 Monument marking the site of the Battle of Halidon Hill, alongside the A6105 Berwick-Foulden, Berwickshire road. With the date of battle. | |||||||
| |||||||
| Belligerents | |||||||
|
|
| ||||||
| Commanders and leaders | |||||||
| Sir Archibald Douglas † | Thomas of Brotherton, Earl of Norfolk | ||||||
| Strength | |||||||
| 13,000 | 9,000 | ||||||
| Casualties and losses | |||||||
| exact figure unknown, but very high | 14 [1] | ||||||
The Battle of Halidon Hill (19 July 1333) was fought during the Second War of Scottish Independence. Scottish forces under Sir Archibald Douglas were heavily defeated by the English forces of King Edward III of England on unfavourable terrain while trying to relieve Berwick-upon-Tweed.
The Disinherited
Ever since the death of John Comyn at the hands of Robert Bruce and his supporters in 1306, the Wars of Scottish Independence had also been a civil war. The Treaty of Northampton in 1328 brought an end to over thirty years of intermittent warfare between England and Scotland; but it also left a large and discontented party of Scots and Anglo-Normans, men with Balliol and Comyn associations, who had lost lands and property in Scotland.
In 1332 under the leadership of Edward Balliol, son and heir of King John Balliol, and Henry Beaumont, 4th Earl of Buchan, these men invaded Scotland with the tacit support of Edward III, defeating the Bruce loyalists at the Battle of Dupplin Moor. Building on this success Balliol was crowned King of Scotland.[2] However, with very limited support in his new realm, he was ambushed at Annan a few months later by supporters of David II, led by Sir Archibald Douglas, the Earl of Moray and the Steward. Balliol fled to England half-dressed.[3][4] He appealed to King Edward for assistance, having already promised to cede to him all of the counties of south-east Scotland in return. Edward dropped all pretence of neutrality, recognised Balliol as King of Scotland and made ready for war.
Berwick under siege
At the beginning of 1333 the atmosphere on the border was tense. England was openly preparing for war. In Scotland Archibald Douglas, brother of the "Good" Sir James Douglas, and now Guardian of the Realm for the underage David, made arrangements for the defence of Berwick-upon-Tweed. Weapons and supplies were gathered, and the defence of the town was entrusted to Sir Alexander Seton. These preparations were all complete by the time Balliol crossed into Roxburghshire on 10 March. Besides the disinherited lords he was also accompanied by a number of English magnates. The army advanced quickly towards Berwick, which was placed under siege. The deceptions of the previous year had gone. Balliol was acting quite openly in the English interest. The Second War of Independence was underway.
Edward arrived at Berwick in person around 1 May,[5] after leaving Queen Philippa in the safety of Bamburgh Castle on the Northumberland coast. His ally and protégé had been at Berwick for some two months, and had been so far unmolested that he had been able to place the town under close siege. Trenches had been dug, the water supply cut and all communication with the hinterland ended. The Guardian's inactivity contrasts sharply with Robert Bruce's swift response to the siege of 1319. Douglas seems to have spent the time gathering a national army, rather than using the troops he already had in diversionary raids.
With the arrival of the English king the attack on Berwick began in earnest. Seton carried out a spirited defence; but by the end of June, under repeated attack by land and sea, his troops were close to exhaustion. He requested and was granted a short truce, but only on the condition that he surrender if not relieved by 11 July. As a guarantee of good faith Seton was required to hand over a number of hostages, which included his son, Thomas. Scotland was now faced with exactly the same situation that England had before Bannockburn: as a matter of national pride Douglas would have to come to the relief of Berwick, just as Edward II had come to the relief of Stirling Castle in 1314. The army the Guardian had spent so much time gathering was now compelled to take to the field, with all initiative lost. Nevertheless, Douglas' force was an impressive representation of the nation's strength and unity, with volunteers coming from all corners of the realm. As with all medieval armies the precise number of troops is difficult to estimate. It is possible, though, that the army was at least as strong as that which had fought at Bannockburn, perhaps even stronger. Douglas now began his belated march to the border.
Advance to Bamburgh
In an attempt to draw Edward away from Berwick, Douglas entered England on 11 July, the last day of Seton's truce. He advanced eastwards to the little port of Tweedmouth, in contested Northumberland. Tweedmouth was destroyed in sight of the English army: Edward did not move. A small party of Scots led by Sir William Keith managed with some difficulty to make their way across the ruins of the old bridge to the northern bank of the Tweed. Keith and some of his men were able to force their way through to the town. Douglas chose to consider this as a technical relief and sent messages to Edward calling on him to depart. This was accompanied with the threat that if he failed to do so the Scots army would continue south and devastate England. Again Edward did not move, so Douglas marched south to Bamburgh, perhaps hoping for a repeat of the events that led in former years to the Battle of Myton. Whatever concerns the king had for his queen he knew that Bamburgh was strong and could easily withstand a siege. The Scots, moreover, did not have the time to construct the kind of equipment that would be necessary to take the fortress by assault. For Berwick, on the other hand, time was definitely running out.
Prince returns
Edward refused to consider Keith's entry into Berwick as a relief in terms of the agreement of 28 June. As the truce had now expired, and the town had not surrendered, he ordered the hostages to be hanged before the walls, beginning with Thomas Seton. A further two were to be hanged on each subsequent day for as long as the garrison refused to capitulate. Edward's determination had the desired effect. To save the lives of those who remained Seton concluded a fresh truce, promising to surrender if not relieved by Tuesday 20 July. Everything now hinged on a Scots victory in battle. News of this was carried to the Guardian at Bamburgh. Having lost all freedom of action he returned north into the teeth of the wolf.
Halidon Hill
Edward and his army took up position on Halidon Hill, a small rise of some 600 ft. two miles to the north-west of Berwick, which gives an excellent view of the town and surrounding countryside. From this vantage point he was able to dominate all of the approaches to the beleaguered port. Any attempt by Douglas to by-pass the hill and march directly on Berwick would have been quickly overwhelmed. Crossing the Tweed to the west of the English position, the Guardian reached the town of Duns on 19 July. On the following day he approached Halidon Hill from the north-west, ready to give battle on ground chosen by his enemy. It was a catastrophic decision. The Book of Pluscarden, a Scots chronicle, describes the scene:
They (the Scots) marched towards the town with great display, in order of battle, and recklessly, stupidly and inadvisedly chose a battle ground at Halidon Hill, where there was a marshy hollow between the two armies, and where a great downward slope, with some precipices, and then again a rise lay in front of the Scots, before they could reach the field where the English were posted.
The approach was observed by Henry de Beaumont, who would have advised Edward of the tactics that brought victory at Dupplin Moor when the two met at York the previous December. The order of battle now employed mirrored those used at Dupplin, with some variations owing to superior strength. The army was divided into three divisions, comprising infantry, men-at-arms and knights. All made ready to fight on foot in a defensive position. The left was commanded by Balliol; the centre by Edward; and the right by the king's uncle Thomas of Brotherton, 1st Earl of Norfolk and Lord Marshal of England. Standing on the flanks of each division were six supporting wings of archers, armed with a decisive weapon: the English longbow. The bowmen projected slightly forward in a wedge formation to offer maximum use of supporting crossfire, an arrangement later adopted at Crécy. Edward was required to take no further action: for if Douglas refused to give battle, as caution and good sense demanded, Berwick would fall by default.
Douglas' army was also arranged in three divisions, drawn up in traditional schiltron formation: the Guardian commanded the left; Robert Stewart, the future king, commanded the centre; and John Randolph, 3rd Earl of Moray the right. As Pluscarden says, to engage the English they had to advance downhill, cross a large area of marshy ground, and then climb up the northern slope of Halidon Hill. Although the Scots spearmen had proved their worth against cavalry at Stirling Bridge and Bannockburn, the battles of Dupplin Moor and Falkirk had shown how vulnerable they were to arrows. Not only was the ground bad, but it must have been obvious to the Guardian as he looked towards the massed ranks of Edward's archers that this was not going to be a cavalry battle. The prudent course of action would have been to withdraw and wait for a better opportunity to fight; but this would mean the automatic loss of Berwick. The Scots were now to fight one of the most disadvantageous battles in their history.
Into the sleet
No sooner had the Scots entered the marsh at the foot of the hill than the first arrows began to descend. They continued to fall in great clouds as the schiltrons freed themselves from the marshy ground and began the ascent up Halidon Hill. Having lost all momentum they moved slowly upwards, so tightly packed that even the most indifferent archer could scarcely fail to hit his target. The shooting was so intense that many turned their faces away as if walking into a storm of sleet. The Lanercost Chronicle reports: ...the Scots who marched in the front were so wounded in the face and blinded by the multitude of English arrows that they could not help themselves, and soon began to turn their faces away from the blows of the arrows and fall.[6] Casualties were heavy, with some of the finest troops falling dead or wounded on the lower reaches of the hill. The survivors crawled upwards, through the arrows and on to the waiting spears.

It was Moray's depleted schiltron that first made contact with the enemy, closing on Balliol's division on the left. Stewart followed, advancing on King Edward in the centre. Douglas came in their wake. But even before Stewart and Douglas arrived Moray's front ranks were failing in the hand-to-hand fighting with Balliol. With no let up in the arrows, the schiltron broke, retreating rapidly downhill. Panic spread from the centre to the left. With English arrows directed towards the flanks the Scots bunched in a disorganised mass towards the centre, much as they had done at Dupplin Moor, as if each man was trying to hide from death behind the body of his comrade. Those in the rear began running back towards the marsh, away from the killing ground. Scots honour was saved by the Earl of Ross and his Highlanders, who fought to the death in a gallant rearguard action.
With Ross gone the English knights took to horse, riding off in pursuit of the fugitives. Stewart and Moray managed to escape; but few others were as lucky. The battlefield was a grim place; the Guardian lay dead with five other earls. They died in the company of the nameless commons of Scotland, who fell in thousands. English casualties were light. The following day Berwick surrendered.
Aftermath
Immediately after the town's capitulation, Edward ordered Henry de Percy, 2nd Baron Percy to be the Constable, with Sir Thomas Grey of Heaton, father of the chronicler Thomas Grey, as his deputy.[7] Edward considering his part done, left for the south, and left Baliol to quell any remaining resistance in Scotland.
Shock and celebration
News of Halidon sent shock waves across southern Scotland. Edward soon received the fealty of several important landowners in the area. In England the victory, the first for many years, brought a great boost to the morale of the nation. Bannockburn had finally been avenged. The English poet, Laurence Minot, was exultant:
A little fro that foresaid toune (Berwick) Halydon-hill that es the name Thaire was crakked many a crowne Of wild Scottes, and alls of tame; Thaire was thaire banner born all doune.
Other balladeers celebrated the restoration of English national pride:
Scottes out of Berwick and Aberdeen At the Burn of Bannock ye were far too keen. King Edward has avenged it now, and fully too, I ween.
Edward's victory at Halidon Hill was a more devastating blow to Scotland than his grandfather's at Dunbar. After Dunbar most of the nobles had been captured and lived to fight another day; after Halidon most of the country's natural leaders were dead, and the few who remained were in hiding. Scotland was prostrate. It was said at the time that the English victory had been so complete that it marked the final end of the northern war. Yet a mere five years afterwards the chronicler Adam Murimuth was to write:
And so, men freely declare that the Scotch wars had been brought to their close, that nothing remained of the Scotch nation that was willing or able to defend or govern itself. Yet they were wrong as the sequel showed.
The time that had passed before Murimuth wrote these words had shown Halidon to be a barren victory. For Edward did little to exploit his success; and Scottish resistance, though weak, was never fully extinguished.
Balliol proceeded north and held a parliament at Perth in October 1333, whereby he restored lands to the "Disinherited", by reversing all territorial grants of the Bruce. In doing so he dispossessed a whole new generation of Scots nobility of their land, thus ensuring continued conflict.[8]
Notable casualties
- Sir Archibald Douglas
- William IV, Lord of Douglas
- Hugh, Earl of Ross
- Maol Choluim II, Earl of Lennox
- Alexander de Brus, Earl of Carrick
- Kenneth de Moravia, 4th Earl of Sutherland
- Alan Stewart of Dreghorn
- John Campbell, Earl of Atholl
The Scottish battle order
A number of related manuscripts and versions of the Brut chronicle give the names of the leading knights of the Scottish battle order.[9] The chronicle account of the battle was included in Hector Boece's Historia Gentis Scotorum (1527) with an abbreviated list of personnel.[10] The fullest list, written in French, is kept in the library of Corpus Christi College, Cambridge, with an estimation of numbers and casualties. The names and numbers from these chronicle sources may be inaccurate.
- The Vanguard: James Frisel, Count of Morreue; Walter Stewart; Reynaud (Che)ne; Patrick de Graham; John Grant; James Cardroke; Patrick de Chartres; Robert de Caldecotes; Philip de Mildrum; James du Jardyn; Thomas de Kirkpatrick; Gilbert Wiseman; Adam de Gordon; James de Gramath; John le Grange younger; Robert de Gordon younger; all barons with their followers.
- The Mid-Guard: Earl of Menteith, Seneschal of Scotland; Sir James his uncle; William Douglas; David de Lyndseye; Hugh Fleming; William de Keith; Duncan Campbell; James Steward of Caldru; Alan Stewart; William du Jardyn; William de Abirnethy; William de Brene de Eldyngton; John le Fitzwilliam; Adam More; Walter FitzGilbert; John de Chryghton; all barons with their followers.
- The Tierce: Hugh, Earl of Ross Earl of Stratherne de Sotheronland: William Kirkeleye; John de Cambron; Gilbert de la Haye; William Gordon; William Prendergast; David Mar, Guardian of the county of Mar; Christian de Herz; John Thomas, all barons and their followers.
- Rear Guard; Archibald Douglas, Guardian of Scotland; Earl of Lennox; Earl of Carrick; Earl of Fife; "Counte D'Assels du Doun", Earl of Atholl of Doune; Robert Bruce; Robert de Lauder; the son of Sir William Vypoin; William de Lemyngston; John de Laundels; Jocelyn Schyrynglowe; William Sreterleye; Bernard Frisel; John de Lyndseye; Alexander de Lyndseye; Alexander de Greye; Ingram de Umfraville; Patrick de Polwarth; David de Wemyss; Michel Lescot; Richard Lauder; Thomas de Boys; Rogier de Mortimer; all barons with their followers.
- In Berwick: the Earl of the March Patrick, Keeper of Berwick Castle and 100 men-at-arms; Alexander Seton, elder, Keeper of the town with 100 men and many more from the countryside.
- Totals: of Earls, 10; of Barons, 69; of Knights-Batchelors, 105; of Men-at-arms, 4,250; of ordinary folk ("du comune people"), 63, 200; in Berwick, townsmen and countryfolk, 5,000.
- The sum total; 67,624; The estimation of the casualties; of nobles 4,000; of common people 19,000.[11]
References
Notes
- ↑ Strickland and Hardy (2011). The Great Warbow: From Hastings to the Mary Rose'. J H Haynes & Co Ltd. p. 188. ISBN 085733090X.
- ↑ Lanercost, pp.268-272
- ↑ Wyntoun book VIII, Chap. XXVI, Vol II, p.395
- ↑ Lanercost, pp.274-275
- ↑ Lanercost, pp.278–279
- ↑ Lanercost, p.279
- ↑ Lanercost, pp.282-3
- ↑ Sadler, p.195
- ↑ see another version of the battle order in Tytler, P.F., History of Scotland, vol.2, Tait, Edinburgh, (1841), p.382–4.
- ↑ Boece, Historia (1527), book 15 chapter 5, see John Bellenden's translation of 1540, in History of Scotland, vol. 2, Tait, Edinburgh (1821), pp.422–424.
- ↑ Bateson, Mary, ed., Miscellany of the Scottish History Society, 2, SHS (1904), pp.27–30 citing Corpus Christi MS. c.c.c.c. 37 fol.100 (some names modernised here)
Primary
- Edward III and his Wars; Extracts from the Chroniclers, ed. and trans. W. J. Ashley, 1887.
- Gray, Thomas Sir, Scalacronica, ed. and trans' Maxwell, Sir Herbert, 1913.
- The Lanercost Chronicle, ed. and trans. Maxwell, Sir Herbert, 1913.
- Minot, Laurence, Poems, ed. J. Rilson, 1825.
- Pluscarden, the Book of, ed. F. J. H. Skene, 1880.
- Wyntoun, Andrew of, Orygynale Cronykil of Scotland vol. II ed. Laing, Edinburgh 1872.
Secondary
- Balfour-Melville, E. W. M., Edward III and David II, 1964.
- Campbell, T., "England, Scotland and the Hundred Years War", in Europe in the late Middle Ages, ed J. Hale et al., 1970.
- Hailes, Lord (David Dalrymple), The Annals of Scotland, 1776.
- Nicholson, R., "The Siege of Berwick in 1333", in the Scottish Historical Review, vol. 40, 1961.
- Nicholson, R., Edward III and the Scots, 1965.
- Oman, C., The Art of War in the Middle Ages, 1898.
- Reid, P., By Fire and Sword: The Rise and Fall of English Supremacy at Arms: 1314–1485, 2007. Note that the armies may have numbered differently than shown above with the English up to 20,000 men, including Balliol's contingent. The Scots, as a mobile raiding army were unlikely to have numbered many more than 7,500 men.
- Sadler, J., Border Fury: England and Scotland at War 1296–1568, 2005.
- Webster, B., "Scotland without a King: 1329–1341", in Medieval Scotland: Crown, Lordship and Community, ed. A. Grant and K. J. Stringer, 1993.
External links
- Battle of Halidon Hill, by historian, R.M. GUnn
Coordinates: 55°47′09″N 2°03′06″W / 55.78579°N 2.05178°W